Welcome to the WellMom Client Spotlight, Jenn Chandler! Jenn became a WellMom distance training client about halfway through her second pregnancy. She feels her workouts helped her mentally and physically during her pregnancy and expedited her recovery after delivery. She continues to train with me today, and she’s getting stronger all the time! Way to go, Jenn!
Jenn Chandler
Mom to Jack (4) and Max (6 months)
What motivated you to work with WellMom? What goals did you have?
When Jack (baby #1) was a born, I remember thinking, “wow, I never realized how physically demanding having a newborn is.”My back, neck and arms were sosore from nursing, lifting him and carrying him (and his gear). For Max, (baby #2), I was nervous about being physically strong enough to keep up with a very active toddler AND carry around a newborn. Plus, I worked out regularly during my first pregnancy with Jack; with Max, I did little beyond chasing a toddler and walking the dog. I just felt sort of “blah” from not having a good exercise routine. I happened to see Chris’ interview on ARLNow and, on a whim, emailed her.
What are your accomplishments since working with WellMom?
Compared to my first pregnancy with Jack, I was not nearly as sore right after Max’s birth or the first few months after he was born. Even towards the end of my pregnancy, I always felt strong and energized after my workouts. They were a great mental and physical boost. I can now do 20 real push ups on my toes, and I’ve moved from 8 lb weights to 15 lb weights for some exercises! Overall, I feel stronger and just more fit.
To what do you attribute those accomplishments?
I really attribute those to having a good relationship with Chris andstaying consistent. I do distance training with her where she emails me a full workout, with links to video clips for new moves, every Friday morning. As I’ve told her, I always get a little excited AND a little terrified to open that email every week and see what she’s cooked up for me. I can do the workout whenever is convenient for me and then report back to her. Chris knows how to push me without overdoing it and has always been great about offering modifications, especially towards the end of my pregnancy.
What goals do you have moving forward?
(1) Be able to consistently do 25 push ups on my toes; (2) Be able to crow pose in yoga (a move I’ve never been able to get); and (3) Get back into running shorter races and eventually run another marathon before I turn 40.
What health and wellness advice do you have for other moms based on your personal journey?
Figure out an exercise routine that works for you. And then stick with it, even when it’s hard or not super convenient. I look forward to my hour workout from Chris every week. And even when I’ve had to start and stop the workout because of a fussy baby, I’ve always felt great after powering through.
Yesterday I had 45-minutes from the time I stepped foot into the gym until the time I needed to leave to make it to a client. I typically plan my workouts ahead of time, but I came unprepared on this occasion. On the spot I created an efficient workout (check!) that first elevated my heart rate (check!) and then hit all the muscle groups I wanted to work, focusing on the posterior chain (check!).
The next time you find yourself with just 45-minutes and zero ideas, give this a go. If you are unfamiliar with any of the exercises, just ask google. If that fails, email me and I’ll tell ya 🙂
Warm up (~5 minutes):
diaphragmatic breathing in quadruped. 30 seconds. (what? breathing as part of the warm up? Yup. And here’s WHY I start all my classes and personal training sessions with diaphragmatic breathing)
cat cows x 10
rocking psoas stretch x 10 each side
body weight glute bridges with overhead reach x 15
body weight squats x 15
walking knee hugs x 10 each leg
standing hip abduction x 15 each side
HIIT Training (10 minutes). Pace: 20 seconds of work, 10 seconds of rest, 20 seconds of work, 10 seconds of rest. Then move on to the next exercise:
Burpees
Lateral high knees
Double butt kickers
Medicine ball slams
Speed skaters
Resistance Training (~25 minutes). 2 supersets, each three times:
Single leg rotational deadlifts x 10 each leg
Dumbbell Lat Pullovers x 15
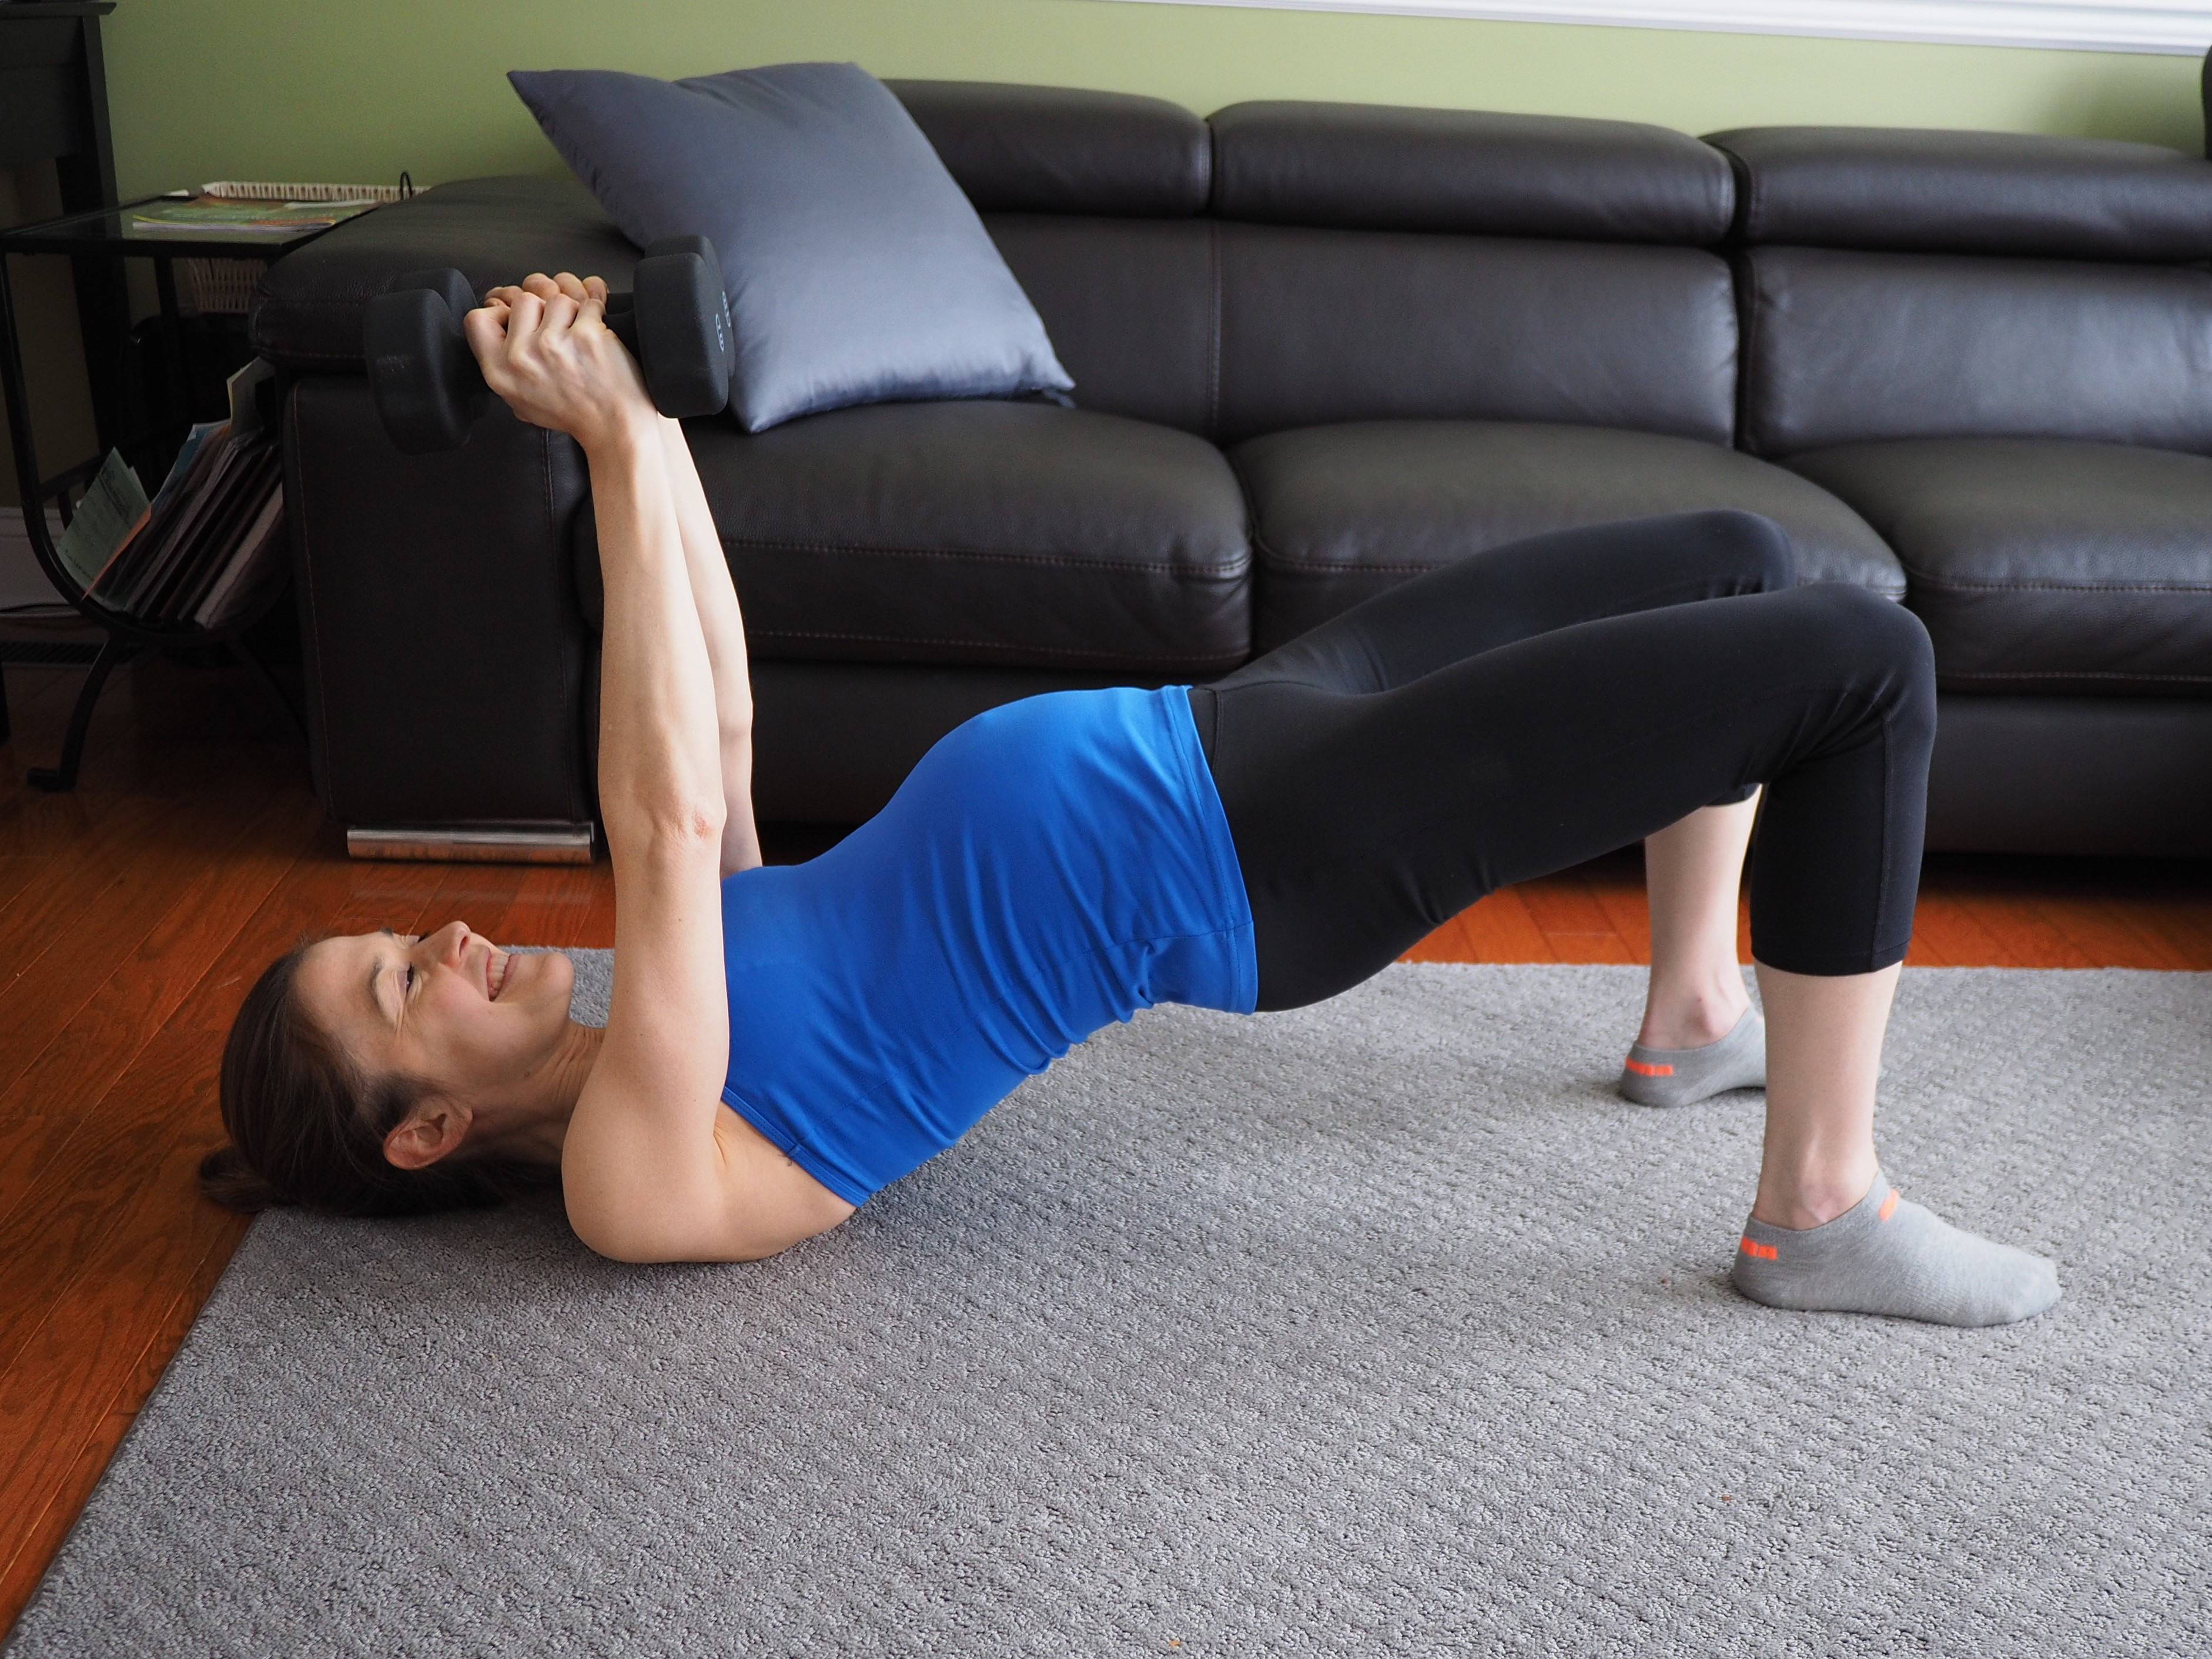
Dumbbell glute bridges x 10+10 pulses at the top
Decline push ups x 15
You might notice I failed to cool down. When I have time, I do. But if I ONLY have time to warm up OR cool down, I always opt for the warm up. Personally I feel it’s more important, especially for injury prevention. But if you’ve got 55-60 minutes, stretch it out, people!
Megan steps into WellMom’s client spotlight this week! Since she started training at the end of last November, she’s increased her self-esteem, energy, and strength. Oh and I did mention she also shed 25 pounds?
Congratulations on your wonderful accomplishments, Megan! I look forward to seeing you continue to reach your goals in the months ahead!
Megan
Mom to Ellie (7) and Jake (4)
What motivated you to work with WellMom? What goals did you have?
I started working with WellMom because I wanted to get back to being the person I used to be. I wanted more energy and to be able to play with my kids without feeling winded or injuring myself. Some recent medical issues scared me and made me think about my long term health. I want to live a full and vibrant life but knew that I would need to feel more comfortable in my own skin in order to do this.
Two realizations marked a turning point and caused me to reach out to WellMom.
I discovered just how bad my self image had gotten when my daughter asked if I knew how to swim. She had never seen me in the pool or ocean even though I actually love swimming.
I realized that I avoid being photographed and that this might affect my kids someday. Would they wish they had more photos of me with them when they were young?
What are your accomplishments since working with WellMom?
Since working with WellMom, I have more energy, have lost weight and can run around with my kids more easily. My health has improved and I feel strong and proud of myself.
To what do you attribute those accomplishments?
I attribute my accomplishments to how hard I have worked and how committed I have been to training. Chris made me feel comfortable when I couldn’t do any of the exercises. She listens to me complain the entire workout but never gives up on me. She has been my non-judgmental cheerleader and has gotten me to a place where I look forward to exercise.
What goals do you have moving forward?
Moving forward, I would like to get even stronger and master some of the more difficult moves Chris has introduced. I would like to lose more weight and would also like to be able to do more push-ups.
What health and wellness advice do you have for other moms based on your personal journey?
I understand just how hard it can be to set aside time for oneself and commit to self-care. I can always think of something else I need to do instead of exercising. I have had to actively ignore that nagging voice and remind myself that this inner chatter is moving me away from my goals. Once I started to see and feel the benefits, the voice has quieted down a bit and I find that I don’t dread exercise as much.
I have tried to set realistic and tangible goals related to something other than the numbers on the scale. If I only focused on my weight, I would have stopped a long time ago. But seeing my strength increase from week to week has kept me going when the weight loss was uninspiring.
We’ve all been there. We know we SHOULD be making our way to the gym to exercise, but we just can’t muster the motivation. Scrubbing the dishes sounds like a more attractive option. Though, of course, parking ourselves on the sofa sounds like the best choice of all.
As a mom or mom-to-be, you probably feel this way more often than you did during your child-free days, when pregnancy and the demands of motherhood weren’t further sapping your energy.
Here are five strategies to get you moving when exercising is the last thing you want to do.
1. Lace up your kicks and see what happens.
Inertia is a powerful thing. The longer we sit around, the harder it can be to get up. Can’t talk yourself into a CrossFit workout? Put on your shoes and take a walk outside. Keep your goal modest – maybe just once around the block. If you’re someone who needs a destination, plan to walk to get the mail or grab a few groceries at the store. You may find that your energy levels pick up the moment the fresh air hits you. And now that you’re out there, maybe that one trip around the block turns into four. Maybe you get really motivated and power walk or find your way into neighborhoods with a few challenging hills (can you say, “interval workout”?). Maybe I ride by on my bike and see you doing push ups next to your stroller. 🙂
2. Get a workout buddy.
Often finding the time for exercise comes down to accountability. If you know your girlfriend is waiting for you at the gym, you’re much more likely to show up than you would be if you were going on your own – especially on those low energy days. Plus, it can be hard to find time to spend with friends, so working out together provides an opportunity for much needed time for yourself and away from family.
3. Remember you don’t have to “kill it.”
If you get to the gym and you still don’t have energy for that 60-minute spin class, don’t sweat it. Make today a light day. If a yoga class is available, take that. Or create your own workout: go low intensity on a piece of cardio equipment for 20 minutes; follow that with 20 minutes of low resistance weight training; complete your workout with 15 minutes of core work to strengthen your TVA and your pelvic floor (e.g. kegels). Our bodies actually do BETTER if we combine intense exercise sessions with light ones.
4. Carve out time when you know your energy levels are highest.
People in general, and expectant moms in particular, have natural highs and lows during the day. If you’re expecting a baby and are experiencing stereotypical morning sickness, plan to work out later in the day when you’re feeling better. Are you more of a morning person? Set an alarm and get that workout in before the kids get up.
5. Reward yourself.
And no, I don’t mean with Oreos (sorry!). Treat yourself to a pedicure or a new article of clothing if you fit in at least 10 exercise sessions during the course of the month. Need a more immediate reward? How about a nice hot bath after your trip to the gym? Or enlist the help of your spouse or partner, and ask for a foot massage to reward your hard work!
And if you just can’t do, be kind to yourself. Obviously you shouldn’t ALWAYS give into inertia, but sometimes rest is truly what you need as a busy mom or mom-to-be. Rest up today, and give it your best shot tomorrow.
These are my favorite posts to do. 🙂 WellMom’s newest client spotlight is Kara M. We started working together at the end of June. In less than 5 months, she dropped 25 pounds and drastically increased her energy levels, and she did it in one of the best ways possible: incremental improvements that over time built to sustained lifestyle change. Her story is nothing less than inspiring.
Kara M
~Mom of Simon (4) and Alden (1)
What motivated you to work with WellMom? What goals did you have?
I saw a photo of myself at a work event in May while waiting to board a plane home and couldn’t believe how heavy and unhealthy I looked. I was also feeling really tired and sluggish, but the photo is what really prompted action. I sent Chris an email from the airport to see if she was accepting new clients.
My original goals were to simply gain strength and energy and to be a better example for my sons. I wasn’t necessarily looking for huge weight loss or diet changes. I honestly didn’t realize how much nutrition and healthy eating choices played into Chris’s one-on-one services. But I am so glad that they do!
What are your accomplishments since working with WellMom?
I have dropped about 25 pounds and gained strength, cardiovascular fitness, and energy.
To what do you attribute those accomplishments?
…25 pounds less!Before…
I largely attribute my accomplishments to having someone to hold me accountable. I also think that making some realistic, small dietary changes at the beginning and then gradually adding other changes was very helpful.
What goals do you have moving forward?
I would like to carve out time in my schedule to work out at least twice a week (once with Chris and once on my own). On the nutrition front, I want to have a plan for healthy weeknight dinners ahead of time every night to avoid scrambling for something quick (and likely less healthy) when crunched for time.
What health and wellness advice do you have for other moms based on your personal journey?
Take it one step at a time and don’t beat yourself up if you slip every so often. Old habits diet hard, and it can take time to make lasting changes.Be mindful about whatever you eat and notice your mental state when you eat it. Stop and listen to what your body is telling you. Are you actually hungry or just snacking because food is there? It’s hard to be mindful when we are constantly juggling the competing demands of work and family life, but it really helps.
Today’s client spotlight lost 47 pounds. That’s the weight of your average first or second grader.
Rashawn is actually my “client” spotlight because she’s not a client at all – she’s my nanny. Beyond modeling healthy behavior and allowing her to pick my brain from time to time, I played no role in her success. She did it all on her own.
Client or not, Rashawn deserves some time in the spotlight. Over the past 16 months, I’ve witnessed her completely transform herself through dedication, determination, and patience. She succeeded above all because she recognized that a diet is a way of life – not something we go “on” and “off.” I am so proud of Rashawn and grateful for the opportunity to share her story with you.
Rashawn B
~Nanny Extraordinaire
What motivated you to make an improvement to your lifestyle? What goals did you have?
My motivation came from one day stepping on the scale and seeing it read 225 pounds. I was 28 at the time and told myself, “you have carried this weight around since high school; getting weight off after 30 is much harder.” With those thoughts, I made a goal to lose 30 lbs (minimum) and fit into a size 10 before my 30th birthday (Aug 28, 2017).
What are your accomplishments since pursuing those goals?
Since May 2016, I have lost 47 pounds (from 225 pounds to 178 pounds) and achieved better control of my exercise and eating habits.
To what do you attribute those accomplishments?
In the beginning, I did not enjoy the thought of exercise, and I lacked the motivation to get it done. I decided, if I’m going to do this, I’m going to do it on my terms. I love to dance, so I purchased dance DVDs and made a goal to exercise 3-4 times per week. I also made a goal to eliminate 1 bad habit a month. The first habit I eliminated was drinking juice and soda. I swapped these beverages for flat and sparkling flavored water (without aspartame). Then I eliminated red meats and fast foods and tried new low carb recipes (thanks to Chris and Pinterest). After a month of the dance tapes, I found that I lost 10 pounds and had energy that was once lost. Following the DVDs, I purchased a Fitbit watch, began walking a lot more, and joined a gym. I focused on cardio and core workouts and using elliptical and ab machines. As I continued to familiarize myself in the routine of working out, I also began to make monthly challenges, such as no artificial sugars and no caffeine. Months later, I began juicing and adding them into my regular diet. Each challenge started out hard, but as I continued the process, I began to feel mentally stronger, physically happy in my results, and more and more confident in myself as I gladly swapped my size 16 for a size 10!
What goals do you have moving forward?
Going forward, I will continue to build my strength by working out and making more challenges for myself. I have committed to a lifestyle change of healthy eating and exercise. Overall, I desire to be confident, happy and live a long fulfilling life.
What health and wellness advice do you have for other women based on your personal journey?
It’s never too late and anything is possible. Diving into lifestyle changes takes time. Start slow, eliminate one bad habit at a time and replace it with a healthy one. If exercise seems intimidating, start with your diet. Good food choices will provide so much more energy – you’re going to want to get up and move! Next, find time to get outdoors. A nice walk and fresh air does wonders!! Lastly, do something you love and challenge yourself. You’re capable of more than you think. There will be bad days, but that is never a reason to quit. Tomorrow is always a perfect day to start over. Just make sure you start!
Rashawn lost 9 inches from her waist, 5 inches from her hips, and dropped 6 dress sizes!
I am so excited to announce WellMom’s new Client Spotlight! Brittany Y became a WellMom client in December 2015, soon after the birth of her third child. Over the past year and a half, Brittany has made AMAZING strides on both physical and emotional levels. Physically she improved the shape of her body and gained strength and energy. Emotionally she experienced boosts to her self confidence and improved her body image. Brittany’s story offers great insight for others, so read on! And make sure you read all the way to the end – it has the best part!
Brittany Y
December 2015: 38 second plank and 15 push-ups May 2017: 3 minute plank and 27 pushups!
~ Mom of Isabelle (5), Sophie (4), and Ernest (19 months)
What motivated you to start working with WellMom? What goals did you have?
I met Chris at Clarendon Day. I remember she had Lily (her youngest daughter) with her and she was engaging people as they walked by her booth. I was not looking for a personal trainer at the time, but after talking with her I felt she had some interesting ideas of how to help me meet my fitness goals. Her website was comprehensive and it was clear she was knowledgeable and passionate about health and wellness, plus her flexibly to do in-home training convinced me to try WellMom. Originally my goals were to strengthen my back, help improve running endurance, close my stomach muscle split after my third baby, lose 10 pounds, and increase muscle tone.
What are your accomplishments since working with WellMom?
I am so much stronger! It has been empowering seeing myself meeting and exceeding specific weight training and strength training targets. My back is so much stronger; I don’t ache as much as I did picking up my kids.My endurance and energy levels are higher. The muscle split in my stomach is gone. While losing 10 pounds was originally part of the goal, and while I did lose some weight, as I saw my body shape change for the better and my clothes fit more comfortably for the first time ever I didn’t really care about the scale numbers. I think if you have ever struggled with body image being able to embrace strength and health regardless of your ideal weight can sometimes be a difficult and uphill mental battle. I felt like Chris helped me so much with this piece of my overall health and wellness.
To what do you attribute those accomplishments?
Regular training, defining specific goals, having someone who knows how to coach you to meet those goals.
What goals do you have moving forward?
Maintaining my current strength level and finding other areas of my life that could be made healthier, nothing radical just improvements like reducing (not eliminating) my daily sugar intake. Perhaps aiming for a 4-minute plank, just kidding, well kind of :).
What insights have you gained on this journey that might help other moms?
If you find time to take care of yourself physically and emotionally you will value yourself and your time more and that will make you a stronger, happier individual and Mom. Sometimes this requires asking a spouse, friend, or family member for help or may mean hiring a babysitter or a trainer like Chris. If your kids see you taking a little time each week to take care of your health they will value their own health more and it helps to give you individuality in their eyes beyond being Mom.
Wishing you all a Happy New Year with the announcement of another Client Spotlight! Alissa G became a WellMom client in late October 2016 with the goal of dropping 11 pounds, and today she is just one pound shy of that goal! Read on and learn more about Alissa and her accomplishments. Awesome job, Alissa! Looking forward to working with you to knock off that last pound!
Alissa G
~ Mom of two, ages 6 and 4
Alissa wanted to remain anonymous. I say she’s a convincing Giselle. 🙂 #excusemypoorphotoeditingskills
What motivated you to start working with WellMom? What goals did you have?
I was motivated to start working with WellMom because I couldn’t seem to lose that last 10 pounds after having my youngest. I also noticed that with age it was getting more difficult to lose the weight. My goal was to feel better about my body and increase my energy level.
What are your accomplishments since working with WellMom?
I am close to my weight loss goal while doing so during Halloween, Thanksgiving and Christmas. I was proud that I could refrain from indulging in my favorite holiday goodies. I have also noticed I have more tone to my muscles and problem areas.
To what do you attribute those accomplishments?
I have become more conscious of what I am eating based on the meal plan and tracking program that Chris and I developed for my journey. I have also increased my workouts per week.
What goals do you have moving forward?
My future goals are to continue building strength, muscle and positive energy.
What insights have you gained on this journey that might help other moms?
My personal experience through this journey has made me realize how much I missed working out, which not only keeps my body fit but my mind fit as well. I am happier overall because I carved out an hour of time to myself 3-4 times a week to exercise.
I’m proud to put the spotlight on WellMom client, Kristen D! Kristen started working with me in July and lost 10 pounds in just 8 weeks! Her weight continues to fall, and she’s developing the body shape she desires as she simultaneously gains strength. Keep reading to learn more about Kristen and her accomplishments. She also has some great advice for other moms there. Way to go, Kristen!
Kristen D
~ Mom to Dominic, 3 years, and Damien, 10 months
“My best advice is to make time for yourself…[and] to be kind to yourself.”What motivated you to start working with WellMom? What goals did you have?
I became motivated to start working out with WellMom when my second son turned 8 months old. I was done breastfeeding, back to work, and dissatisfied with my weight and fitness level. I wanted to lose 10 pounds, fit into my pre-pregnancy clothes, and change my eating habits.
What are your accomplishments since working with WellMom?
Since working with WellMom, I achieved my 10 pound weight loss goal and am back in those pre-pregnancy clothes! Importantly, I have gained core strength and overall stamina. I have also made meal-planning and prep part of my lifestyle so that I am not scrambling to come up with dinner ideas and resorting to take-out or frozen foods. I feel more satisfied eating whole foods and saving splurges for something truly worthwhile. Chris really guided me through this process. She was always accessible via text, which made it so easy.
To what do you attribute those accomplishments?
I could not have reached these goals without Chris’s support! Every week I knew that we would meet and discuss my weight loss. This accountability helped me reach for healthy food choices and get in my workouts. I also really appreciate that she tailored workouts to my needs. I can do the circuits that she designs for me at home or at the gym, so I really have no excuse not to work out. The exercises are also both challenging and fun!
What goals do you have moving forward?
I have set a new weight loss goal, with a continued emphasis on core strength, glute shaping (!), and overall fat loss. I also hope to continue building on the good eating habits I’ve established.
After losing 8 lbs (and she kept losing)!Before
What health and wellness advice do you have for other moms based on your personal journey?
My best advice is to make time for yourself. I am a much better mom, wife, and friend when I feel good about myself. Part of that is physical fitness and a healthy weight. I am so glad that I sought out personal training to jump start a new health journey as the mom of two young kids. I would also say to be kind to yourself. Perfection is not the goal! Rather, feeling strong and energetic are the best rewards. Well, that, and fitting into your old jeans 🙂
In Part I of this post, I noted that diaphragmatic breathing is foundational to core strength and shared a breathing exercise with you. Be sure to check it out if you missed it.
Today we’re taking breathing to the next level, as I introduce two additional breathing exercises that further strengthen the muscles of the inner core.
With diaphragmatic breathing or “belly breathing,” we take slow, deep breaths in and out. We strengthen the diaphragm on the in breath as it engages and descends into the abdominal cavity. This fills the belly with air, which strengthens the other muscles of the inner core – multifidus, pelvic floor, and transversus abdominis (TVA) – when they eccentrically contract against the resulting pressure created in the abdomen.
We can further exercise and strengthen the inner unit through “piston” breathing. With a piston inhale, we quickly and forcefully draw the breath into the belly; with a piston exhale we do just the opposite, expelling the air as quickly and forcefully as possible. The inhale tones all the muscle of the inner unit in the same way that diaphragmatic breathing does, with a concentric contraction of the diaphragm and an eccentric contraction of the multifidus, pelvic floor, and TVA. The piston exhale provides additional strengthening of the pelvic floor and TVA, as we must further engage these muscles to forcefully expel the air from the abdomen.
I demonstrate all three breathing patterns – diaphragmatic breathing, piston inhales, and piston exhales – in the video below. I start the video with the slow, deep, diaphragmatic breaths. At 1:00, I transfer to the piston inhales; at 2:10 I start the piston exhales.
Here are a few tips to help you practice:
Always start with the slow, deep breathing in order to connect with the diaphragm. Once you access the diaphragm and establish a rhythm, you can switch to the piston breathing.
Practice the piston inhales and exhales separately. Take a slow, deep inhale before each piston exhale, and follow each piston exhale with a slow, deep exhale.
When performing piston inhales, soften through your belly and focus on shooting the air into the pit of your stomach as quickly as possible.
When performing the piston exhales, simultaneously engage both the TVA (i.e. draw your navel to your spine) and the pelvic floor (i.e. perform a kegel) at the end of the slow inhale, using these muscles to forcefully expel the breath from the body.
Winter Mom Camp started this past week, and core strength is a big focus in my Gentle Class. While critical for everyone, core strength is especially important for pregnant and postpartum women since pregnancy and delivery wreak havoc on these muscles. Many of the moms in my Gentle Class recently delivered, and I started class with a discussion of core strength that I’m sharing with you today, along with a breathing exercise that’s foundational to a tone core.
Those looking to strengthen their core muscles often turn to exercises that target the rectus abdominis (the “six pack”), like crunches. But TRUE core strength comes from an entirely different set of muscles, including the diaphragm, transversus abdominis (TVA), pelvic floor, and multifidus. We might call this group of muscles the “inner core” or “inner unit.” You can think of it as a rectangular-shaped cylinder that sits in your abdominal cavity with the diaphragm on top, the TVA in the front, the pelvic floor at the bottom, and the multifidus in the back.
Arguably the most important of these muscles is also the most overlooked: the diaphragm. It’s a parachute-shaped muscle that attaches to the bottom of the lunges. When we breathe with our diaphragm, the muscle contracts and descends into the abdominal cavity. This creates pressure in the abdomen because the pelvic floor, multifidus, and TVA eccentrically contract as the diaphragm descends. I find the image of a french press useful here. The diaphragm is like the plunger on the top. When you breathe in with this muscle, it’s like pushing the plunger down.
Core strength comes from this pressure created in the abdomen, pressure that the diaphragm sets in motion when you inhale. The pressure stabilizes the spine and provides support in your everyday activities, whether you be walking, climbing stairs, carrying children or groceries, or lifting weights in the gym. Moreover, every time you breathe with your diaphragm, you’re also strengthening the other three inner core muscles because they eccentrically contract in response to the movement of the diaphragm. That’s why the diaphragm is foundational for core strength.
Sounds simple, right? Just breathe your way to a strong core. Well, yes and no. The problem is most people DON’T breathe this way. I often have clients practice this type of breathing, and many lack access to the diaphragm, at least at first. Instead they are among the many “chest breathers” out there: they breathe in and out, but the breath gets stuck in the chest, rather than traveling all the way down to the pit of the belly as it should. If the diaphragm doesn’t descend fully into the chamber, it doesn’t properly pressurize, increasing your risk of lower back pain.
To gauge access to your diaphragm, try this exercise. Assume savasana pose, lying on your back with your arms and legs extended. Then place one hand on your chest and the other on your belly. Soften through your abdomen and take a deep breath in. Imagine that your abdomen is like a vase, and the air is like water. As you draw your air (the water) in, allow it to fill the pit of your belly (the bottom of the vase) first before rising up to the top. You’re doing it right if you feel the hand on your belly rise first and the hand on your chest rise last.
Practice that every day for the next week, aiming for fuller and deeper breaths each day. This will set your foundation. In my next post I will describe other ways to further strengthen the muscles of your inner unit.
And by the way, there’s still ONE spot left in Mom Camp’s Gentle Class. It’s perfect for pre- and postnatal moms, those with exercise limitations, and those who are new to exercise. Would love to have you there!
Today I’ve got an update on my pooch. And that’s the belly pooch we’re talking about here, not the “bow-wow” kind of pooch.
Last I wrote, I was diligently doing my core training in an attempt to close the diastasis responsible for the belly bulge that remained after the birth of my second daughter in July. If you missed that post, definitely check it out for background information. There’s also a lot of good information there for you if you find yourself with an unwanted pooch.
When we left off, I was four weeks postpartum. My belly had shrunk considerably from delivery, but a noticeable pooch remained:
3 Days PostpartumFour weeks postpartum
And now here’s four weeks compared to ten weeks:
4 weeks postpartum10 weeks postpartum
And remember, ALL of these photos are taken with my belly completely relaxed. No false advertising here by drawing in my abs. (Read my last post if you want to hear me get on my soapbox about THAT topic 🙂 ).
Now, I didn’t take belly shots before my pregnancy, so I can’t compare the 10-week photo to a pre-pregnancy baseline. But my memory tells me that while I’m still not quite back to pre-pregnancy belly flatness, I’m certainly close.
And what about the diastasis? Unfortunately, a non-trivial gap remains. Depending on the time of day when I do the measuring, I can still fit more than two fingers into the space between the two sides of my abdominal wall. But the WIDTH of the gap is only half the story. The DEPTH of the gap also tells us something about the severity of the diastasis. My gap is considerably more shallow now than it was after delivery. This suggests that the linea alba – the fascia that joins the two sides of the rectus abdominis – is much stronger than it was before.
I’m now 16 weeks postpartum, and I’ve been continuing twice-daily exercises for my TVA. Although I stopped taking the belly shots, here’s a fun photo of me and Lily at 13 weeks. I’m very happy with how far I’ve come!
13 weeks postpartum. And I promise I’m still not drawing in my abs!
No, I didn’t get a puppy. I’m talking about my belly pooch.
After giving birth to my first daughter, my belly returned to its normal flat self almost immediately, so I was a little disappointed to find that a bump remained after the recent delivery of my second daughter. The bump was present despite my having done everything you’re supposed to do to avoid it, including staying active during pregnancy with a focus on strengthening the inner core.
I’m quite thin, and excess belly fat was not the explanation. Diastasis recti, or the separation of the rectus abdominis (i.e. your “six pack”) into left and right halves, was the explanation.
We’re going to talk more about that, along with other changes that take place in the few weeks after delivery that help explain why you might still look six months pregnant after having your baby. I’m also going to show you a series of belly pictures taken over my first four weeks postpartum to help illustrate these changes.
Before we look at those pictures, I feel compelled to note that I did everything to make them look as bad as possible: I took profile pictures; I wore a tight, white camisole; I completely relaxed my belly. I also took all the pictures in the evening, a time of the day when I’ve noticed that my belly is particularly distended. I say this because it bugs me when I see other women post misleading pictures. They will provide views of their bellies with their abdominals tightly drawn in, and they will look pretty darn good. They will look something like this:
Three weeks postpartum, abdominals engagedFour weeks postpartum, abdominals engaged
Looks pretty good, right? That’s me at three and four weeks postpartum, drawing in my belly. It’s even more impressive with a frontal view and some skin exposed. Here’s me again at four weeks postpartum:
Four weeks postpartum, abdominals engaged
Unfortunately these pictures are dishonest. Here’s what I look like at those same points in time with my belly relaxed:
Three weeks postpartum, abdominals relaxedFour weeks postpartum, abdominals relaxed
If you ask me, I still don’t look too shabby, but the pooch remains.
So the moral of the story is this: if you see a fitness mom trying to sell you a flat belly after baby by providing a view with her abs drawn in, be skeptical. It’s probably false advertising.
Ok, so now that I’ve got that off my chest, let’s look at an entire series of unflattering (but honest!) photos over the first four weeks after delivery:
Belly Shrinkage during First Four Weeks after Delivery (Abdominals Relaxed)
3 days postpartumOne week postpartum
Two weeks postpartumThree weeks postpartum
Four weeks postpartum
Woah! Pretty cool, huh? One thing that you should immediately notice is that my belly shrinks significantly at first but then more gradually. That’s because of uterine involution. At delivery, your uterus is at least 500 times larger than it was before you conceived, and it takes a while to shrink back down. The rate of involution is greatest in the days immediately postpartum and then begins to slow, with the uterus returning to its normal size in about six weeks.
But uterine involution is only half the story. By the second week postpartum, the uterus is considerably smaller and has returned to its original location in the pelvis. Yet as you can see, I still have my pooch at week two. That takes us back to the diastasis. Let’s talk a little more about that.
When the two sides of the rectus abdominis split, there’s nothing to hold the contents of your abdomen in, so they pop out. Most of what protrudes are your intestines, so if you have a diastasis, you may notice that your pooch is larger if you’re constipated or experience gas.
To correct the diastasis we must strengthen the transversus abdominis, or TVA. As I’ve noted elsewhere, the TVA lies beneath the rectus abdominis. While the muscles of the latter run vertically, the muscles of the former run horizontally, acting like a corset to pull all four side of the body together. If we tighten the corset by strengthening the TVA, we pull together the two sides of the rectus abdominis.
As noted above, I HAD been diligently doing my TVA exercises while pregnant, so what gives? Why did I still have the diastasis? Was there something else I failed to do to avoid this fate? Did I do something I shouldn’t have done?
Unless you consider having a second baby a mistake (I sure don’t!), there was nothing I did wrong. Diastasis recti is simply more common in subsequent pregnancies than the first one. Everything had been stretched out before, so things stretched more easily the second time around. It’s kind of like how you tend to feel pregnant faster with your second pregnancy than you did with your first. As a friend of mine once said, it’s like your body saying, “I know what to do!”
Having multiple pregnancies is just one risk factor. Others include having a c-section, having a large baby, and carrying in the front. I had a vaginal delivery, and although I had a 7 lb 5 oz peanut, I carried her WAY in the front, leading my husband to refer to my belly as the “torpedo” (Thanks, babe. I love you too). So make that two risk factors for me: second baby and torpedo.
Although I can’t prove it, it stands to reason that my diastasis would have been worse had I not done the TVA exercises while pregnant. And these exercises remain the key for correcting the separation now. Every day I collectively spend 25-30 minutes strengthening the TVA. Depending on my schedule, I’ll either spend ten minutes on the exercises three times/day or 15 minutes twice/day. I can’t precisely tell you how much of my progress is due to time and how much to the exercises, but I can say with certainty that my TVA is much stronger now than it was when I started doing them one week postpartum.
So what exactly are these exercises? Pelvic tilts (both with and without heel slides) are definitely one of them. If you don’t know what those are, check out my earlier blog post that provides instruction. If you’re looking for other ideas, I’m currently taking new clients, both in-home and distance-based. I’d love to work with you!
I also mentioned that you can enhance the core work in this pose by very consciously drawing your navel in towards your spine to engage your transversus abdominis (TVA) and by lifting your pelvic floor. Today I’m going to explain why the TVA and pelvic floor are so important and show you how to perform this exercise.
When you think of your “core,” what muscles do you imagine? Your “six pack,” perhaps? If you do, you’re not alone, but you’re also incorrect. When we talk about core strength, it’s the deep muscles to which we refer, including the diaphragm, TVA, multifidus (deep spinal muscles), and pelvic floor. These four muscles create a rectangular-shaped box inside our abdomen with the diaphragm on top, the TVA in the front, the pelvic floor on the bottom, and the multifidus in the back.
Maintenance of intra-abdominal pressure is the key to core strength. When the core is functioning properly, the diaphragm descends into the abdominal chamber when we inhale; this creates pressure in the abdomen, much like a we would pressurize a plunger cylinder by pressing on the top of the plunger (I find the image of a french press useful here). The TVA, multifidus, and pelvic floor work in concert with the diaphragm to help create and maintain that pressure, by naturally engaging as the diaphragm descends. Weakness in any one of these four muscles compromises the ability of the body to maintain this abdominal pressure and stabilize the joints. This leads to a variety of adverse consequences including lower back pain, muscular imbalances, and poor posture, as the body stabilizes the joints in less ideal ways.
Pregnancy and delivery make moms especially prone to core weakness. The TVA becomes overstretched and undertoned as the uterus expands. The growing weight of the uterus puts strain on the pelvic floor and weakens it. Depending on the mode of delivery, moms experience additional trauma either to the pelvic floor (in the case of vaginal birth) or the TVA (in the case of a C-section, which cuts through this muscle).
Moms-to-be can strengthen these important muscles by performing cat cows/pelvic rocking with TVA and pelvic floor activation. As you exhale into cat pose, very consciously draw your navel in towards your spine to engage the TVA and then perform a kegel at the very end of the exhale to engage the pelvic floor. The TVA work becomes increasingly challenging as you progress through your pregnancy because the weight of your uterus increases. You truly are using your TVA to lift your growing baby and other components of your uterus!
Here’s a video of me performing this exercise at 38 weeks. Look closely and you can really see my TVA working to lift the uterus as I exhale; you will also see my uterus descend on the inhale as I lower the weight of my belly back down. Unfortunately, the kegels you cannot see. We will have to save instruction on kegels for another day. 🙂
Tomorrow marks my 36th week of pregnancy, and as I head into the home stretch, I’m finding myself increasingly drawn to a handful of yoga poses. I’m sharing them with you today and highlighting the specific benefits of each for moms-to-be. Even if you’re not expecting – heck, even if you’re not a mom… or even a woman! – these poses are beneficial to you too, so keep reading! In fact, I have little time for yoga outside of the Vinyasa classes I teach, and I have no qualms about including all of these poses in my classes because they have such wide applicability.
1. Cat cow/pelvic rocking
Come into an all fours position with wrists under shoulders and knees under hips, spine neutral. As you inhale, tilt your pelvis forward, so your tailbone rises and navel drops down toward the floor, while simultaneously turning your gaze to the ceiling. At the end of the inhale, exhale as you draw your pelvis backward, turning your tailbone down towards the floor, drawing navel to spine, arching your back, and tucking your chin to your chest. Repeat for several breaths.
Benefits: This pose is a gentle way to encourage your baby to drop into the pelvis. It also gently strengthens and stretches all of the core muscles, and helps relieve pain in the lower back, which is especially common in the second and third trimesters.
Tip: Enhance the core work by very consciously drawing your navel in towards your spine as you exhale into cat pose. This engages and strengthens the transversus abdominis (TVA), which pregnancy weakens as your belly expands. Add a kegel at the end of the exhale to strengthen the pelvic floor, another set of muscles that pregnancy weakens, owing to the increased weight of the uterus.
2. Bird dog
Come into an all fours position with wrists under shoulders and knees under hips, spine neutral. As you inhale, extend your right arm and your left leg. As you exhale, return to your starting position. Repeat on the opposite side. Continue for several breaths.
Benefits: This pose also strengthens the core and relieves pain in the lower back. You can increase the intensity of the poses – and the core work – by holding opposite arm and leg extended for several breaths before switching sides.
3. Squat
I like to enter this pose from a wide legged forward fold with toes turned out. From this position, shift your hips back and bend your knees. Place your elbows on the insides of your thighs, just above your knees. Drop your hips as low to the floor as you can and hold your hands in prayer at heart center. Hold for several breaths.
Benefits and Precautions: This pose open the pelvis and strengthen legs for delivery. It also stretches the pelvic floor and uses gravity to help your baby descend into the pelvis. This pose is not recommended if your baby is in breech position, as it will encourage the baby to descend further into the pelvis in a sub-optimal position. Those who experience knee pain in this pose should also avoid it. This pose may also be inappropriate if you experience symptoms of sciatica and/or pelvic girdle pain.
4. Goddess
Take a wide-legged stance with toes turned out. Extend arms overhead with palms facing forward. On the exhale, lower your arms to cactus pose, retracting your shoulders as you lower your elbows and bring your forearms parallel to the floor with elbows bent to 90 degrees. Simultaneously drop into a squat, lowering your tailbone down toward the floor and bending your knees. Inhale and reverse the movement. Repeat for several breaths.
Benefits and Precautions: The benefits and contraindications listed above for squat also apply to this pose. However, because you don’t descend into such a deep squat, Goddess pose is accessible to more people. Goddess pose additionally strengthens the upper back and shoulders, and it stretches the chest. This will prove important when the baby arrives and you spend a lot of time carrying your little one around and feeding your baby.
Tip: Imagine that you are standing with your back against a wall in this pose. As you descend into Goddess, imagine that your hips are sliding down the wall and keep drawing your arms back, such that your shoulder blades, elbows and the backs of your hands scrape the wall behind you.
5. Savasana
Lie supine (on your back) with arms and legs extended, hands near your sides with palms facing up. Relax and breathe. Stay in this pose for at least five minutes. If you prefer not to lie on your back, you can elevate your torso with stacked blankets or pillows.
Benefits: This pose is a great dress rehearsal for labor when you are best served by relaxing through contractions.
Tip: Savasana is an excellent opportunity to practice diaphragmatic breathing. Not only is this relaxing, but the diaphragm is a part of your core musculature, and breathing this way helps to strengthen it. Imagine that the abdomen is like a vase and the air like water. When you fill a vase with water it fills the bottom first and then slowly rises to the top. As you breathe in, visualize the air filling the lower portions of your abdomen and then rising to the top, filling the chest last. I sometimes encourage my students to place one hand on the chest, the other on the lower abdomen, so they can feel the abdomen rise first.
Among the resources in my PT library is “The Men’s Health Big Book of Exercises.” I’m here to tell you why I like it and why you should consider picking up your own copy.
The Book
The lion’s share of this book is the exercises – 619 of them, in fact. Of the book’s 15 chapters, nine of them pertain to the exercises themselves, with a separate chapter for various body parts – chest (chapter 4), back (chapter 5), shoulders (chapter 6), etc. Each of these chapters begins with a just-technical-enough description of the muscles involved and corresponding pictures. The well-illustrated exercises follow with key points on proper form highlighted.
The book also includes chapters that discuss the importance of resistance training, answer common questions about training (e.g. how many reps should I do? what weights should I select?), offer diet and exercise plans, and discuss nutrition.
Why I Like It
My favorite thing about this book are the exercises themselves. Even with all the resources available online, it’s nice to have a physical book to pick up and leaf through. I often find myself turning to this book when looking for inspiration for new exercises for my clients, and the illustrations are top notch.
I also think the author strikes the right balance between technicality and simplicity, making it a good resource for BOTH trainers and a more lay audience. For instance, the rank and file may really appreciate the anatomy material, while more informed readers can probably skip this over. At the same time, there’s other more detailed material that lay readers may skip over but fitness professionals may really appreciate.
The nutrition chapter has a section entitled, “The Simplest Diet Ever,” which I largely endorse. Many people struggle with how to eat for fat loss, largely because there’s so much information out there, a lot of which is conflicting. When working with clients who hope to trim down, I emphasize what I consider the key points, many of which the author outlines in this chapter: eat a lot of fruits, vegetables, and lean protein; eat healthy fats in moderation; reduce your intake of starch and sugars; watch your total caloric consumption. Certainly the EXECUTION of these principles may still prove daunting, but at least the reader knows where to begin.
A Minor Quibble
Overall, I think this book is great, but there is one change I’d like to see. Many of the 619 exercises in the book are variations on a more basic move. The barbell squat, for instance, has ten variations, including wide-stance, front-loaded, and quarter squat. My issue is that often the author fails to explain WHY someone might want to select one variation over another: are different muscles recruited? does one variation put less stress on certain joints and is therefore better for certain populations? Is it just about variety?
Here’s a close-up, in case you’re having trouble following me here.
There’s also a book out there entitled, “The Women’s Health Big Book of Exercises.” I don’t own this one, but from what I understand, it’s basically the same book, but the language is geared more towards women (more talk of getting “tone” rather than “cut”), and the illustrations contain women performing the exercises. Personally, I think the author missed the mark here. I mean, do you see the eye candy on the cover of this book? I guess we can call that a second quibble. 🙂
All-in-all, this is a great book! I picked up a cheap used copy online. And even if you dislike the content, it’s hard to argue with the eye candy.
A few weeks ago I picked up a new personal training client – my husband. The pay is terrible, but he’s easy on the eyes, so we’ll call that a nice fringe benefit. Plus I know he won’t sue me if I say something inappropriate or slap his butt during a training session.
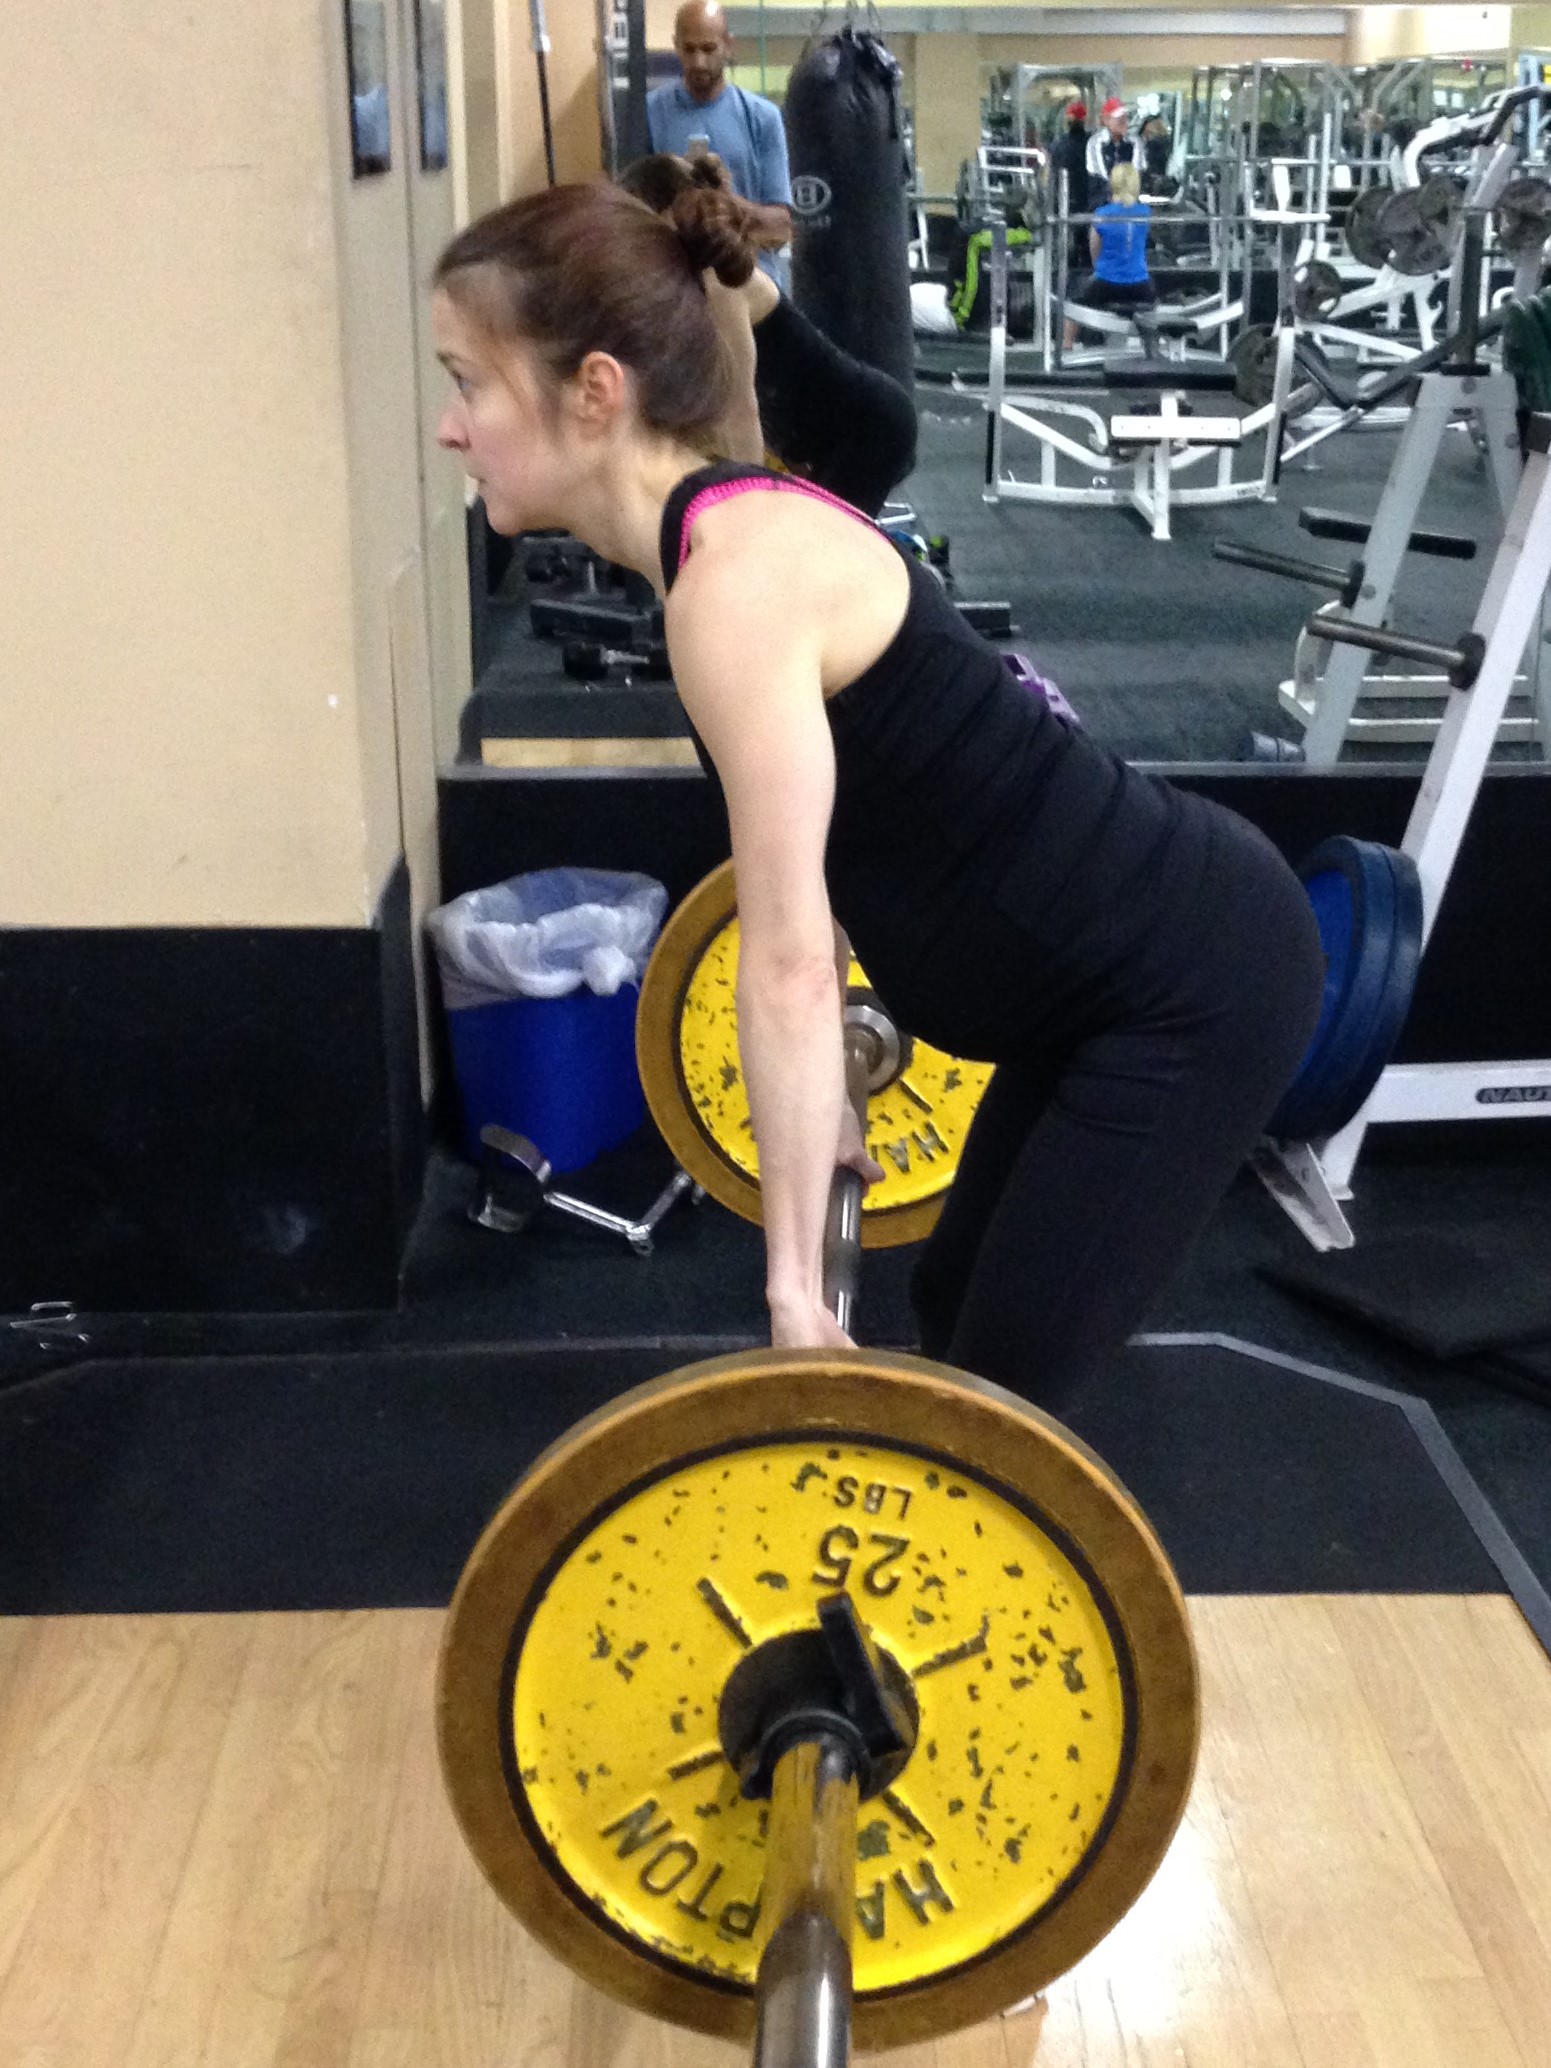
In any event, last week we worked out together during his session. I had him doing deadlifts, and then he about had a heart attack when his six-month pregnant wife stepped up to take her turn. Something in his eyes said, “Will our unborn child drop from your uterus if you pull that bar again?”
I get it. Deadlifts look serious. And they are! But they are also a great exercise to include in your fitness routine, pregnant or not. In fact, pregnant women may have even MORE to gain from the deadlift than the average Jane or Joe.
What’s So Great about the Deadlift?
The deadlift targets a myriad of muscles in your posterior chain – basically the entire backside of your body, including your back, glutes, and hamstrings. If you’re a desk jockey or someone else who does a lot of sitting (read: most of the American population), there’s a good chance these muscles are relatively weak. In fact, every client I’ve ever trained has exhibited weakness in or more of these muscle groups.
Pregnancy tends to exacerbate these muscular imbalances as the uterus expands and the center of gravity shifts forward, causing an unwelcome chain of reactions. The pelvis tilts anteriorly (forward), increasing the curve of the lumbar (lower) spine. The resulting lordosis, along with the increased weight in the breasts, can cause the shoulders to roll forward and the upper back to round. This can shorten and tighten some muscles, including the hip flexors (quads, for instance) and pecs/chest, while lengthening and weakening others, including the – you guessed it! – back, glutes, and hamstrings.
The deadlift is a great way to strengthen all of these weak muscles in a single exercise. Let’s learn how to do it!
Performing the Deadlift
Set your loaded bar on the floor in front of you. Step all the way up to the bar, so that it’s almost touching your ankles or shins, depending on the size of your plates. Stand with feet shoulder width apart and toes slightly turned out.
Lower yourself to the floor by first hinging at your hips, so your hips move behind you as your knees bend. Grab the bar with a pronated grip (palms facing your body), hands just outside your legs. Take the slack out of your arms by lifting your hips a little higher and taking some of the bend out of your knees. Roll your shoulders down and back and assume a neutral spinal position. Do NOT round your upper back.
With a firm grip on the bar, brace your core and push your hips forward as you come to standing on an exhale. Then reverse the movement, lowering the bar back to the floor, again allowing your hips to lead the way. Touch the bar briefly to the floor and repeat for desired number of reps.
It should look like this:
Hips move first as you lower yourself to the bar.Keep spine neutral as you bring hips forward and lift.End position. Return to standing.
And if a picture is worth a thousand words, then a video must be worth a whole lot more. Here’s a short clip of me performing the deadlift with a view from the front:
Some caveats are in order. Whether you’re pregnant or not, please work with a trainer if you are new to this exercise. Likewise, keep the intensity low as you train your body to perform the exercise properly and build your muscle memory. If you are pregnant, make sure you clear this and all exercise with your doctor before beginning.
Have fun with this one! My back side has become so much stronger since incorporating the deadlift into my regular fitness routine. Plus it just makes me feel powerful. 🙂 It’s one of my favorite exercises, and I hope it becomes one of yours too!
Are you a pregnant or postpartum woman who experiences pain in the front or back of the hip, lower back, buttocks, or down the leg? Does the pain create difficulty standing on one leg, getting in and out of cars, or climbing stairs? If so, then you might be experiencing pelvic girdle pain (PGP), also known as symphysis pubic dysfunction. Today you’ll learn what it is, what causes it, and what you can do about it. If you don’t have the symptoms yet, you’ll also learn what you can do to minimize the risk of developing PGP.
The pelvis has three primary joints: two sacroiliac joints and the symphysis pubic joint. The former join the pelvis in the back while the latter joins the pelvis in the front.
These joints have very little movement – usually. But during pregnancy, women experience a rise in the hormone, relaxin, which relaxes tissues and joints in the body. This is important to prepare the body for labor, but it has the unfortunate side effect of increasing joint instability. If movement in the hip joints increase, it can create the symptoms described above, causing PGP. The pain can be debilitating and is common in pregnancy.
Women can decrease their risk of developing PGP by strengthening their core muscles, which support the pelvic joints. Pelvic tilts are a great way to strengthen the transversus abdominis (TVA), the deep abdominal muscles that lie beneath the rectus abdominis, or the “six pack.” Performing kegels will strengthen the pelvic floor, and performing opposite arm-opposite leg reaches from the quadruped (all fours) position will strengthen both the lower back and the TVA. The glutes are also a part of the core, although we don’t typically think of them this way. Exercises that effectively target these muscles include single leg squats, glute bridges, and donkey kicks.
Other exercises place pregnant and postpartum women at a greater risk for developing PGP. Women should avoid quick or jerky movements that may cause the bones to separate. Lateral and rotational lunges when executed powerfully can also be problematic, as are exercises that abduct the legs simultaneously (e.g. those that bring the legs apart, such as the the hip abduction machine).
If you do suffer from PGP, you’re not alone. And now you have some tools to help you find relief!
I feel like I haven’t posted any good exercises recently. Let’s fix that!
WellMom offers small group training in addition to one-on-one PT. I like to call it “Mom Camp.” 🙂 Today I’m sharing a workout that some current campers recently performed. It’s a full body, fat torching workout designed to leave you breathless!
Like many of WellMom’s fat loss circuits, it relies on the principle of rest-based training. The idea is you push yourself hard – as hard as you can! – until you simply must take a break. Then you rest just long enough until you’re ready to hit it again. Heavy resistance is also key. In fact a good starting weight is one that you have to reduce at some point during the workout. The high intensity interval training coupled with heavy load increases your afterburn, or the calories you burn up to 48 hours AFTER your workout! What’s that you say? Burning calories when I’m doing nothing?! You heard me correctly. And the whole thing only takes 25 minutes out of your day!
I have my campers do a lot of this type of training, and it works! Just halfway through their 8-week program, the group of four moms that recently performed this circuit have collectively torched 16 pounds!
Full Body, Fat Torching Circuit
Note: Prenatal moms should approach this circuit with caution. It is appropriate for those accustomed to intense training but not for those new to exercise. Postpartum moms who aren’t yet ready for intense training should also avoid this circuit.
Repeat each exercise sequentially for the specified time and complete 5 rounds. Push yourself as hard as can while you’re working, breaking as often as you need.
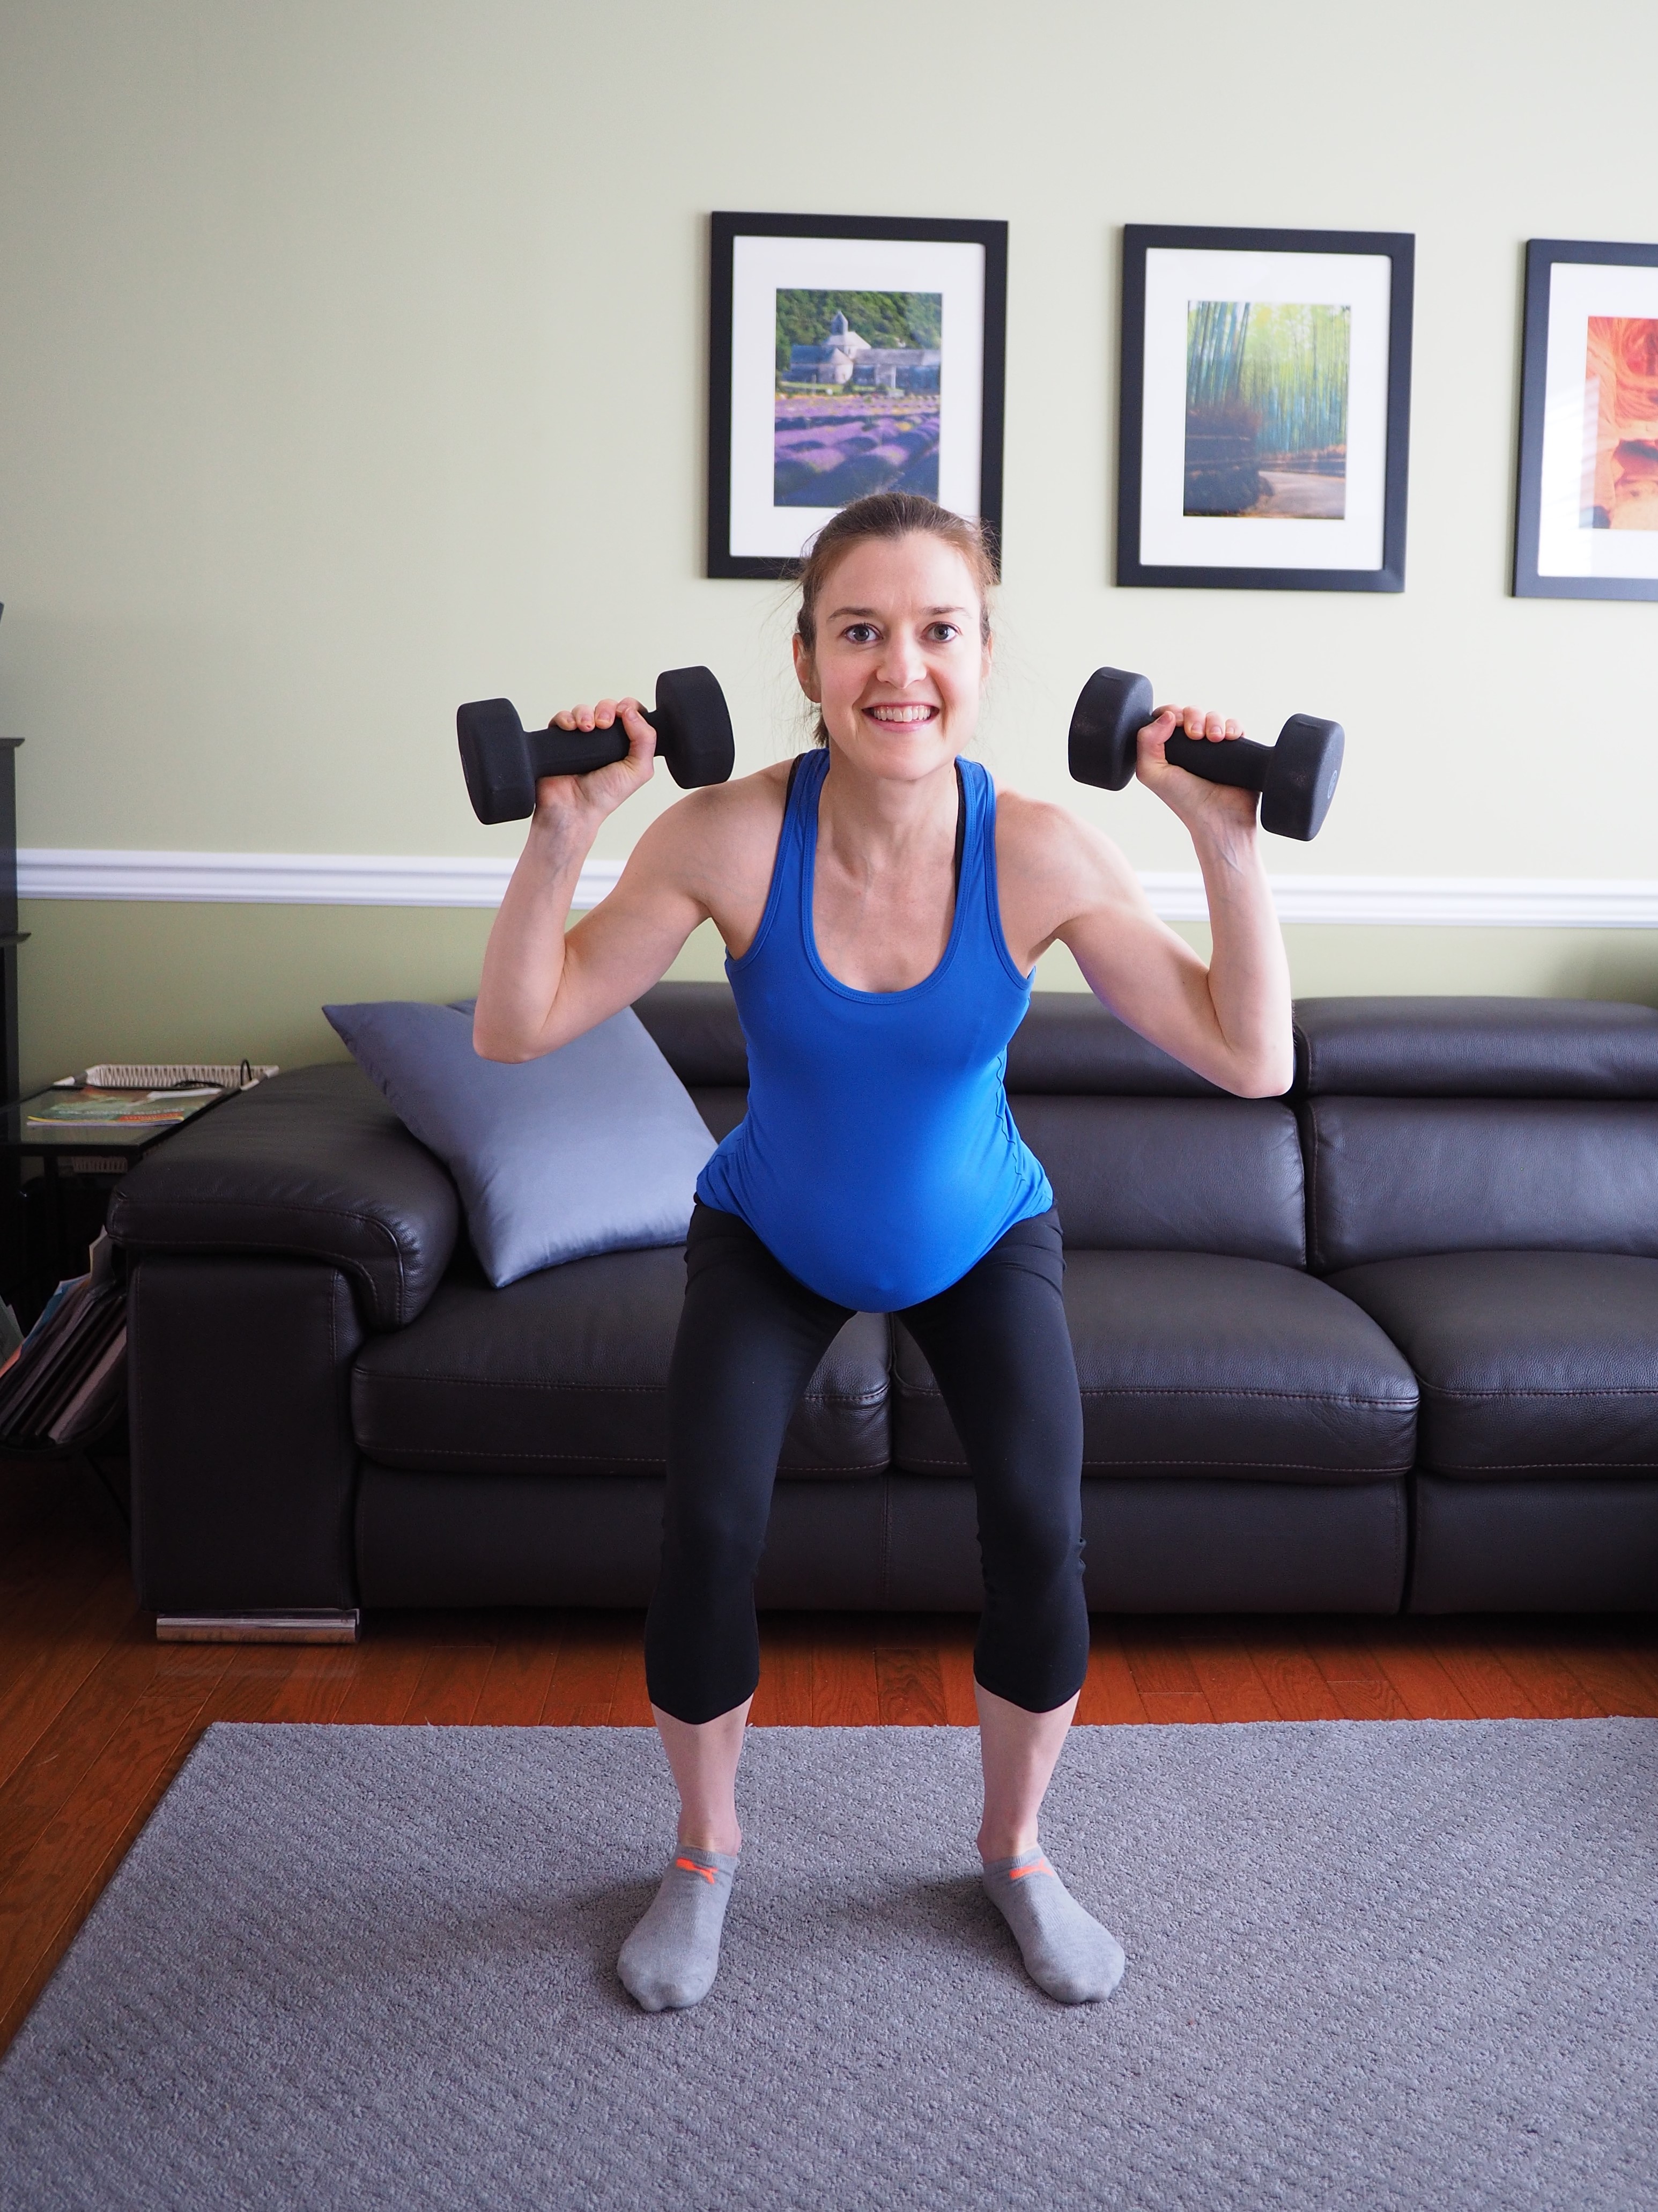
1. Dumbbell thrusters. 1 minute
(Do these as quickly and explosively as possible!)
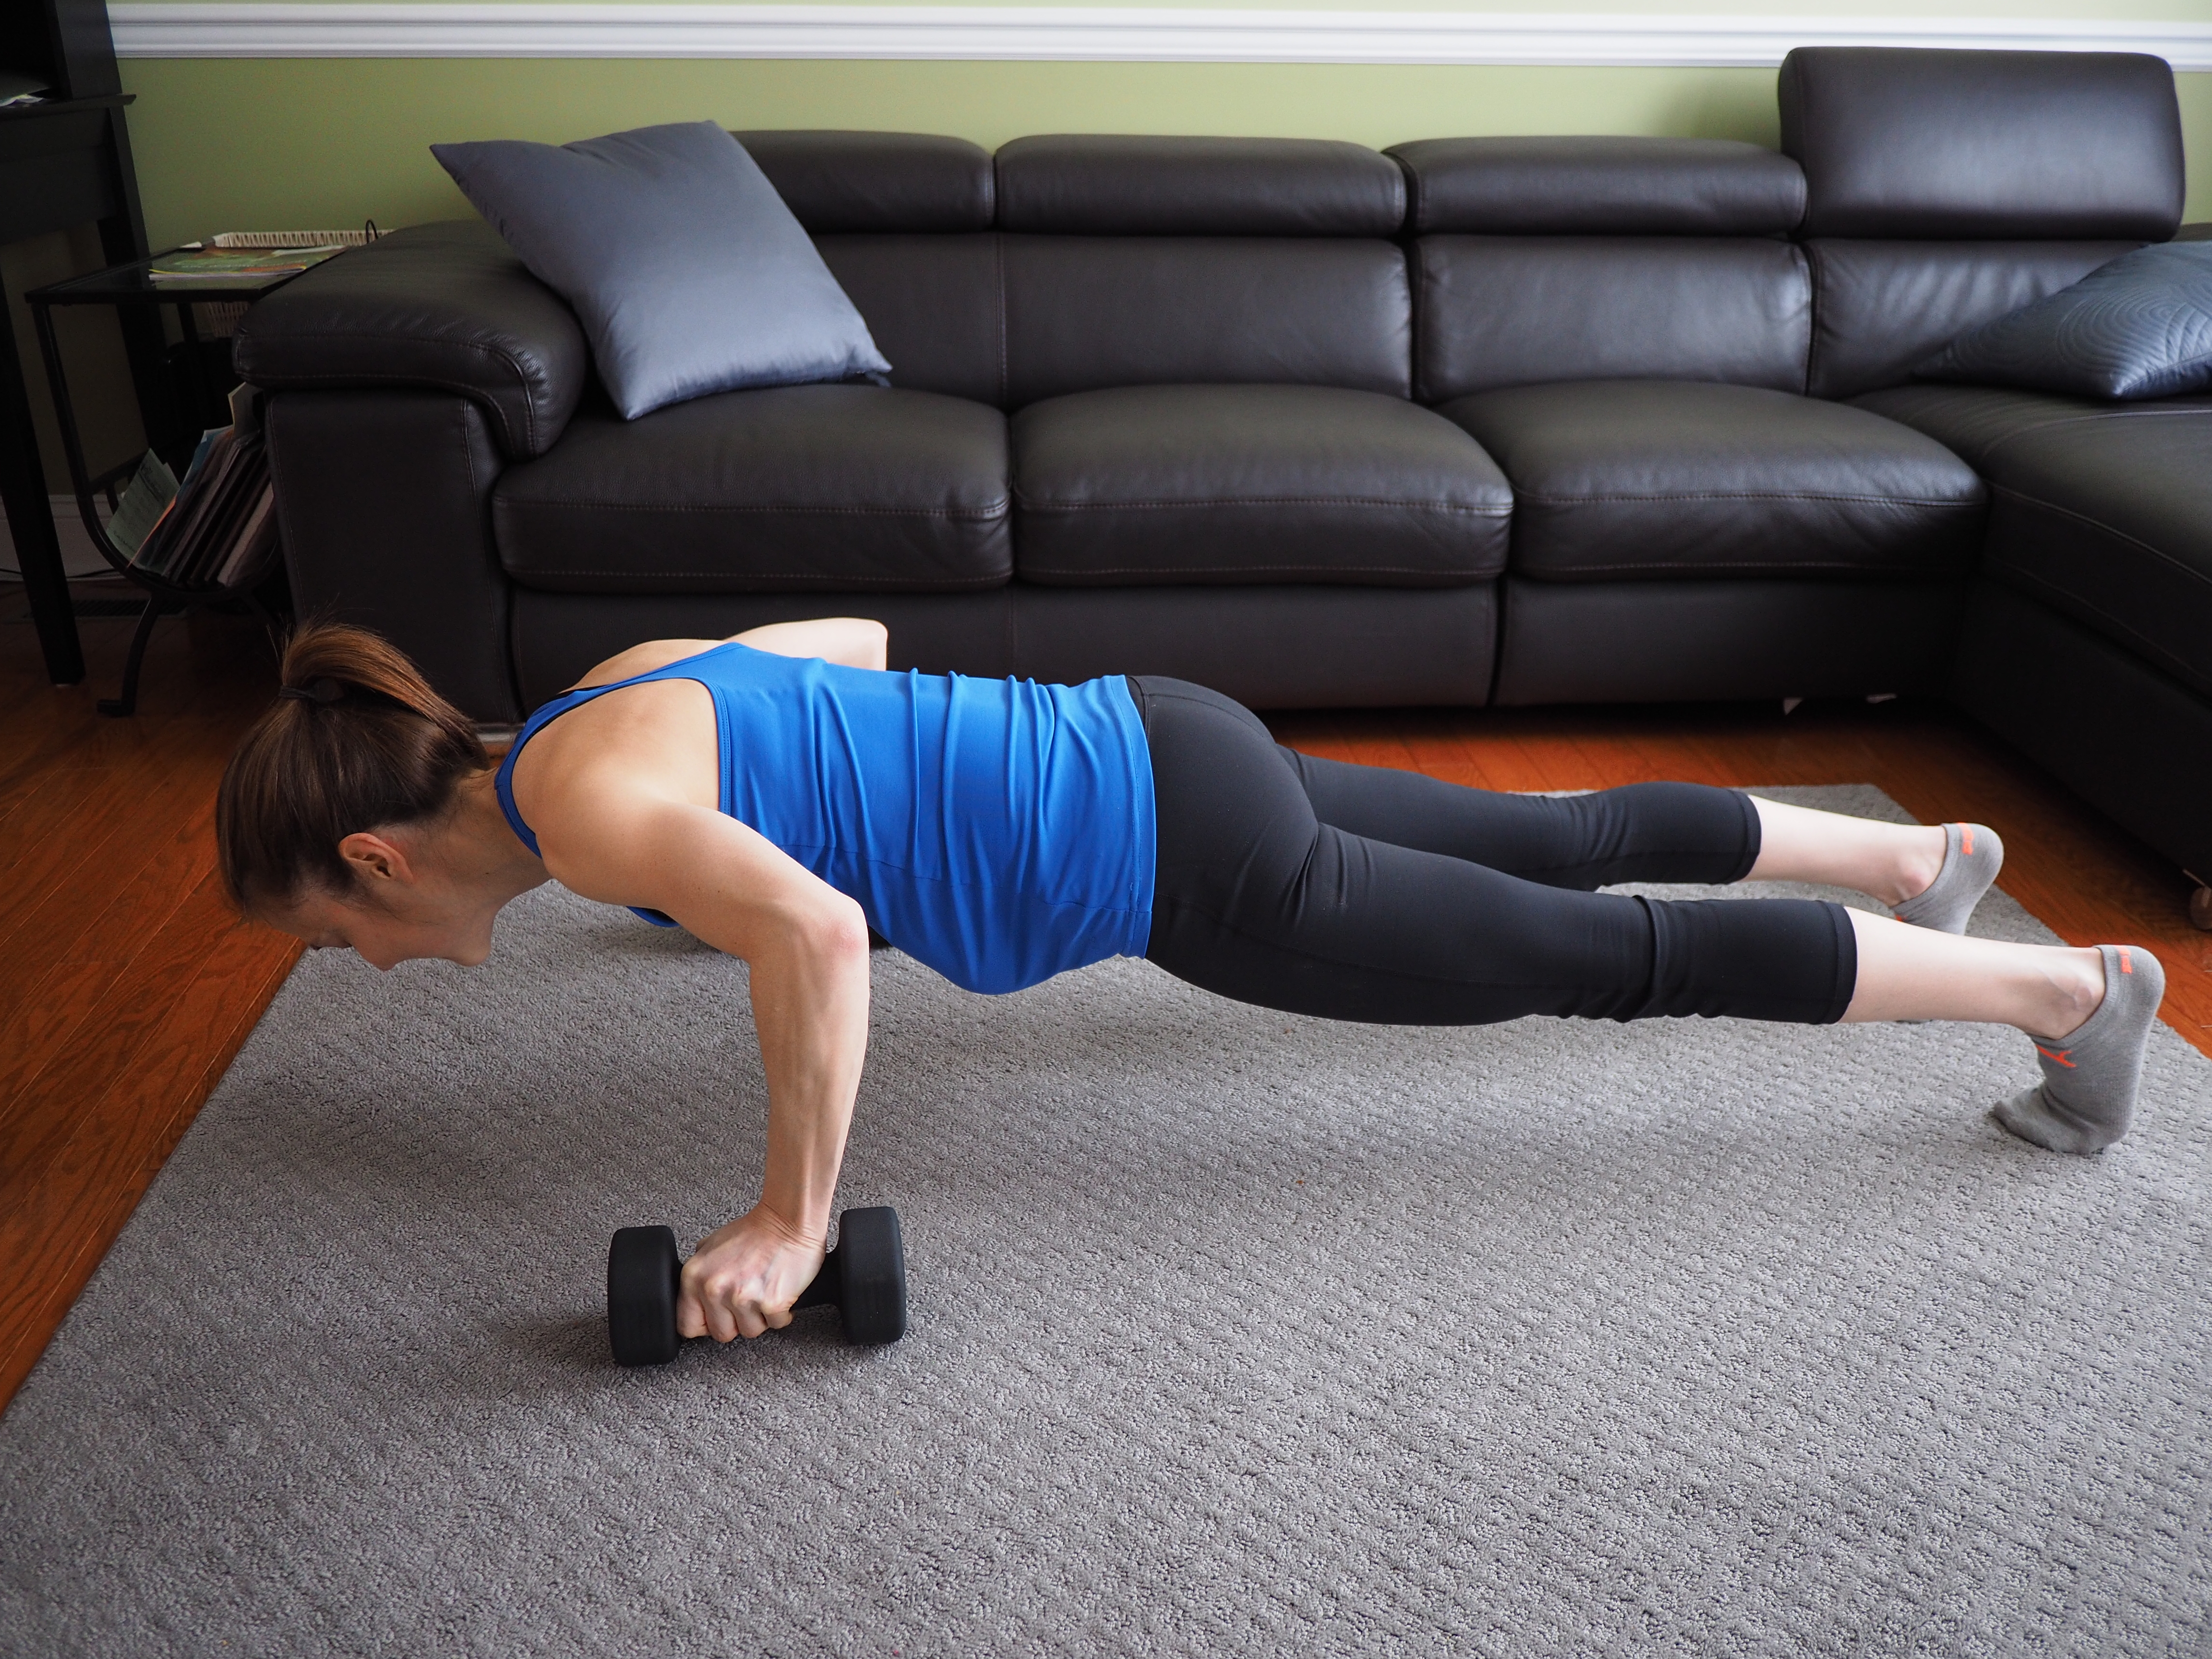
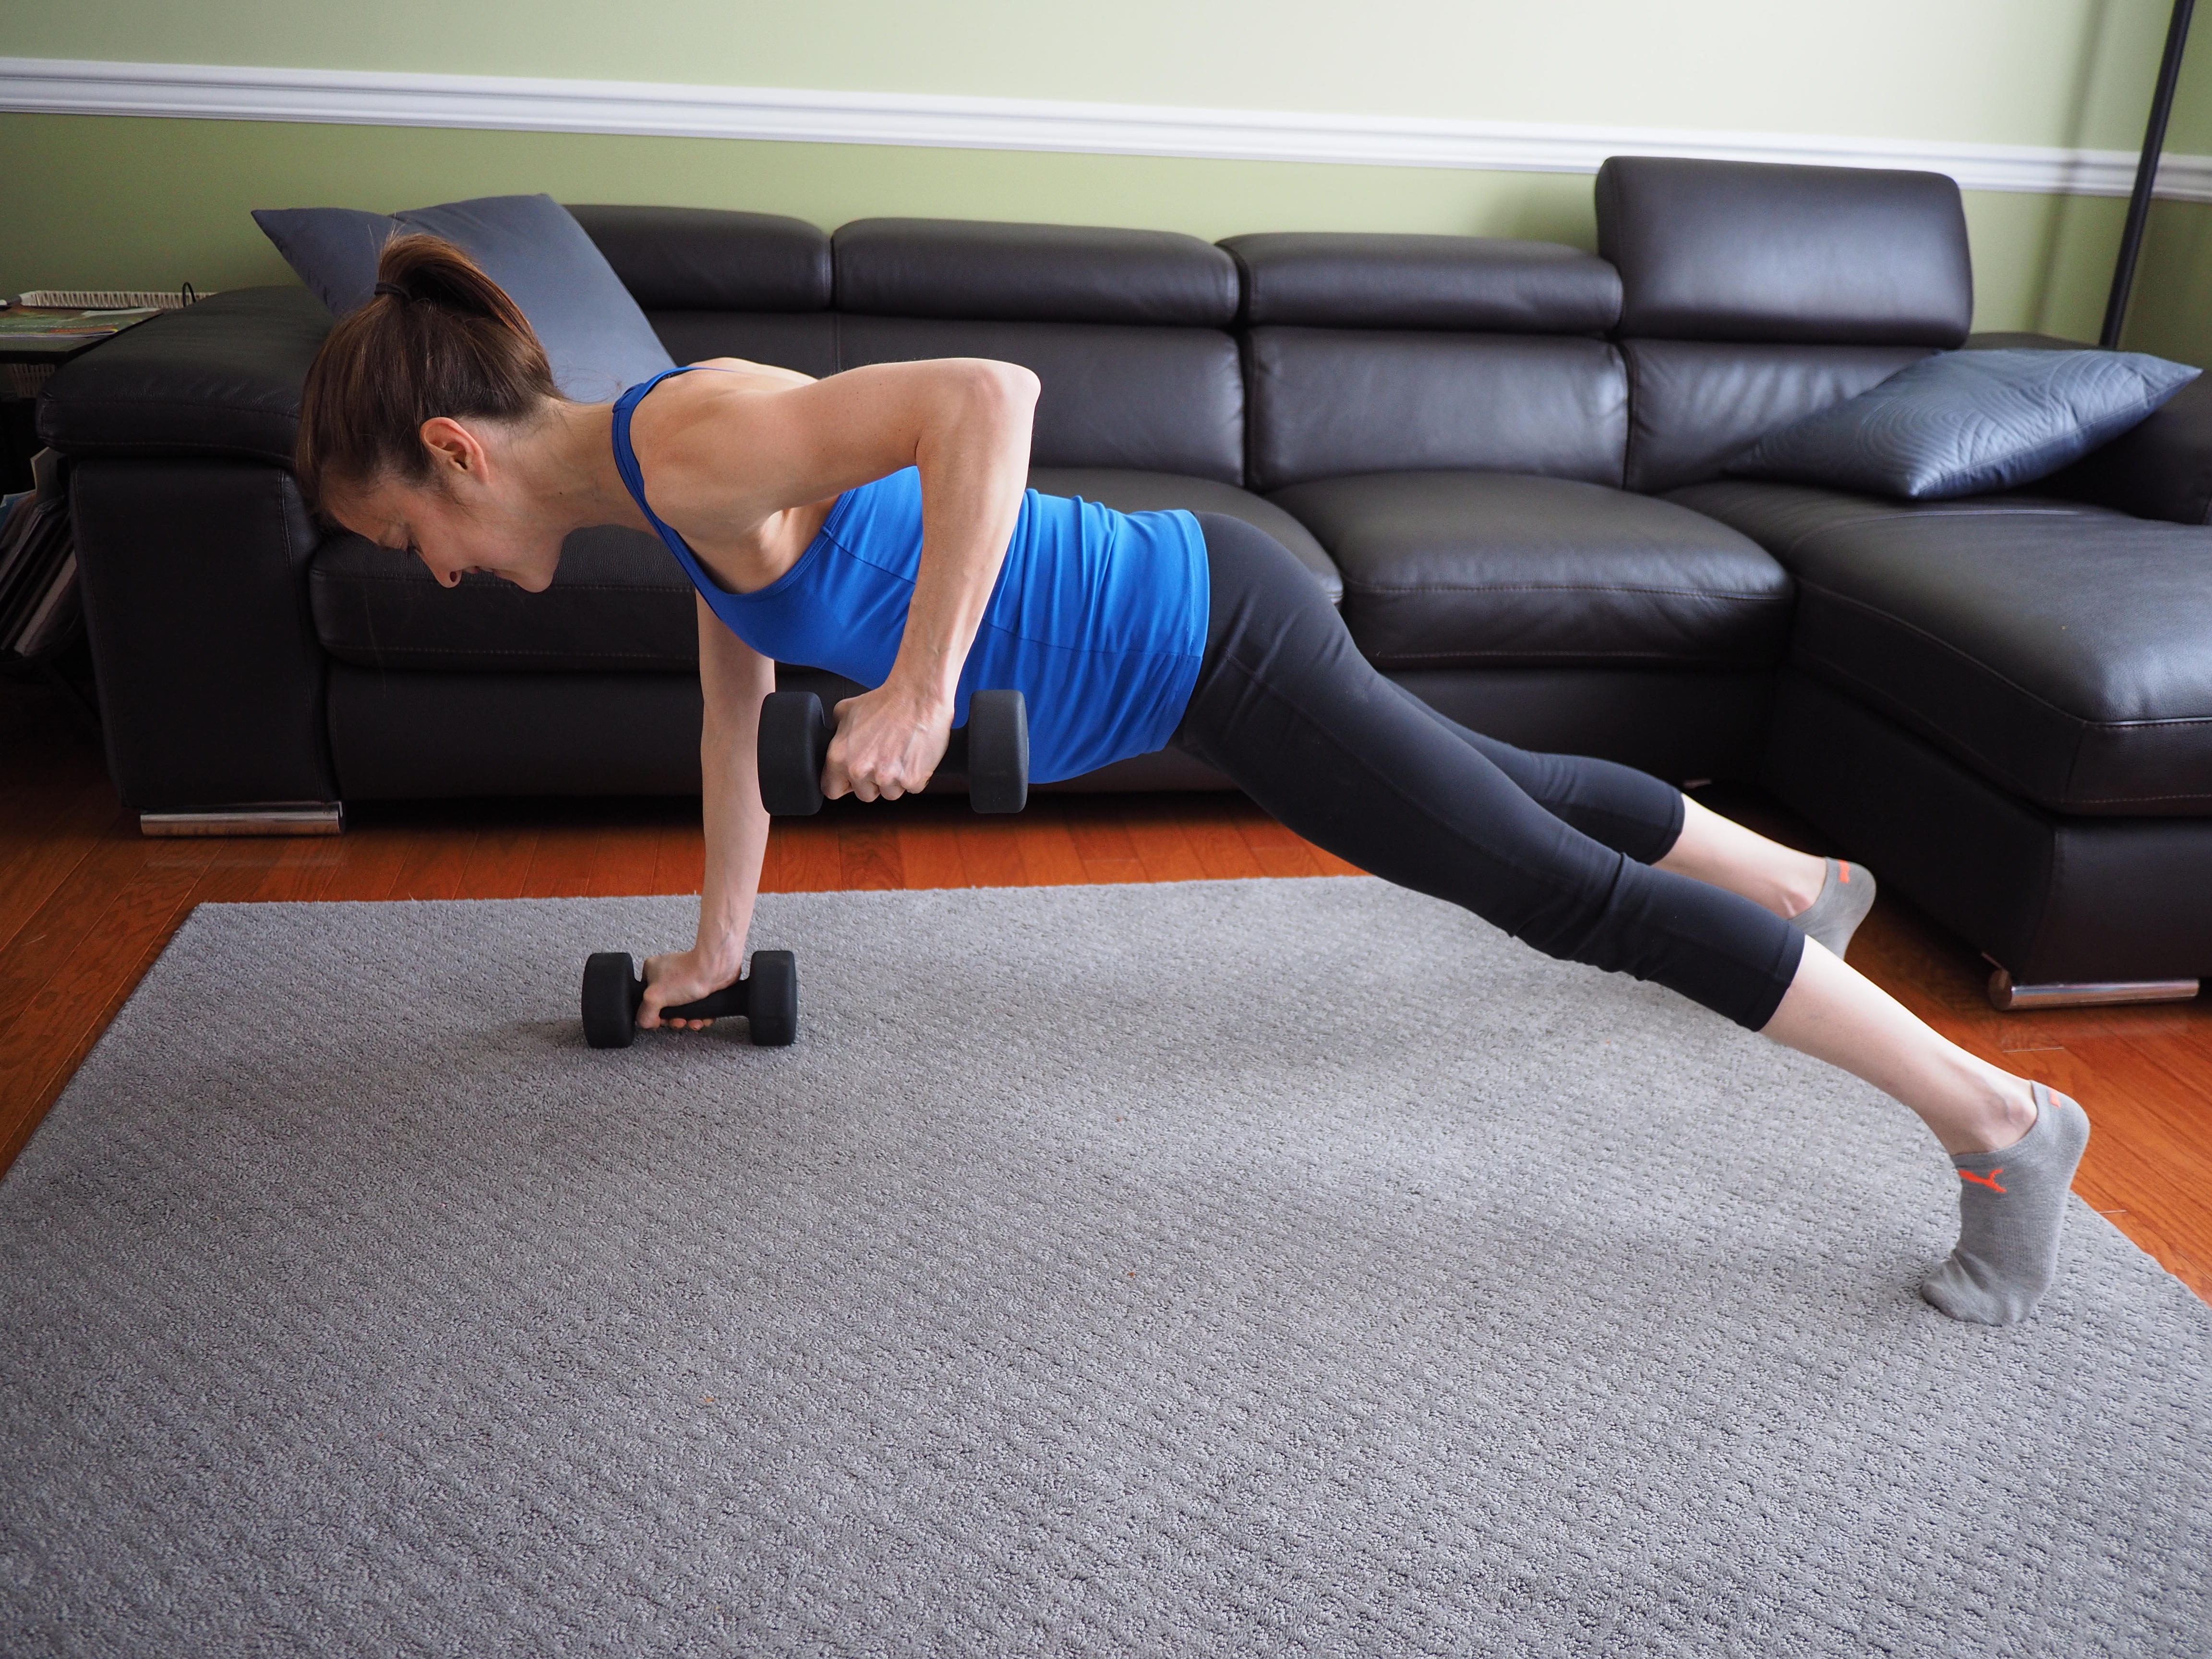
3. Push-up with row (on knees or toes), alternating arms. 1 minute
4. Static front lunge. 30 seconds with each leg leading
Cool-down
Walk for two minutes.
*****
And since I mentioned Mom Camp, here’s a picture of two of my moms from camp last week. We often round out class with some flexibility training. Doesn’t Caitlin make triangle pose look fun? 🙂
If YOU want to go to camp, drop me a line! I also offer small group training for postpartum moms where the intensity is much lower and the focus is on rehabilitation of the inner core, (pregnancy and delivery – whether vaginal or Cesarean – wreak havoc on this area of the body). I’d love to see you in my next class!
Diastasis what-ti? If that’s what you’re thinking, you’re not alone. Even I hadn’t heard of it before my training in pre- and postnatal exercise. Let’s start with an anatomy lesson, move onto a definition, then discuss what to do about it.
When we talk about the core, we often think of the rectus abdominis – i.e. the “six pack” – or the outermost abdominal muscles. The deepest of all the abdominal muscles is the transversus abdominis, or the TVA. While the muscles of the rectus abdominis run vertically, the muscles of the TVA run horizontally, acting like a corset to pull all four side of the body together. The linea alba is the fascia (tissue) that connects the left and right halves of the rectus abdominis.
A primary role of the TVA is to provide spinal stability. When the TVA is weak, our bodies compensate and provide stability in other ways. This has a variety of negative consequences, including lower back pain, muscular imbalances, and poor posture.
Image taken from diastasisrehab.com
Diastasis Recti refers to the separation of the rectus abdominis into left and right halves. Although anyone can have a diastasis, it’s common in pregnant and postpartum women because the growing uterus leaves the TVA overstretched and undertoned. The rise in the hormone, relaxin, during pregnancy also facilitates a diastasis because it softens and relaxes fascia all over the body, including the linea alba. The TVA is further traumatized in women who deliver via c-section, as the surgery cuts through the muscles.
Not sure if you have a diastasis? Not to worry. You can ask your OB or midwife to evaluate you at your next appointment, or you can do it yourself. If you want to self-diagnose, here’s one video I recommend. Oh, and if you have a “mummy tummy” (y’all know what I’m talking about, right ladies?), there’s a VERY good chance you have a diastasis.
Estimates of the prevalence of diastasis recti are high, ranging from two-thirds to 100 percent of women in their third trimester.* While you may not be able to avoid the condition, research shows that diastasis is less prevalent and less severe among women who exercise regularly. The best exercises are those that focus on strengthening – you guessed it – the TVA.
Recall that the muscle fibers of the TVA act like a corset, pulling the four sides of the body together. To strengthen the TVA, you need to tighten and relax that corset, much like you tighten and relax your bicep muscles when doing bicep curls in order to strengthen them.
Below are pictures of me illustrating this contraction. As it turns out, I’m not only the owner and founder of WellMom, I’m also a client. 🙂 I have a two year old daughter, and I’m expecting my second in July. The pictures below were taken when I was 17 weeks and four days pregnant with number two. I’m drawing in my abdominals (i.e. tightening the corset) in the picture on the left and relaxing my abdominal muscles in the picture on the right.
The pelvic tilt is an EXCELLENT exercise to strengthen the TVA. If you have an existing diastasis, it’s also a very useful for rehabilitation. Here’s one way to perform the exercise:
Lie on your back with your knees bent and your feet flat on the floor. Begin in a neutral spinal position (you should be able to slide your hand between the small of your back and the floor). Take a deep breath in. As you begin to exhale, tilt your pelvis back, shifting your tailbone up. Press the small of your back firmly into the floor and imagine drawing your navel in towards your spine and drawing the two sides of your rib cage together. Take another deep breath in, releasing the tilt and returning to a neutral spinal position.
You can make this exercise more challenging with the addition of heel slides. To do this, while your pelvis is tilted back, slowly slide one heel along the floor until the leg is fully extended, then slowly draw it back in. Release the tilt, returning to a neutral spinal position, then repeat on the opposite side. For an even greater challenge, slide both heels simultaneously.
If you’re pregnant and uncomfortable lying on your back, you can also perform this exercise standing. Stand with your head, shoulders, and hips against the wall, but with your feet away from the wall and your knees bent. Tilt the pelvis and draw your navel toward your spine, as for the supine version.
I prescribe pelvic tilts to my clients, and I’ve been doing them daily as a part of my TVA strengthening routine since learning of my current pregnancy. In fact, this technique has helped me to close the small diastasis that I had at the start of this pregnancy. So get your pelvic tilt on!
*Benjamin, D.R. et al. 2013. Effects of Exercise on Diastasis of the Rectus Abdominis Muscle in the Antenatal and Postnatal Periods: A Systematic Review. Physiotherapy 100(1): 1-8.
 sore from nursing, lifting him and carrying him (and his gear). For Max, (baby #2), I was nervous about being physically strong enough to keep up with a very active toddler AND carry around a newborn. Plus, I worked out regularly during my first pregnancy with Jack; with Max, I did little beyond chasing a toddler and walking the dog. I just felt sort of “blah” from not having a good exercise routine. I happened to see Chris’ interview on ARLNow and, on a whim, emailed her.


 ches. But TRUE core strength comes from an entirely different set of muscles, including the diaphragm, transversus abdominis (TVA), pelvic floor, and multifidus. We might call this group of muscles the “inner core” or “inner unit.” You can think of it as a rectangular-shaped cylinder that sits in your abdominal cavity with the diaphragm on top, the TVA in the front, the pelvic floor at the bottom, and the multifidus in the back.