Welcome to the WellMom Client Spotlight, Jenn Chandler! Jenn became a WellMom distance training client about halfway through her second pregnancy. She feels her workouts helped her mentally and physically during her pregnancy and expedited her recovery after delivery. She continues to train with me today, and she’s getting stronger all the time! Way to go, Jenn!
Jenn Chandler
Mom to Jack (4) and Max (6 months)
What motivated you to work with WellMom? What goals did you have?
When Jack (baby #1) was a born, I remember thinking, “wow, I never realized how physically demanding having a newborn is.”My back, neck and arms were sosore from nursing, lifting him and carrying him (and his gear). For Max, (baby #2), I was nervous about being physically strong enough to keep up with a very active toddler AND carry around a newborn. Plus, I worked out regularly during my first pregnancy with Jack; with Max, I did little beyond chasing a toddler and walking the dog. I just felt sort of “blah” from not having a good exercise routine. I happened to see Chris’ interview on ARLNow and, on a whim, emailed her.
What are your accomplishments since working with WellMom?
Compared to my first pregnancy with Jack, I was not nearly as sore right after Max’s birth or the first few months after he was born. Even towards the end of my pregnancy, I always felt strong and energized after my workouts. They were a great mental and physical boost. I can now do 20 real push ups on my toes, and I’ve moved from 8 lb weights to 15 lb weights for some exercises! Overall, I feel stronger and just more fit.
To what do you attribute those accomplishments?
I really attribute those to having a good relationship with Chris andstaying consistent. I do distance training with her where she emails me a full workout, with links to video clips for new moves, every Friday morning. As I’ve told her, I always get a little excited AND a little terrified to open that email every week and see what she’s cooked up for me. I can do the workout whenever is convenient for me and then report back to her. Chris knows how to push me without overdoing it and has always been great about offering modifications, especially towards the end of my pregnancy.
What goals do you have moving forward?
(1) Be able to consistently do 25 push ups on my toes; (2) Be able to crow pose in yoga (a move I’ve never been able to get); and (3) Get back into running shorter races and eventually run another marathon before I turn 40.
What health and wellness advice do you have for other moms based on your personal journey?
Figure out an exercise routine that works for you. And then stick with it, even when it’s hard or not super convenient. I look forward to my hour workout from Chris every week. And even when I’ve had to start and stop the workout because of a fussy baby, I’ve always felt great after powering through.
We’ve all been there. We know we SHOULD be making our way to the gym to exercise, but we just can’t muster the motivation. Scrubbing the dishes sounds like a more attractive option. Though, of course, parking ourselves on the sofa sounds like the best choice of all.
As a mom or mom-to-be, you probably feel this way more often than you did during your child-free days, when pregnancy and the demands of motherhood weren’t further sapping your energy.
Here are five strategies to get you moving when exercising is the last thing you want to do.
1. Lace up your kicks and see what happens.
Inertia is a powerful thing. The longer we sit around, the harder it can be to get up. Can’t talk yourself into a CrossFit workout? Put on your shoes and take a walk outside. Keep your goal modest – maybe just once around the block. If you’re someone who needs a destination, plan to walk to get the mail or grab a few groceries at the store. You may find that your energy levels pick up the moment the fresh air hits you. And now that you’re out there, maybe that one trip around the block turns into four. Maybe you get really motivated and power walk or find your way into neighborhoods with a few challenging hills (can you say, “interval workout”?). Maybe I ride by on my bike and see you doing push ups next to your stroller. 🙂
2. Get a workout buddy.
Often finding the time for exercise comes down to accountability. If you know your girlfriend is waiting for you at the gym, you’re much more likely to show up than you would be if you were going on your own – especially on those low energy days. Plus, it can be hard to find time to spend with friends, so working out together provides an opportunity for much needed time for yourself and away from family.
3. Remember you don’t have to “kill it.”
If you get to the gym and you still don’t have energy for that 60-minute spin class, don’t sweat it. Make today a light day. If a yoga class is available, take that. Or create your own workout: go low intensity on a piece of cardio equipment for 20 minutes; follow that with 20 minutes of low resistance weight training; complete your workout with 15 minutes of core work to strengthen your TVA and your pelvic floor (e.g. kegels). Our bodies actually do BETTER if we combine intense exercise sessions with light ones.
4. Carve out time when you know your energy levels are highest.
People in general, and expectant moms in particular, have natural highs and lows during the day. If you’re expecting a baby and are experiencing stereotypical morning sickness, plan to work out later in the day when you’re feeling better. Are you more of a morning person? Set an alarm and get that workout in before the kids get up.
5. Reward yourself.
And no, I don’t mean with Oreos (sorry!). Treat yourself to a pedicure or a new article of clothing if you fit in at least 10 exercise sessions during the course of the month. Need a more immediate reward? How about a nice hot bath after your trip to the gym? Or enlist the help of your spouse or partner, and ask for a foot massage to reward your hard work!
And if you just can’t do, be kind to yourself. Obviously you shouldn’t ALWAYS give into inertia, but sometimes rest is truly what you need as a busy mom or mom-to-be. Rest up today, and give it your best shot tomorrow.
Winter Mom Camp started this past week, and core strength is a big focus in my Gentle Class. While critical for everyone, core strength is especially important for pregnant and postpartum women since pregnancy and delivery wreak havoc on these muscles. Many of the moms in my Gentle Class recently delivered, and I started class with a discussion of core strength that I’m sharing with you today, along with a breathing exercise that’s foundational to a tone core.
Those looking to strengthen their core muscles often turn to exercises that target the rectus abdominis (the “six pack”), like crunches. But TRUE core strength comes from an entirely different set of muscles, including the diaphragm, transversus abdominis (TVA), pelvic floor, and multifidus. We might call this group of muscles the “inner core” or “inner unit.” You can think of it as a rectangular-shaped cylinder that sits in your abdominal cavity with the diaphragm on top, the TVA in the front, the pelvic floor at the bottom, and the multifidus in the back.
Arguably the most important of these muscles is also the most overlooked: the diaphragm. It’s a parachute-shaped muscle that attaches to the bottom of the lunges. When we breathe with our diaphragm, the muscle contracts and descends into the abdominal cavity. This creates pressure in the abdomen because the pelvic floor, multifidus, and TVA eccentrically contract as the diaphragm descends. I find the image of a french press useful here. The diaphragm is like the plunger on the top. When you breathe in with this muscle, it’s like pushing the plunger down.
Core strength comes from this pressure created in the abdomen, pressure that the diaphragm sets in motion when you inhale. The pressure stabilizes the spine and provides support in your everyday activities, whether you be walking, climbing stairs, carrying children or groceries, or lifting weights in the gym. Moreover, every time you breathe with your diaphragm, you’re also strengthening the other three inner core muscles because they eccentrically contract in response to the movement of the diaphragm. That’s why the diaphragm is foundational for core strength.
Sounds simple, right? Just breathe your way to a strong core. Well, yes and no. The problem is most people DON’T breathe this way. I often have clients practice this type of breathing, and many lack access to the diaphragm, at least at first. Instead they are among the many “chest breathers” out there: they breathe in and out, but the breath gets stuck in the chest, rather than traveling all the way down to the pit of the belly as it should. If the diaphragm doesn’t descend fully into the chamber, it doesn’t properly pressurize, increasing your risk of lower back pain.
To gauge access to your diaphragm, try this exercise. Assume savasana pose, lying on your back with your arms and legs extended. Then place one hand on your chest and the other on your belly. Soften through your abdomen and take a deep breath in. Imagine that your abdomen is like a vase, and the air is like water. As you draw your air (the water) in, allow it to fill the pit of your belly (the bottom of the vase) first before rising up to the top. You’re doing it right if you feel the hand on your belly rise first and the hand on your chest rise last.
Practice that every day for the next week, aiming for fuller and deeper breaths each day. This will set your foundation. In my next post I will describe other ways to further strengthen the muscles of your inner unit.
And by the way, there’s still ONE spot left in Mom Camp’s Gentle Class. It’s perfect for pre- and postnatal moms, those with exercise limitations, and those who are new to exercise. Would love to have you there!
Today I’ve got an update on my pooch. And that’s the belly pooch we’re talking about here, not the “bow-wow” kind of pooch.
Last I wrote, I was diligently doing my core training in an attempt to close the diastasis responsible for the belly bulge that remained after the birth of my second daughter in July. If you missed that post, definitely check it out for background information. There’s also a lot of good information there for you if you find yourself with an unwanted pooch.
When we left off, I was four weeks postpartum. My belly had shrunk considerably from delivery, but a noticeable pooch remained:
3 Days PostpartumFour weeks postpartum
And now here’s four weeks compared to ten weeks:
4 weeks postpartum10 weeks postpartum
And remember, ALL of these photos are taken with my belly completely relaxed. No false advertising here by drawing in my abs. (Read my last post if you want to hear me get on my soapbox about THAT topic 🙂 ).
Now, I didn’t take belly shots before my pregnancy, so I can’t compare the 10-week photo to a pre-pregnancy baseline. But my memory tells me that while I’m still not quite back to pre-pregnancy belly flatness, I’m certainly close.
And what about the diastasis? Unfortunately, a non-trivial gap remains. Depending on the time of day when I do the measuring, I can still fit more than two fingers into the space between the two sides of my abdominal wall. But the WIDTH of the gap is only half the story. The DEPTH of the gap also tells us something about the severity of the diastasis. My gap is considerably more shallow now than it was after delivery. This suggests that the linea alba – the fascia that joins the two sides of the rectus abdominis – is much stronger than it was before.
I’m now 16 weeks postpartum, and I’ve been continuing twice-daily exercises for my TVA. Although I stopped taking the belly shots, here’s a fun photo of me and Lily at 13 weeks. I’m very happy with how far I’ve come!
13 weeks postpartum. And I promise I’m still not drawing in my abs!
No, I didn’t get a puppy. I’m talking about my belly pooch.
After giving birth to my first daughter, my belly returned to its normal flat self almost immediately, so I was a little disappointed to find that a bump remained after the recent delivery of my second daughter. The bump was present despite my having done everything you’re supposed to do to avoid it, including staying active during pregnancy with a focus on strengthening the inner core.
I’m quite thin, and excess belly fat was not the explanation. Diastasis recti, or the separation of the rectus abdominis (i.e. your “six pack”) into left and right halves, was the explanation.
We’re going to talk more about that, along with other changes that take place in the few weeks after delivery that help explain why you might still look six months pregnant after having your baby. I’m also going to show you a series of belly pictures taken over my first four weeks postpartum to help illustrate these changes.
Before we look at those pictures, I feel compelled to note that I did everything to make them look as bad as possible: I took profile pictures; I wore a tight, white camisole; I completely relaxed my belly. I also took all the pictures in the evening, a time of the day when I’ve noticed that my belly is particularly distended. I say this because it bugs me when I see other women post misleading pictures. They will provide views of their bellies with their abdominals tightly drawn in, and they will look pretty darn good. They will look something like this:
Three weeks postpartum, abdominals engagedFour weeks postpartum, abdominals engaged
Looks pretty good, right? That’s me at three and four weeks postpartum, drawing in my belly. It’s even more impressive with a frontal view and some skin exposed. Here’s me again at four weeks postpartum:
Four weeks postpartum, abdominals engaged
Unfortunately these pictures are dishonest. Here’s what I look like at those same points in time with my belly relaxed:
Three weeks postpartum, abdominals relaxedFour weeks postpartum, abdominals relaxed
If you ask me, I still don’t look too shabby, but the pooch remains.
So the moral of the story is this: if you see a fitness mom trying to sell you a flat belly after baby by providing a view with her abs drawn in, be skeptical. It’s probably false advertising.
Ok, so now that I’ve got that off my chest, let’s look at an entire series of unflattering (but honest!) photos over the first four weeks after delivery:
Belly Shrinkage during First Four Weeks after Delivery (Abdominals Relaxed)
3 days postpartumOne week postpartum
Two weeks postpartumThree weeks postpartum
Four weeks postpartum
Woah! Pretty cool, huh? One thing that you should immediately notice is that my belly shrinks significantly at first but then more gradually. That’s because of uterine involution. At delivery, your uterus is at least 500 times larger than it was before you conceived, and it takes a while to shrink back down. The rate of involution is greatest in the days immediately postpartum and then begins to slow, with the uterus returning to its normal size in about six weeks.
But uterine involution is only half the story. By the second week postpartum, the uterus is considerably smaller and has returned to its original location in the pelvis. Yet as you can see, I still have my pooch at week two. That takes us back to the diastasis. Let’s talk a little more about that.
When the two sides of the rectus abdominis split, there’s nothing to hold the contents of your abdomen in, so they pop out. Most of what protrudes are your intestines, so if you have a diastasis, you may notice that your pooch is larger if you’re constipated or experience gas.
To correct the diastasis we must strengthen the transversus abdominis, or TVA. As I’ve noted elsewhere, the TVA lies beneath the rectus abdominis. While the muscles of the latter run vertically, the muscles of the former run horizontally, acting like a corset to pull all four side of the body together. If we tighten the corset by strengthening the TVA, we pull together the two sides of the rectus abdominis.
As noted above, I HAD been diligently doing my TVA exercises while pregnant, so what gives? Why did I still have the diastasis? Was there something else I failed to do to avoid this fate? Did I do something I shouldn’t have done?
Unless you consider having a second baby a mistake (I sure don’t!), there was nothing I did wrong. Diastasis recti is simply more common in subsequent pregnancies than the first one. Everything had been stretched out before, so things stretched more easily the second time around. It’s kind of like how you tend to feel pregnant faster with your second pregnancy than you did with your first. As a friend of mine once said, it’s like your body saying, “I know what to do!”
Having multiple pregnancies is just one risk factor. Others include having a c-section, having a large baby, and carrying in the front. I had a vaginal delivery, and although I had a 7 lb 5 oz peanut, I carried her WAY in the front, leading my husband to refer to my belly as the “torpedo” (Thanks, babe. I love you too). So make that two risk factors for me: second baby and torpedo.
Although I can’t prove it, it stands to reason that my diastasis would have been worse had I not done the TVA exercises while pregnant. And these exercises remain the key for correcting the separation now. Every day I collectively spend 25-30 minutes strengthening the TVA. Depending on my schedule, I’ll either spend ten minutes on the exercises three times/day or 15 minutes twice/day. I can’t precisely tell you how much of my progress is due to time and how much to the exercises, but I can say with certainty that my TVA is much stronger now than it was when I started doing them one week postpartum.
So what exactly are these exercises? Pelvic tilts (both with and without heel slides) are definitely one of them. If you don’t know what those are, check out my earlier blog post that provides instruction. If you’re looking for other ideas, I’m currently taking new clients, both in-home and distance-based. I’d love to work with you!
The WellMom blog has been a little quiet for the past few weeks, owing to the arrival of our second second child on July 12! Today I thought I’d share our birth story with you.
My due date was July 21, so I was surprised to find myself feeling unusual contractions around 11:30 pm on Saturday, July 11. I was getting ready for bed when I noticed that the Braxton Hicks contractions that I had become so accustomed to feeling were coming with much greater frequency. However, they had no discernible pattern, with some as many as five minutes apart and others as few as two minutes apart. Flummoxed, I called my doula. “Could it be false labor?” I asked. She was likewise mystified, yet we both remembered how quickly my labor progressed with my first daughter, Siyona, and neither one of us wanted to wait too long and me give birth on the side of the road en route to the hospital! I telephoned the midwife on call at the hospital to seek her advice. She said it sounded like early labor but left it to me to decide if I wanted to come in right away or labor at home for a bit longer. While Neil (loving husband) and I talked it over, the intensity of contractions began to pick up, so we decided to go in. We called a good friend to come over and sleep on the couch and be there in the morning to care for Siyona; when he arrived, we were off.
We checked into the hospital around 2 a.m. At this point, the contractions intensified to the point where it was difficult to talk through them. By the time we got upstairs to my room, each contraction stopped me dead in my tracks. I found that the best position for me to labor in was seated on the edge of the bed with my arms draped over Neil’s shoulders, as I did my best to breathe and relax through the contractions. A feeling of nausea signaled transition, the last part of active labor before the pushing stage begins. The contractions then became even more severe. After a very short period of time, I felt the baby descend into my pelvis and the need to push. I remember exclaiming, “My water is about to break!” After just a few pushes, break it did. At this point I was laboring lying down on my side on the bed. Just three pushing contractions later, the baby arrived at 3:10 a.m., weighing 5 pounds and 7 ounces. We’re old fashioned and opted to keep the gender a surprise, and the next thing I remember is the hospital staff asking my husband to announce the sex. In the short pause between hearing those words and my husband’s reply, I remember thinking to myself, “I don’t care.” And in that moment I knew it really didn’t matter to me whether we had a boy or a girl, just as I had claimed countless times during my pregnancy whenever people asked me which I preferred. Then came Neil’s reply, “It’s another girl!”
We spent just 36 hours in the hospital, just long enough to finally decide on a name for our beautiful baby girl: Lily. For the past three weeks, we’ve been adjusting to life as a family of four. Help from family and friends has greatly aided the transition. I’ve been amazed at my pace of recovery. I was almost feeling back to my old self when we checked out of the hospital! I attribute this to a combination of good genes (thanks, Mom and Dad!) and staying active throughout my pregnancy.
Here are some pictures of me and my girls during our first week together. Enjoy!
Taken very shortly after birth.
Me and my girls at the hospital.
Siyona may look thrilled to be a big sister, but this was moments before she started pushing Lily away saying, “Off!” My hand is there to catch Lily!
I also mentioned that you can enhance the core work in this pose by very consciously drawing your navel in towards your spine to engage your transversus abdominis (TVA) and by lifting your pelvic floor. Today I’m going to explain why the TVA and pelvic floor are so important and show you how to perform this exercise.
When you think of your “core,” what muscles do you imagine? Your “six pack,” perhaps? If you do, you’re not alone, but you’re also incorrect. When we talk about core strength, it’s the deep muscles to which we refer, including the diaphragm, TVA, multifidus (deep spinal muscles), and pelvic floor. These four muscles create a rectangular-shaped box inside our abdomen with the diaphragm on top, the TVA in the front, the pelvic floor on the bottom, and the multifidus in the back.
Maintenance of intra-abdominal pressure is the key to core strength. When the core is functioning properly, the diaphragm descends into the abdominal chamber when we inhale; this creates pressure in the abdomen, much like a we would pressurize a plunger cylinder by pressing on the top of the plunger (I find the image of a french press useful here). The TVA, multifidus, and pelvic floor work in concert with the diaphragm to help create and maintain that pressure, by naturally engaging as the diaphragm descends. Weakness in any one of these four muscles compromises the ability of the body to maintain this abdominal pressure and stabilize the joints. This leads to a variety of adverse consequences including lower back pain, muscular imbalances, and poor posture, as the body stabilizes the joints in less ideal ways.
Pregnancy and delivery make moms especially prone to core weakness. The TVA becomes overstretched and undertoned as the uterus expands. The growing weight of the uterus puts strain on the pelvic floor and weakens it. Depending on the mode of delivery, moms experience additional trauma either to the pelvic floor (in the case of vaginal birth) or the TVA (in the case of a C-section, which cuts through this muscle).
Moms-to-be can strengthen these important muscles by performing cat cows/pelvic rocking with TVA and pelvic floor activation. As you exhale into cat pose, very consciously draw your navel in towards your spine to engage the TVA and then perform a kegel at the very end of the exhale to engage the pelvic floor. The TVA work becomes increasingly challenging as you progress through your pregnancy because the weight of your uterus increases. You truly are using your TVA to lift your growing baby and other components of your uterus!
Here’s a video of me performing this exercise at 38 weeks. Look closely and you can really see my TVA working to lift the uterus as I exhale; you will also see my uterus descend on the inhale as I lower the weight of my belly back down. Unfortunately, the kegels you cannot see. We will have to save instruction on kegels for another day. 🙂
I whipped this up the other day and felt mighty accomplished.
Sauteed sea scallops served over a bed of green lentils mixed with tomatoes and wilted arugula.
So far so good, right? 🙂
I’m willing to pay a bit of premium for things that I consume (is there any more worthy investment than our health?), and I like my foods simply prepared, so that the taste and quality of the ingredients stand out. If I’m making a salad and it’s summertime, I’m going to the farmer’s market and getting fresh greens, heirloom tomatoes, sweet bell peppers, and maybe some fresh herbs. Maybe I’ll even get all wild and crazy and toast some pine nuts to add to the mix. Then I’m tossing it all together with nothing more than a bit of olive oil and a dash of salt and pepper to pull all the flavors together and really make them pop. I can’t imagine, say, dumping a bunch of ranch dressing on that salad. If I did that, I might as well just be eating ranch dressing because it’s all I’d taste.
This dish was no exception to that general rule. When I took my first bite, I tasted only the medley of the fresh ingredients that comprised it. The spicy arugula. The sweetness of the tomatoes. The robust and slightly peppery flavor of the lentils. The sweet and rich taste of the scallops.
Technique was also important. Scallops are on the pricey side, and there’s nothing worse than splurging on them only to end up with a gross, rubbery mess! I’ve found that two tricks are key to making sure they turn out just right:
Placing them at room temperature 20-30 minutes before cooking to ensure even cooking.
Ensuring a nice sear by patting them dry with a paper towel before adding them to the saute pan and making sure the oil and pan are nice and hot.
And did I mention how super healthy this is?! I especially recommend the dish for moms-to-be because it has a lot of the goodies that pregnant women need in larger quantities, including omega-3’s, protein, folate, and iron.
Now that I’ve (hopefully!) sold you, let’s eat!
Sauteed Scallops over Green Lentils
Serves 2
10 ounces sea scallops
1/2 cup dried green lentils
3 cups baby arugula
1 roma tomato, diced
1 large clove garlic, minced
1 tablespoon fresh squeezed lemon juice
3 tablespoons fresh basil, chopped
2 tablespoons olive oil, divided
salt and pepper
Place lentils in a small pot with 3 cups of water and set burner to high. Reduce the heat when the water begins to boil and allow the lentils to simmer until desired tenderness, about 30-40 minutes. Drain any remaining water.
Remove scallops from the refrigerator about ten minutes into cooking the lentils. Set aside.
While the lentils cook, add 1 tablespoon olive oil to a saute pan placed over medium heat. Add arugula and garlic and cook until just wilted, about 2 minutes. Stir in tomatoes, basil, and lemon juice. Add to drained lentils and stir to combine.
Pat the scallops dry with a paper towel and sprinkle them with salt and pepper. Add 1 tablespoon olive oil to a saute pan (more if surface is NOT nonstick) and place pan over medium-high to high heat, depending on your stovetop. After pan is hot but not smoking, add scallops. Allow to cook undisturbed until the scallops have a caramel-colored sear, about 2 minutes. Gently turn scallops over and cook another 1-2 minutes on the other side.
Divide the lentil mixture evenly onto two plates and top with equal amounts of scallops.
Tomorrow marks my 36th week of pregnancy, and as I head into the home stretch, I’m finding myself increasingly drawn to a handful of yoga poses. I’m sharing them with you today and highlighting the specific benefits of each for moms-to-be. Even if you’re not expecting – heck, even if you’re not a mom… or even a woman! – these poses are beneficial to you too, so keep reading! In fact, I have little time for yoga outside of the Vinyasa classes I teach, and I have no qualms about including all of these poses in my classes because they have such wide applicability.
1. Cat cow/pelvic rocking
Come into an all fours position with wrists under shoulders and knees under hips, spine neutral. As you inhale, tilt your pelvis forward, so your tailbone rises and navel drops down toward the floor, while simultaneously turning your gaze to the ceiling. At the end of the inhale, exhale as you draw your pelvis backward, turning your tailbone down towards the floor, drawing navel to spine, arching your back, and tucking your chin to your chest. Repeat for several breaths.
Benefits: This pose is a gentle way to encourage your baby to drop into the pelvis. It also gently strengthens and stretches all of the core muscles, and helps relieve pain in the lower back, which is especially common in the second and third trimesters.
Tip: Enhance the core work by very consciously drawing your navel in towards your spine as you exhale into cat pose. This engages and strengthens the transversus abdominis (TVA), which pregnancy weakens as your belly expands. Add a kegel at the end of the exhale to strengthen the pelvic floor, another set of muscles that pregnancy weakens, owing to the increased weight of the uterus.
2. Bird dog
Come into an all fours position with wrists under shoulders and knees under hips, spine neutral. As you inhale, extend your right arm and your left leg. As you exhale, return to your starting position. Repeat on the opposite side. Continue for several breaths.
Benefits: This pose also strengthens the core and relieves pain in the lower back. You can increase the intensity of the poses – and the core work – by holding opposite arm and leg extended for several breaths before switching sides.
3. Squat
I like to enter this pose from a wide legged forward fold with toes turned out. From this position, shift your hips back and bend your knees. Place your elbows on the insides of your thighs, just above your knees. Drop your hips as low to the floor as you can and hold your hands in prayer at heart center. Hold for several breaths.
Benefits and Precautions: This pose open the pelvis and strengthen legs for delivery. It also stretches the pelvic floor and uses gravity to help your baby descend into the pelvis. This pose is not recommended if your baby is in breech position, as it will encourage the baby to descend further into the pelvis in a sub-optimal position. Those who experience knee pain in this pose should also avoid it. This pose may also be inappropriate if you experience symptoms of sciatica and/or pelvic girdle pain.
4. Goddess
Take a wide-legged stance with toes turned out. Extend arms overhead with palms facing forward. On the exhale, lower your arms to cactus pose, retracting your shoulders as you lower your elbows and bring your forearms parallel to the floor with elbows bent to 90 degrees. Simultaneously drop into a squat, lowering your tailbone down toward the floor and bending your knees. Inhale and reverse the movement. Repeat for several breaths.
Benefits and Precautions: The benefits and contraindications listed above for squat also apply to this pose. However, because you don’t descend into such a deep squat, Goddess pose is accessible to more people. Goddess pose additionally strengthens the upper back and shoulders, and it stretches the chest. This will prove important when the baby arrives and you spend a lot of time carrying your little one around and feeding your baby.
Tip: Imagine that you are standing with your back against a wall in this pose. As you descend into Goddess, imagine that your hips are sliding down the wall and keep drawing your arms back, such that your shoulder blades, elbows and the backs of your hands scrape the wall behind you.
5. Savasana
Lie supine (on your back) with arms and legs extended, hands near your sides with palms facing up. Relax and breathe. Stay in this pose for at least five minutes. If you prefer not to lie on your back, you can elevate your torso with stacked blankets or pillows.
Benefits: This pose is a great dress rehearsal for labor when you are best served by relaxing through contractions.
Tip: Savasana is an excellent opportunity to practice diaphragmatic breathing. Not only is this relaxing, but the diaphragm is a part of your core musculature, and breathing this way helps to strengthen it. Imagine that the abdomen is like a vase and the air like water. When you fill a vase with water it fills the bottom first and then slowly rises to the top. As you breathe in, visualize the air filling the lower portions of your abdomen and then rising to the top, filling the chest last. I sometimes encourage my students to place one hand on the chest, the other on the lower abdomen, so they can feel the abdomen rise first.
My sister had her first baby recently, and I’m out in Phoenix right now, lending a hand. I say that a bit loosely since my toddler, Siyona, came along with me, and sometimes I feel like my sister is helping ME more than I help her!
In any case, in a conversation prior to my arrival she expressed some feelings and behaviors that are common among postpartum moms. She’s constantly fatigued because she’s up every three hours at night breastfeeding. She tries to make up for the sleep during the day, taking naps whenever her daughter is napping. Consequently, she doesn’t get out of the house much, and because she’s home alone with her daughter, she often feels lonely and isolated.
As a mom myself, I totally relate to this! But I also learned through my own experience that sometimes the best thing to do when you’re feeling exhausted is to push back against it, or, as I like to say, to don the “Supermom Cape.” So I decided that one way that I would offer help during my visit was by showing her the special powers that this cape holds.
As it turned out, I found myself needing to lead by example. Siyona and I arrived in Phoenix from the east coast, three time zones away. We’ve both been waking up early, but she’s not as content as I am to linger in bed at 4:30 a.m. To make matters worse, I’m nearly seven months pregnant and sleeping poorly throughout the night, plagued by uncomfortable pregnancy symptoms like restless leg syndrome and the constant need to use the bathroom.
I reached for the Supermom Cape when I found myself particularly exhausted one morning. It was 6:15 a.m., and I forced myself into the shower. I told my sister I was making myself presentable and planning to go out. I would take Siyona with me and her daughter too if she wanted to lay back down to sleep. I put on a cute maxi dress, blow dried my hair, and applied make-up.
She rose to the challenge and cleaned herself up too (luckily I packed a spare cape with me, you see). Downstairs she emerged with styled hair and in her own cute dress. It was nearly 9:30 by the time we all made it out the door, but we were on our way!
We ended up having a lovely morning. But the real point is this: the moment I made the mental shift – the moment I put on my Supermom Cape – I felt my energy level rise. I was determined to be capable, to not let the fatigue win.
I was reminded of a time during my first pregnancy when I saw a woman with a newborn on a flight. She was traveling alone, and she just appeared to have it together. I passed her as I walked down the aisle of the plane to my seat. She was sitting nearer to the front, reading a book while her baby fed discreetly and contently under a breastfeeding cover. I thought to myself, “That’s the mom I want to be.”
And on this morning, I was determined to be the woman on the plane. And I was. And so was my sister. And it felt – if I can be so liberal with the word – empowering.
I don’t put on my cape every day. In fact, sometimes it’s good to leave it folded neatly in the drawer or hanging in your closet. Sometimes you really DO need to forgo the shower – even the toothbrush – and just rest any moment you can. But just don’t let the fatigue win out every time. Otherwise, you miss out on some great things, like these:
Enjoying an expertly made espresso macchiato (my favorite drink!) at a fantastic Scottsdale coffee shop…
…while looking fabulous and capable, holding my beautiful new niece…
…just before taking goofy selfies with my equally beautiful daughter.
So go for it! Get your Momcape on! The world needs more superheroes. 🙂
A few weeks ago I picked up a new personal training client – my husband. The pay is terrible, but he’s easy on the eyes, so we’ll call that a nice fringe benefit. Plus I know he won’t sue me if I say something inappropriate or slap his butt during a training session.
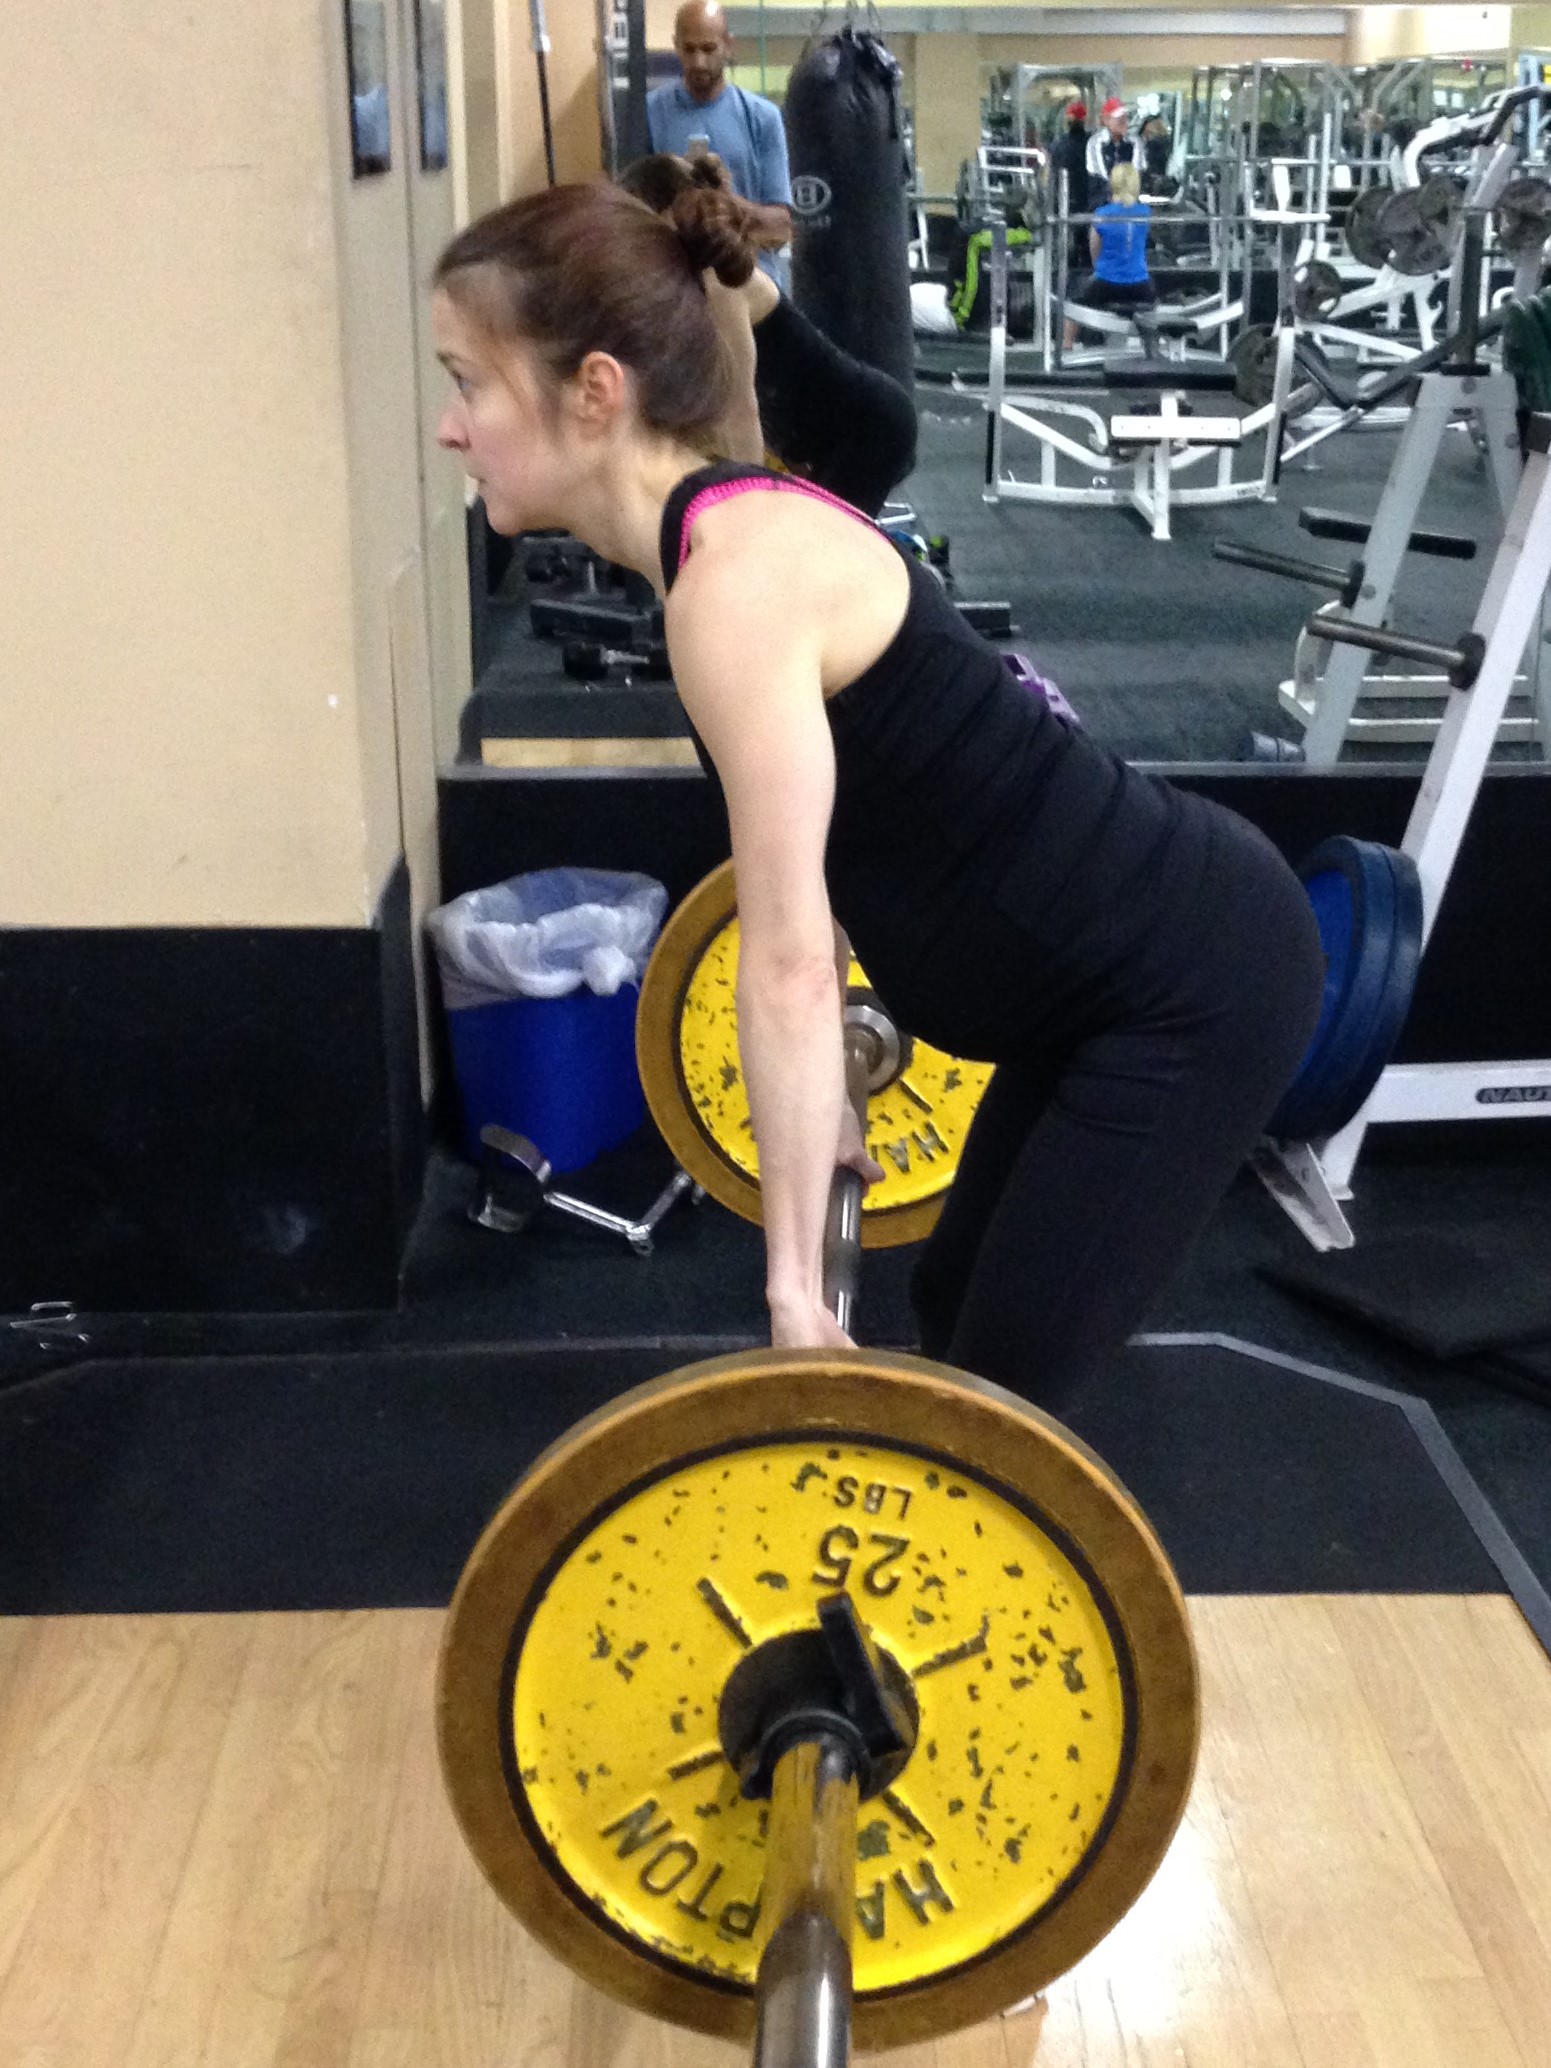
In any event, last week we worked out together during his session. I had him doing deadlifts, and then he about had a heart attack when his six-month pregnant wife stepped up to take her turn. Something in his eyes said, “Will our unborn child drop from your uterus if you pull that bar again?”
I get it. Deadlifts look serious. And they are! But they are also a great exercise to include in your fitness routine, pregnant or not. In fact, pregnant women may have even MORE to gain from the deadlift than the average Jane or Joe.
What’s So Great about the Deadlift?
The deadlift targets a myriad of muscles in your posterior chain – basically the entire backside of your body, including your back, glutes, and hamstrings. If you’re a desk jockey or someone else who does a lot of sitting (read: most of the American population), there’s a good chance these muscles are relatively weak. In fact, every client I’ve ever trained has exhibited weakness in or more of these muscle groups.
Pregnancy tends to exacerbate these muscular imbalances as the uterus expands and the center of gravity shifts forward, causing an unwelcome chain of reactions. The pelvis tilts anteriorly (forward), increasing the curve of the lumbar (lower) spine. The resulting lordosis, along with the increased weight in the breasts, can cause the shoulders to roll forward and the upper back to round. This can shorten and tighten some muscles, including the hip flexors (quads, for instance) and pecs/chest, while lengthening and weakening others, including the – you guessed it! – back, glutes, and hamstrings.
The deadlift is a great way to strengthen all of these weak muscles in a single exercise. Let’s learn how to do it!
Performing the Deadlift
Set your loaded bar on the floor in front of you. Step all the way up to the bar, so that it’s almost touching your ankles or shins, depending on the size of your plates. Stand with feet shoulder width apart and toes slightly turned out.
Lower yourself to the floor by first hinging at your hips, so your hips move behind you as your knees bend. Grab the bar with a pronated grip (palms facing your body), hands just outside your legs. Take the slack out of your arms by lifting your hips a little higher and taking some of the bend out of your knees. Roll your shoulders down and back and assume a neutral spinal position. Do NOT round your upper back.
With a firm grip on the bar, brace your core and push your hips forward as you come to standing on an exhale. Then reverse the movement, lowering the bar back to the floor, again allowing your hips to lead the way. Touch the bar briefly to the floor and repeat for desired number of reps.
It should look like this:
Hips move first as you lower yourself to the bar.Keep spine neutral as you bring hips forward and lift.End position. Return to standing.
And if a picture is worth a thousand words, then a video must be worth a whole lot more. Here’s a short clip of me performing the deadlift with a view from the front:
Some caveats are in order. Whether you’re pregnant or not, please work with a trainer if you are new to this exercise. Likewise, keep the intensity low as you train your body to perform the exercise properly and build your muscle memory. If you are pregnant, make sure you clear this and all exercise with your doctor before beginning.
Have fun with this one! My back side has become so much stronger since incorporating the deadlift into my regular fitness routine. Plus it just makes me feel powerful. 🙂 It’s one of my favorite exercises, and I hope it becomes one of yours too!
Are you a pregnant or postpartum woman who experiences pain in the front or back of the hip, lower back, buttocks, or down the leg? Does the pain create difficulty standing on one leg, getting in and out of cars, or climbing stairs? If so, then you might be experiencing pelvic girdle pain (PGP), also known as symphysis pubic dysfunction. Today you’ll learn what it is, what causes it, and what you can do about it. If you don’t have the symptoms yet, you’ll also learn what you can do to minimize the risk of developing PGP.
The pelvis has three primary joints: two sacroiliac joints and the symphysis pubic joint. The former join the pelvis in the back while the latter joins the pelvis in the front.
These joints have very little movement – usually. But during pregnancy, women experience a rise in the hormone, relaxin, which relaxes tissues and joints in the body. This is important to prepare the body for labor, but it has the unfortunate side effect of increasing joint instability. If movement in the hip joints increase, it can create the symptoms described above, causing PGP. The pain can be debilitating and is common in pregnancy.
Women can decrease their risk of developing PGP by strengthening their core muscles, which support the pelvic joints. Pelvic tilts are a great way to strengthen the transversus abdominis (TVA), the deep abdominal muscles that lie beneath the rectus abdominis, or the “six pack.” Performing kegels will strengthen the pelvic floor, and performing opposite arm-opposite leg reaches from the quadruped (all fours) position will strengthen both the lower back and the TVA. The glutes are also a part of the core, although we don’t typically think of them this way. Exercises that effectively target these muscles include single leg squats, glute bridges, and donkey kicks.
Other exercises place pregnant and postpartum women at a greater risk for developing PGP. Women should avoid quick or jerky movements that may cause the bones to separate. Lateral and rotational lunges when executed powerfully can also be problematic, as are exercises that abduct the legs simultaneously (e.g. those that bring the legs apart, such as the the hip abduction machine).
If you do suffer from PGP, you’re not alone. And now you have some tools to help you find relief!
I feel like I haven’t posted any good exercises recently. Let’s fix that!
WellMom offers small group training in addition to one-on-one PT. I like to call it “Mom Camp.” 🙂 Today I’m sharing a workout that some current campers recently performed. It’s a full body, fat torching workout designed to leave you breathless!
Like many of WellMom’s fat loss circuits, it relies on the principle of rest-based training. The idea is you push yourself hard – as hard as you can! – until you simply must take a break. Then you rest just long enough until you’re ready to hit it again. Heavy resistance is also key. In fact a good starting weight is one that you have to reduce at some point during the workout. The high intensity interval training coupled with heavy load increases your afterburn, or the calories you burn up to 48 hours AFTER your workout! What’s that you say? Burning calories when I’m doing nothing?! You heard me correctly. And the whole thing only takes 25 minutes out of your day!
I have my campers do a lot of this type of training, and it works! Just halfway through their 8-week program, the group of four moms that recently performed this circuit have collectively torched 16 pounds!
Full Body, Fat Torching Circuit
Note: Prenatal moms should approach this circuit with caution. It is appropriate for those accustomed to intense training but not for those new to exercise. Postpartum moms who aren’t yet ready for intense training should also avoid this circuit.
Repeat each exercise sequentially for the specified time and complete 5 rounds. Push yourself as hard as can while you’re working, breaking as often as you need.
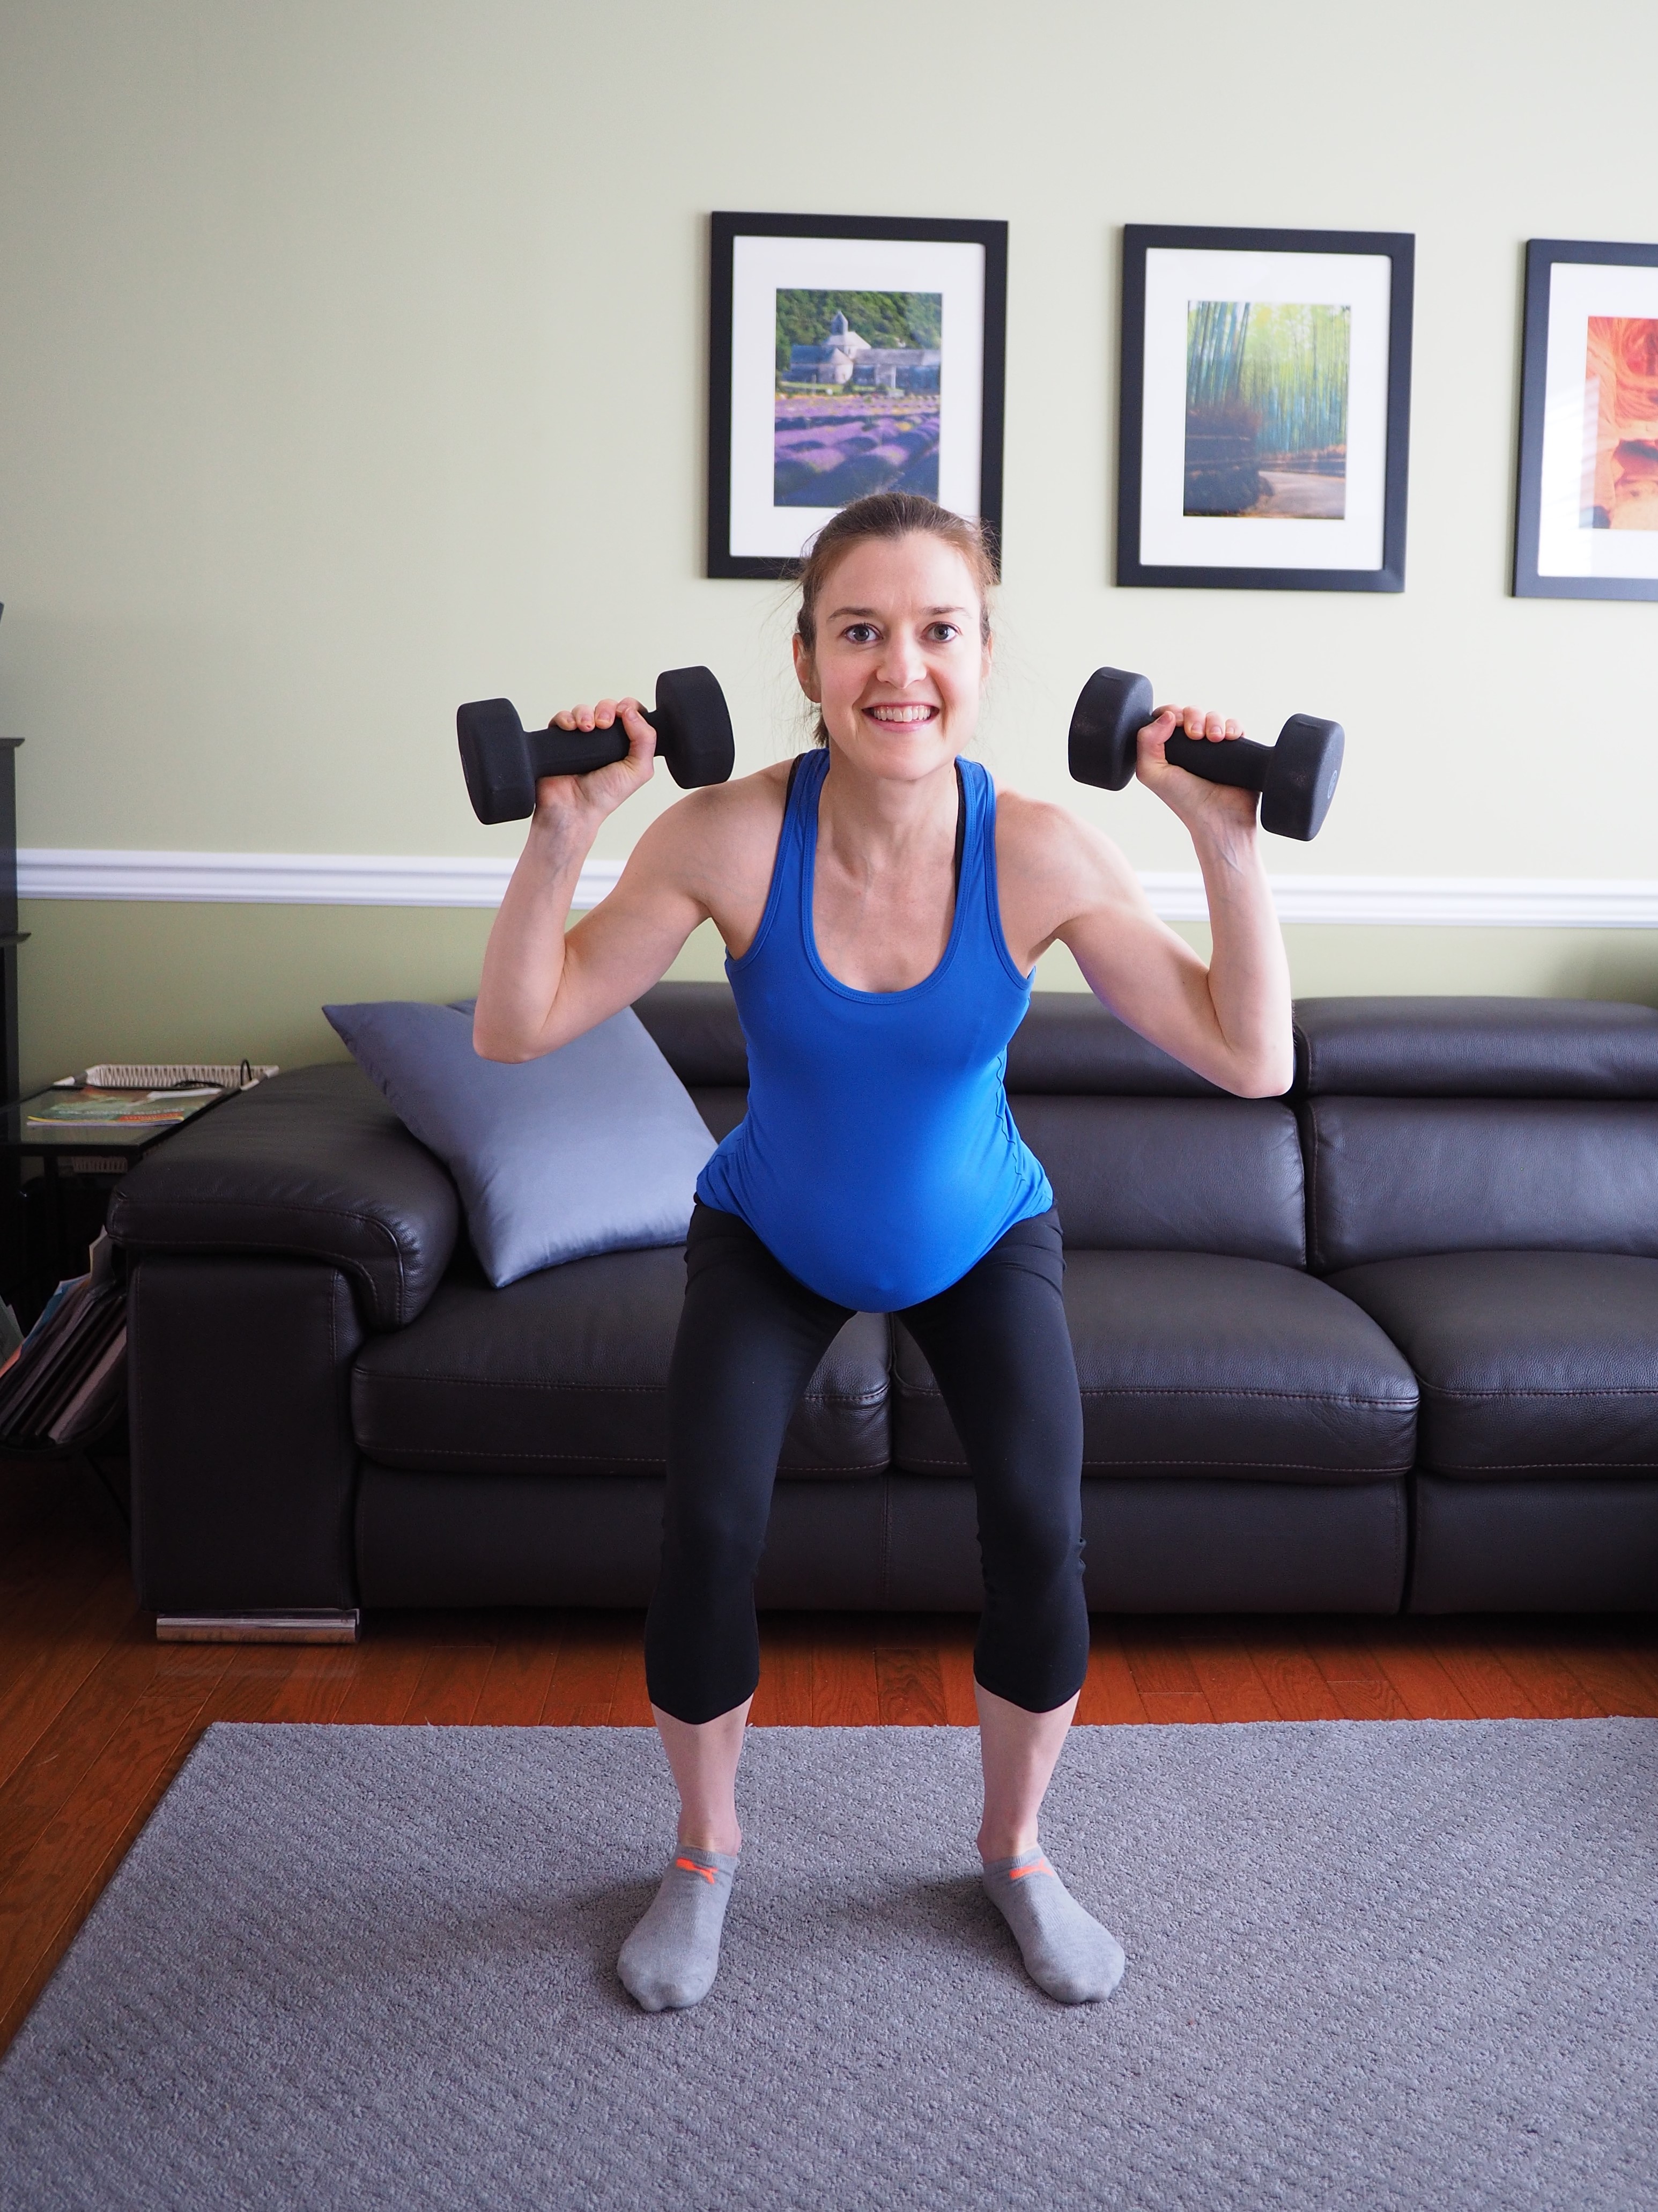
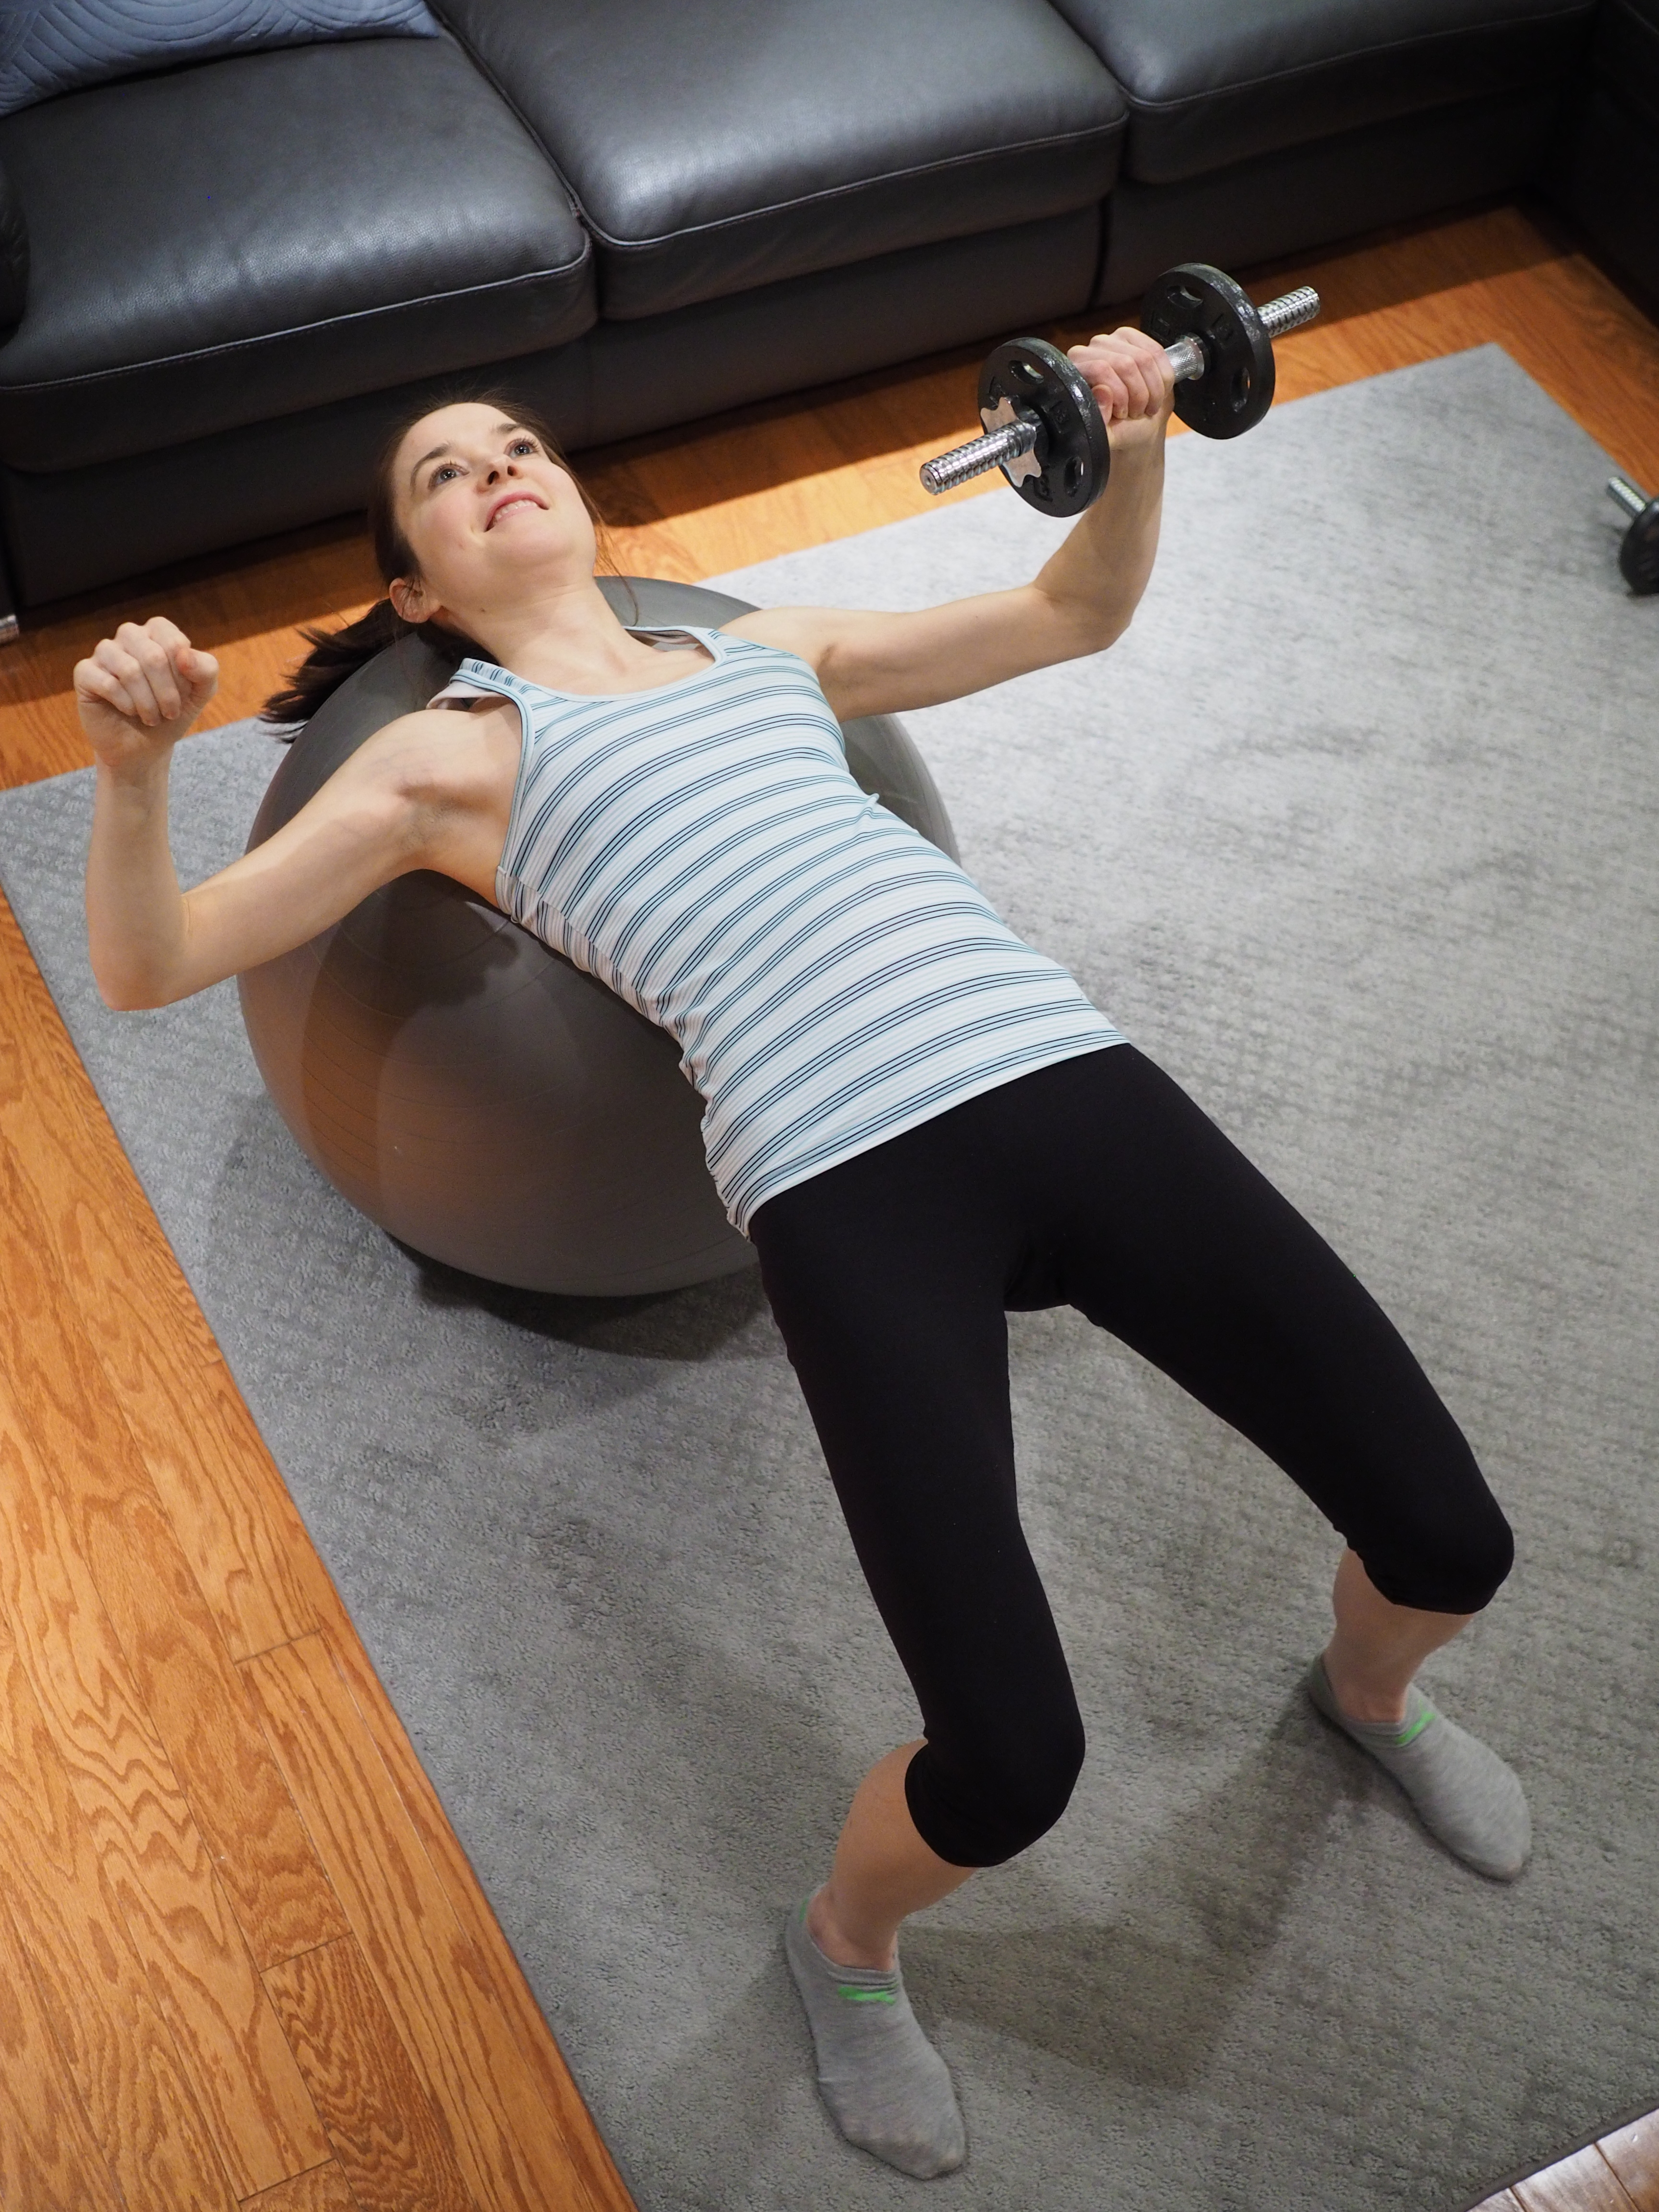
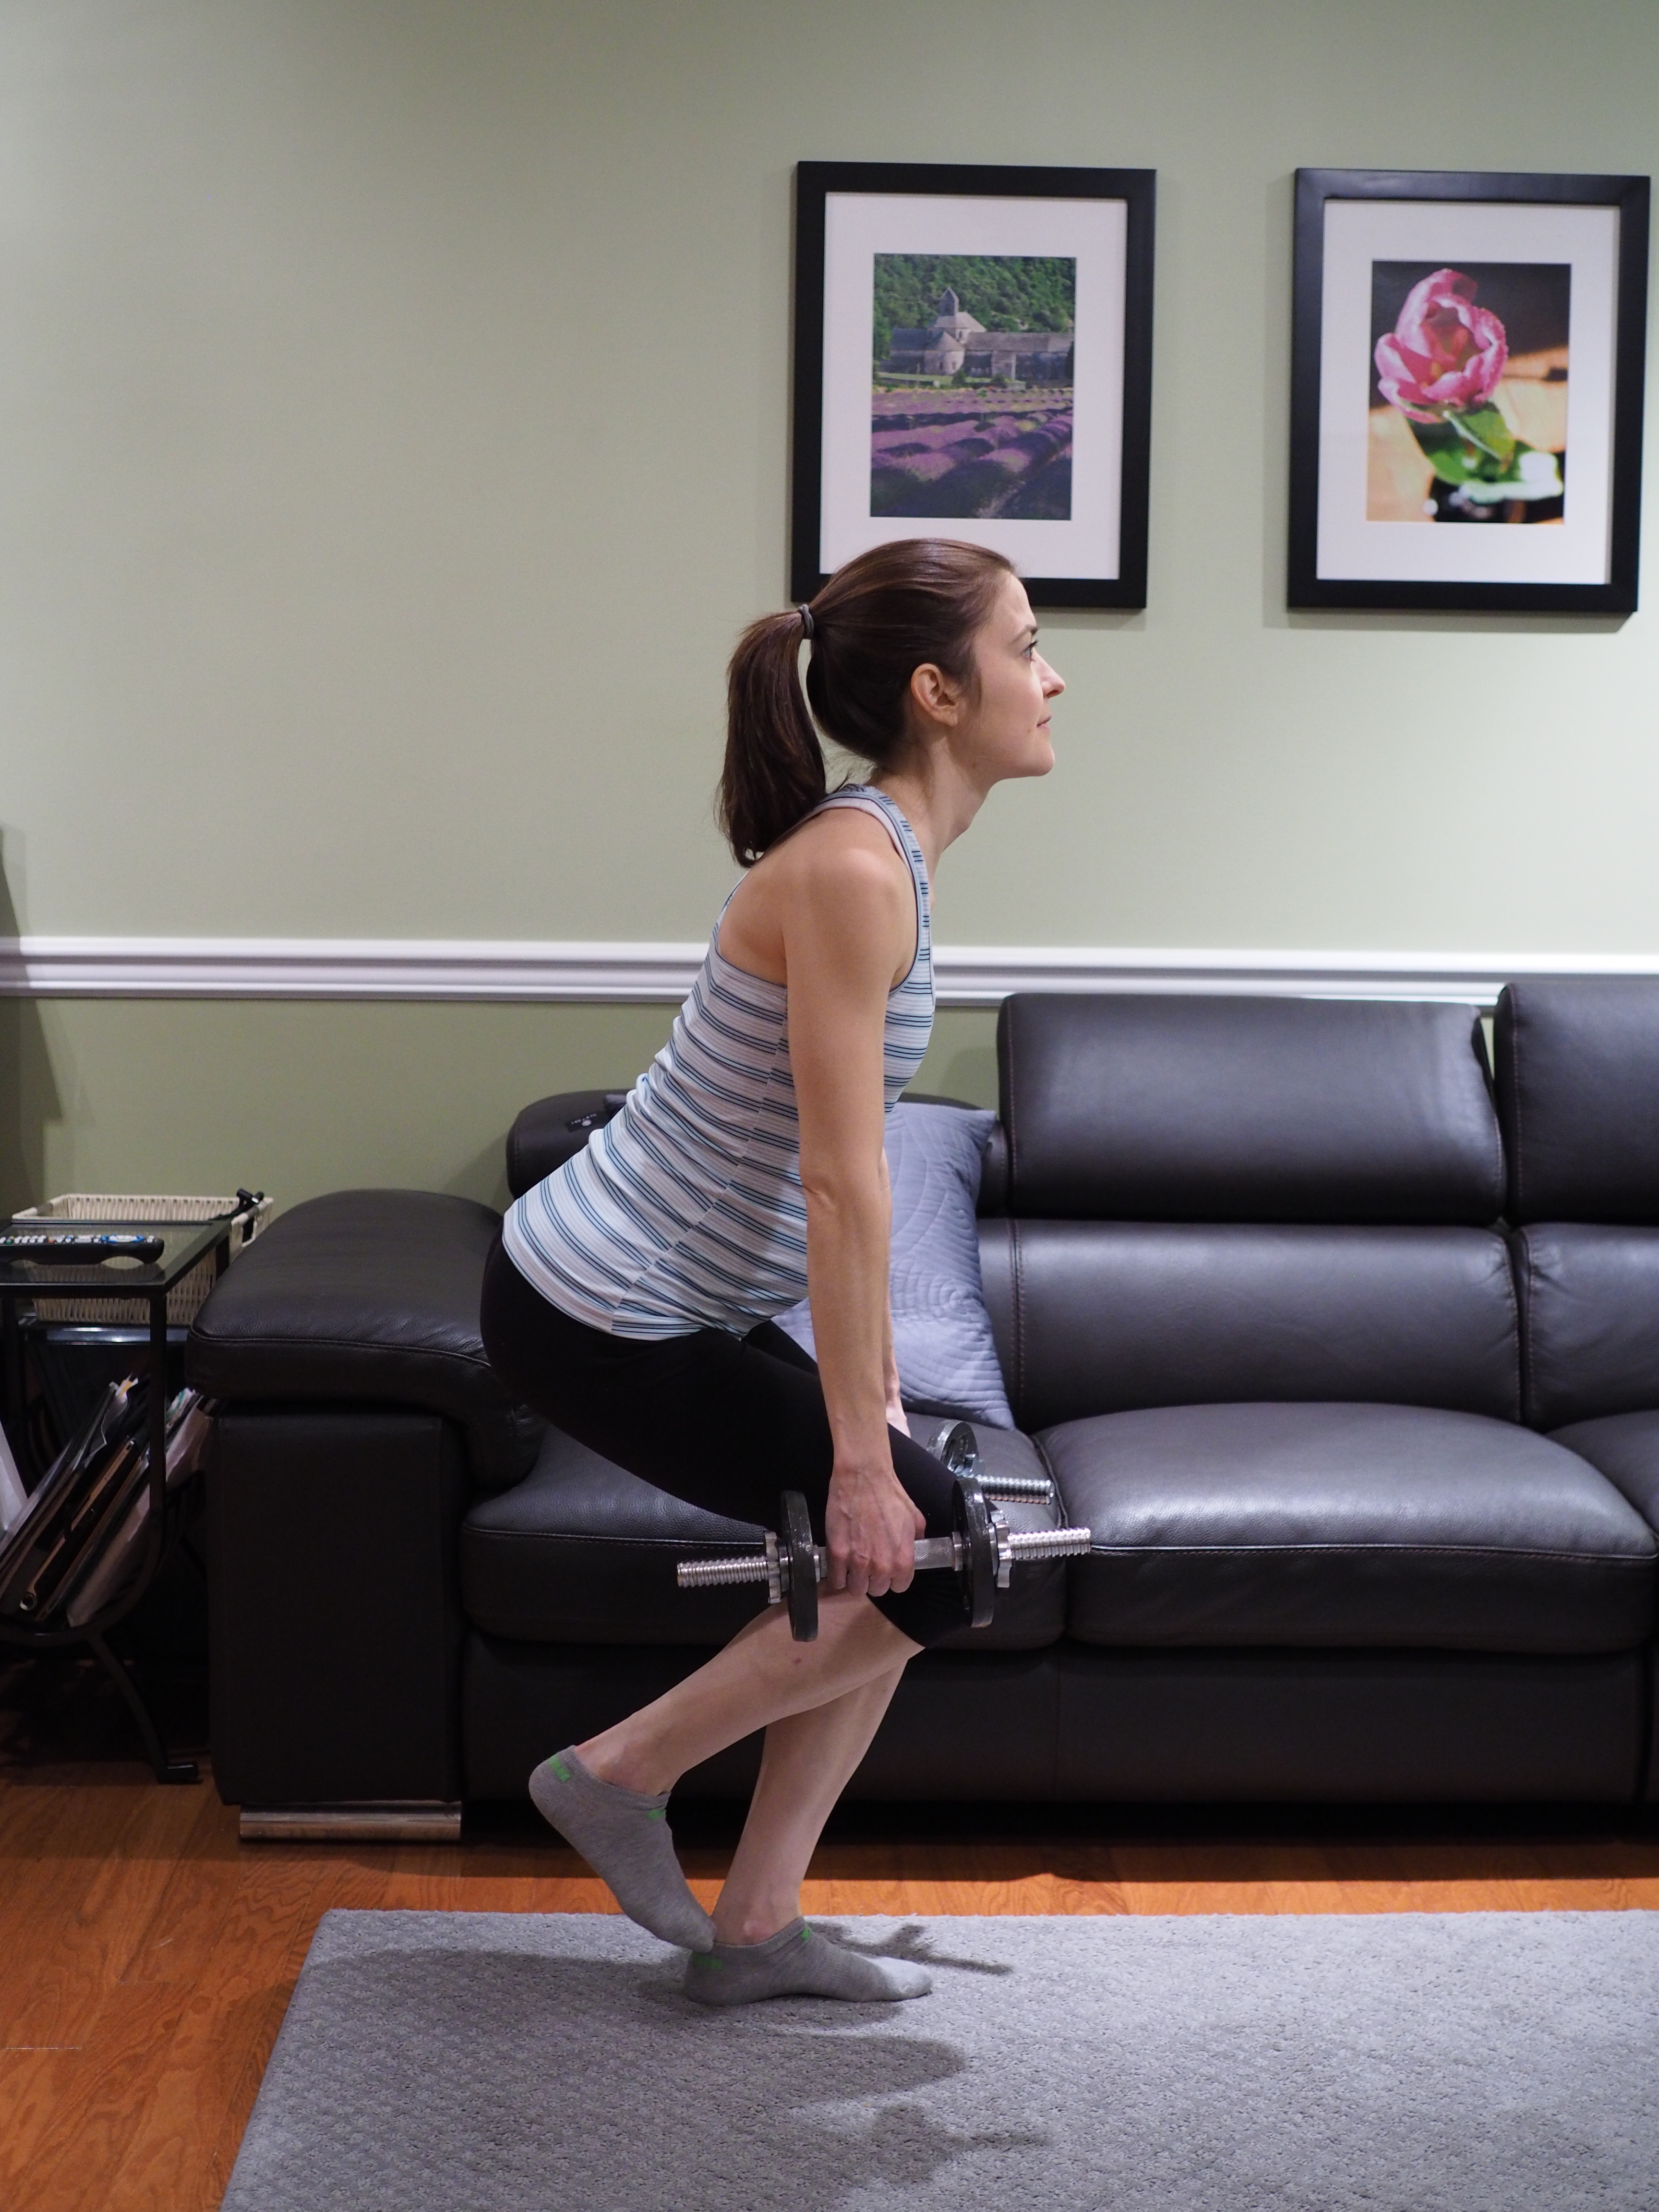
1. Dumbbell thrusters. 1 minute
(Do these as quickly and explosively as possible!)
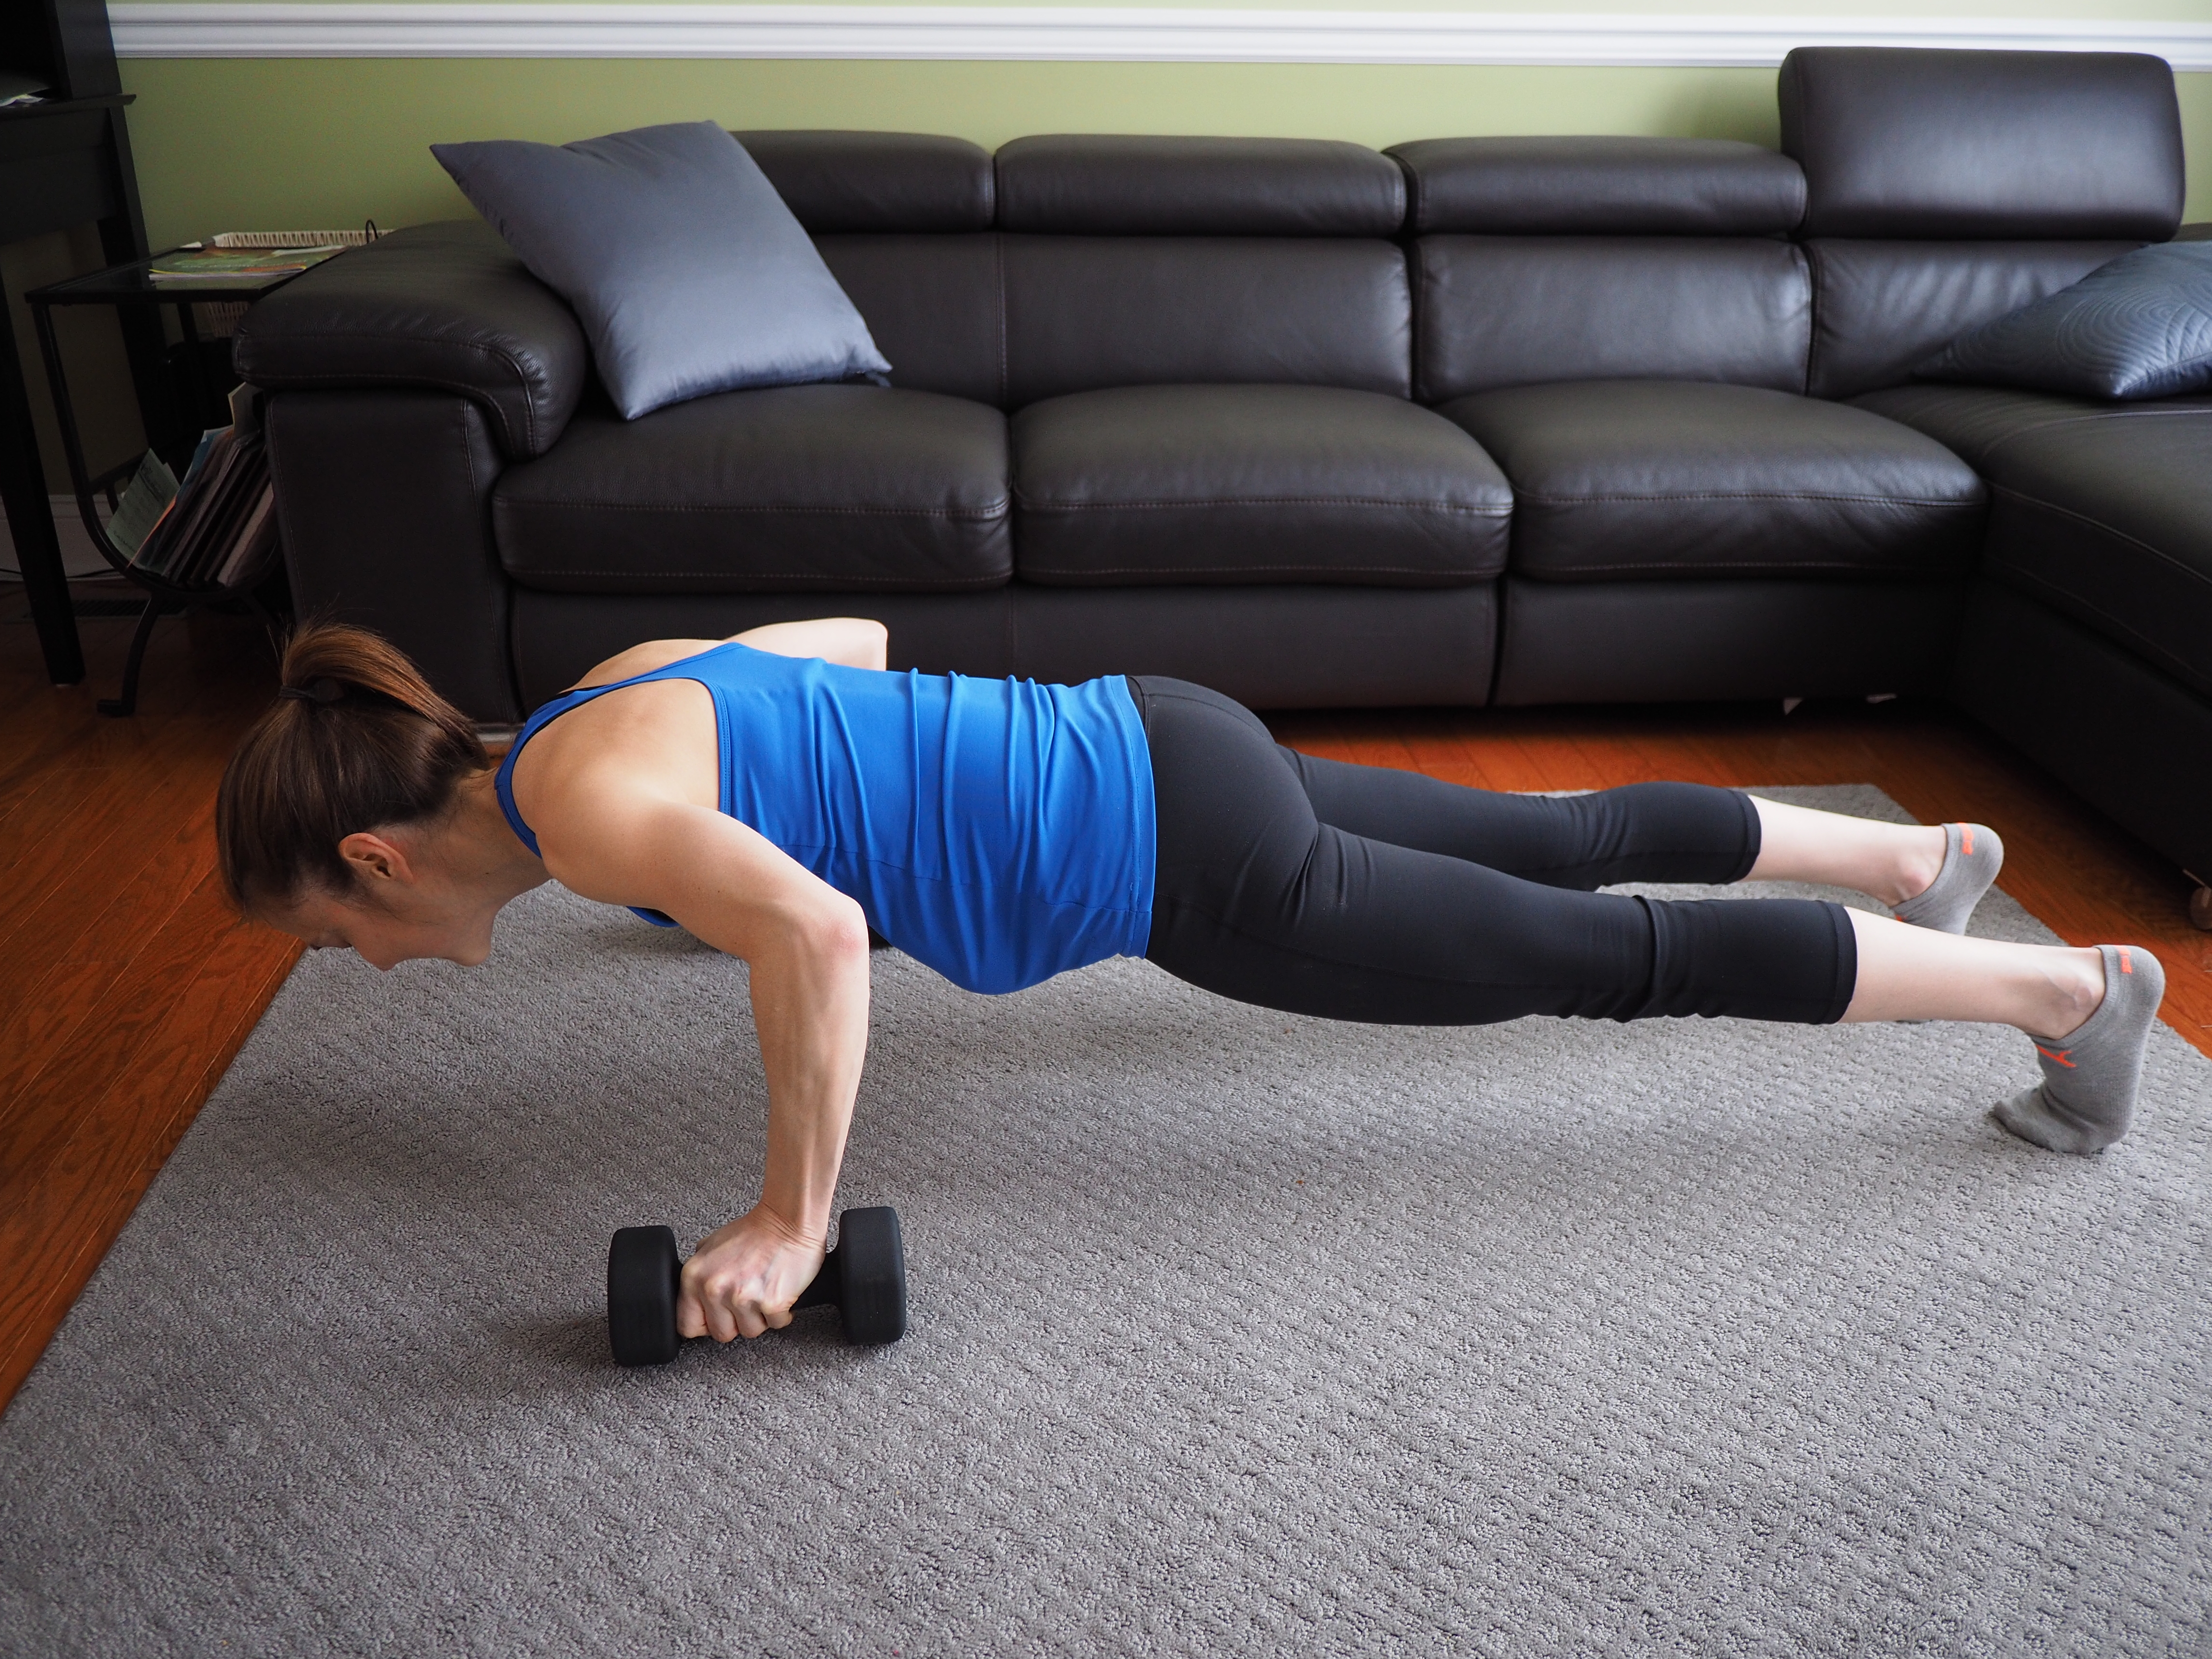
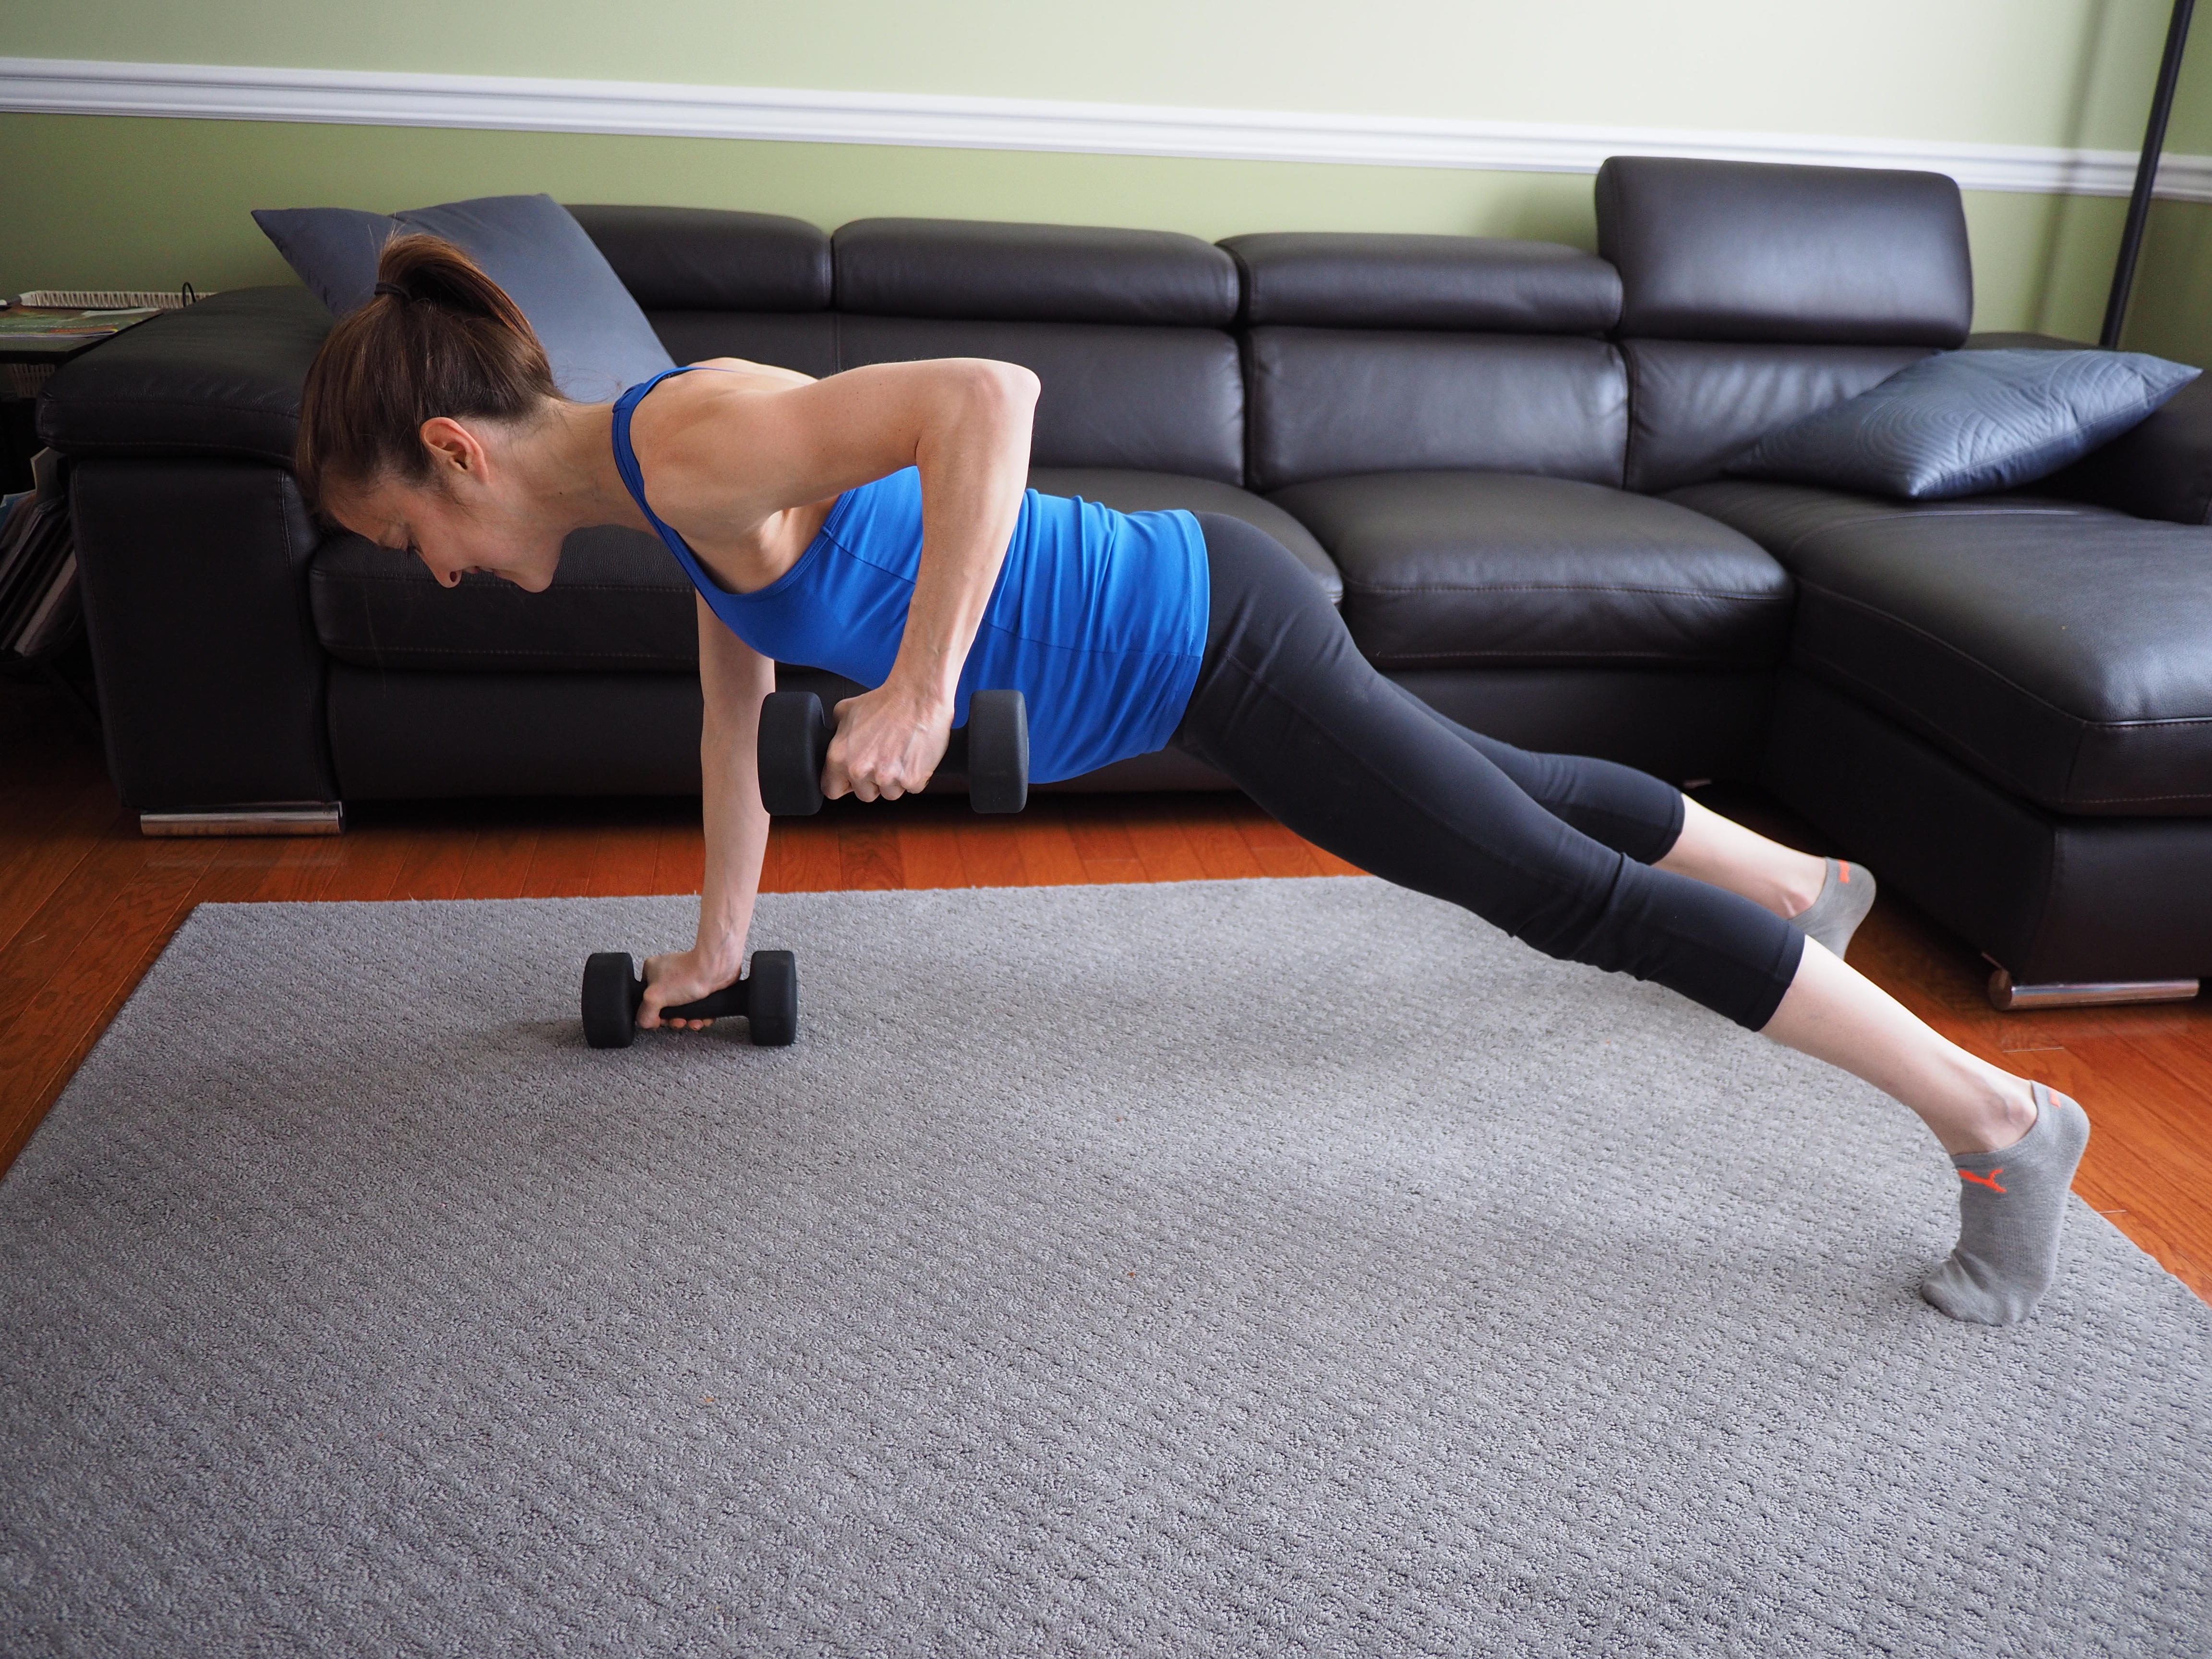
3. Push-up with row (on knees or toes), alternating arms. 1 minute
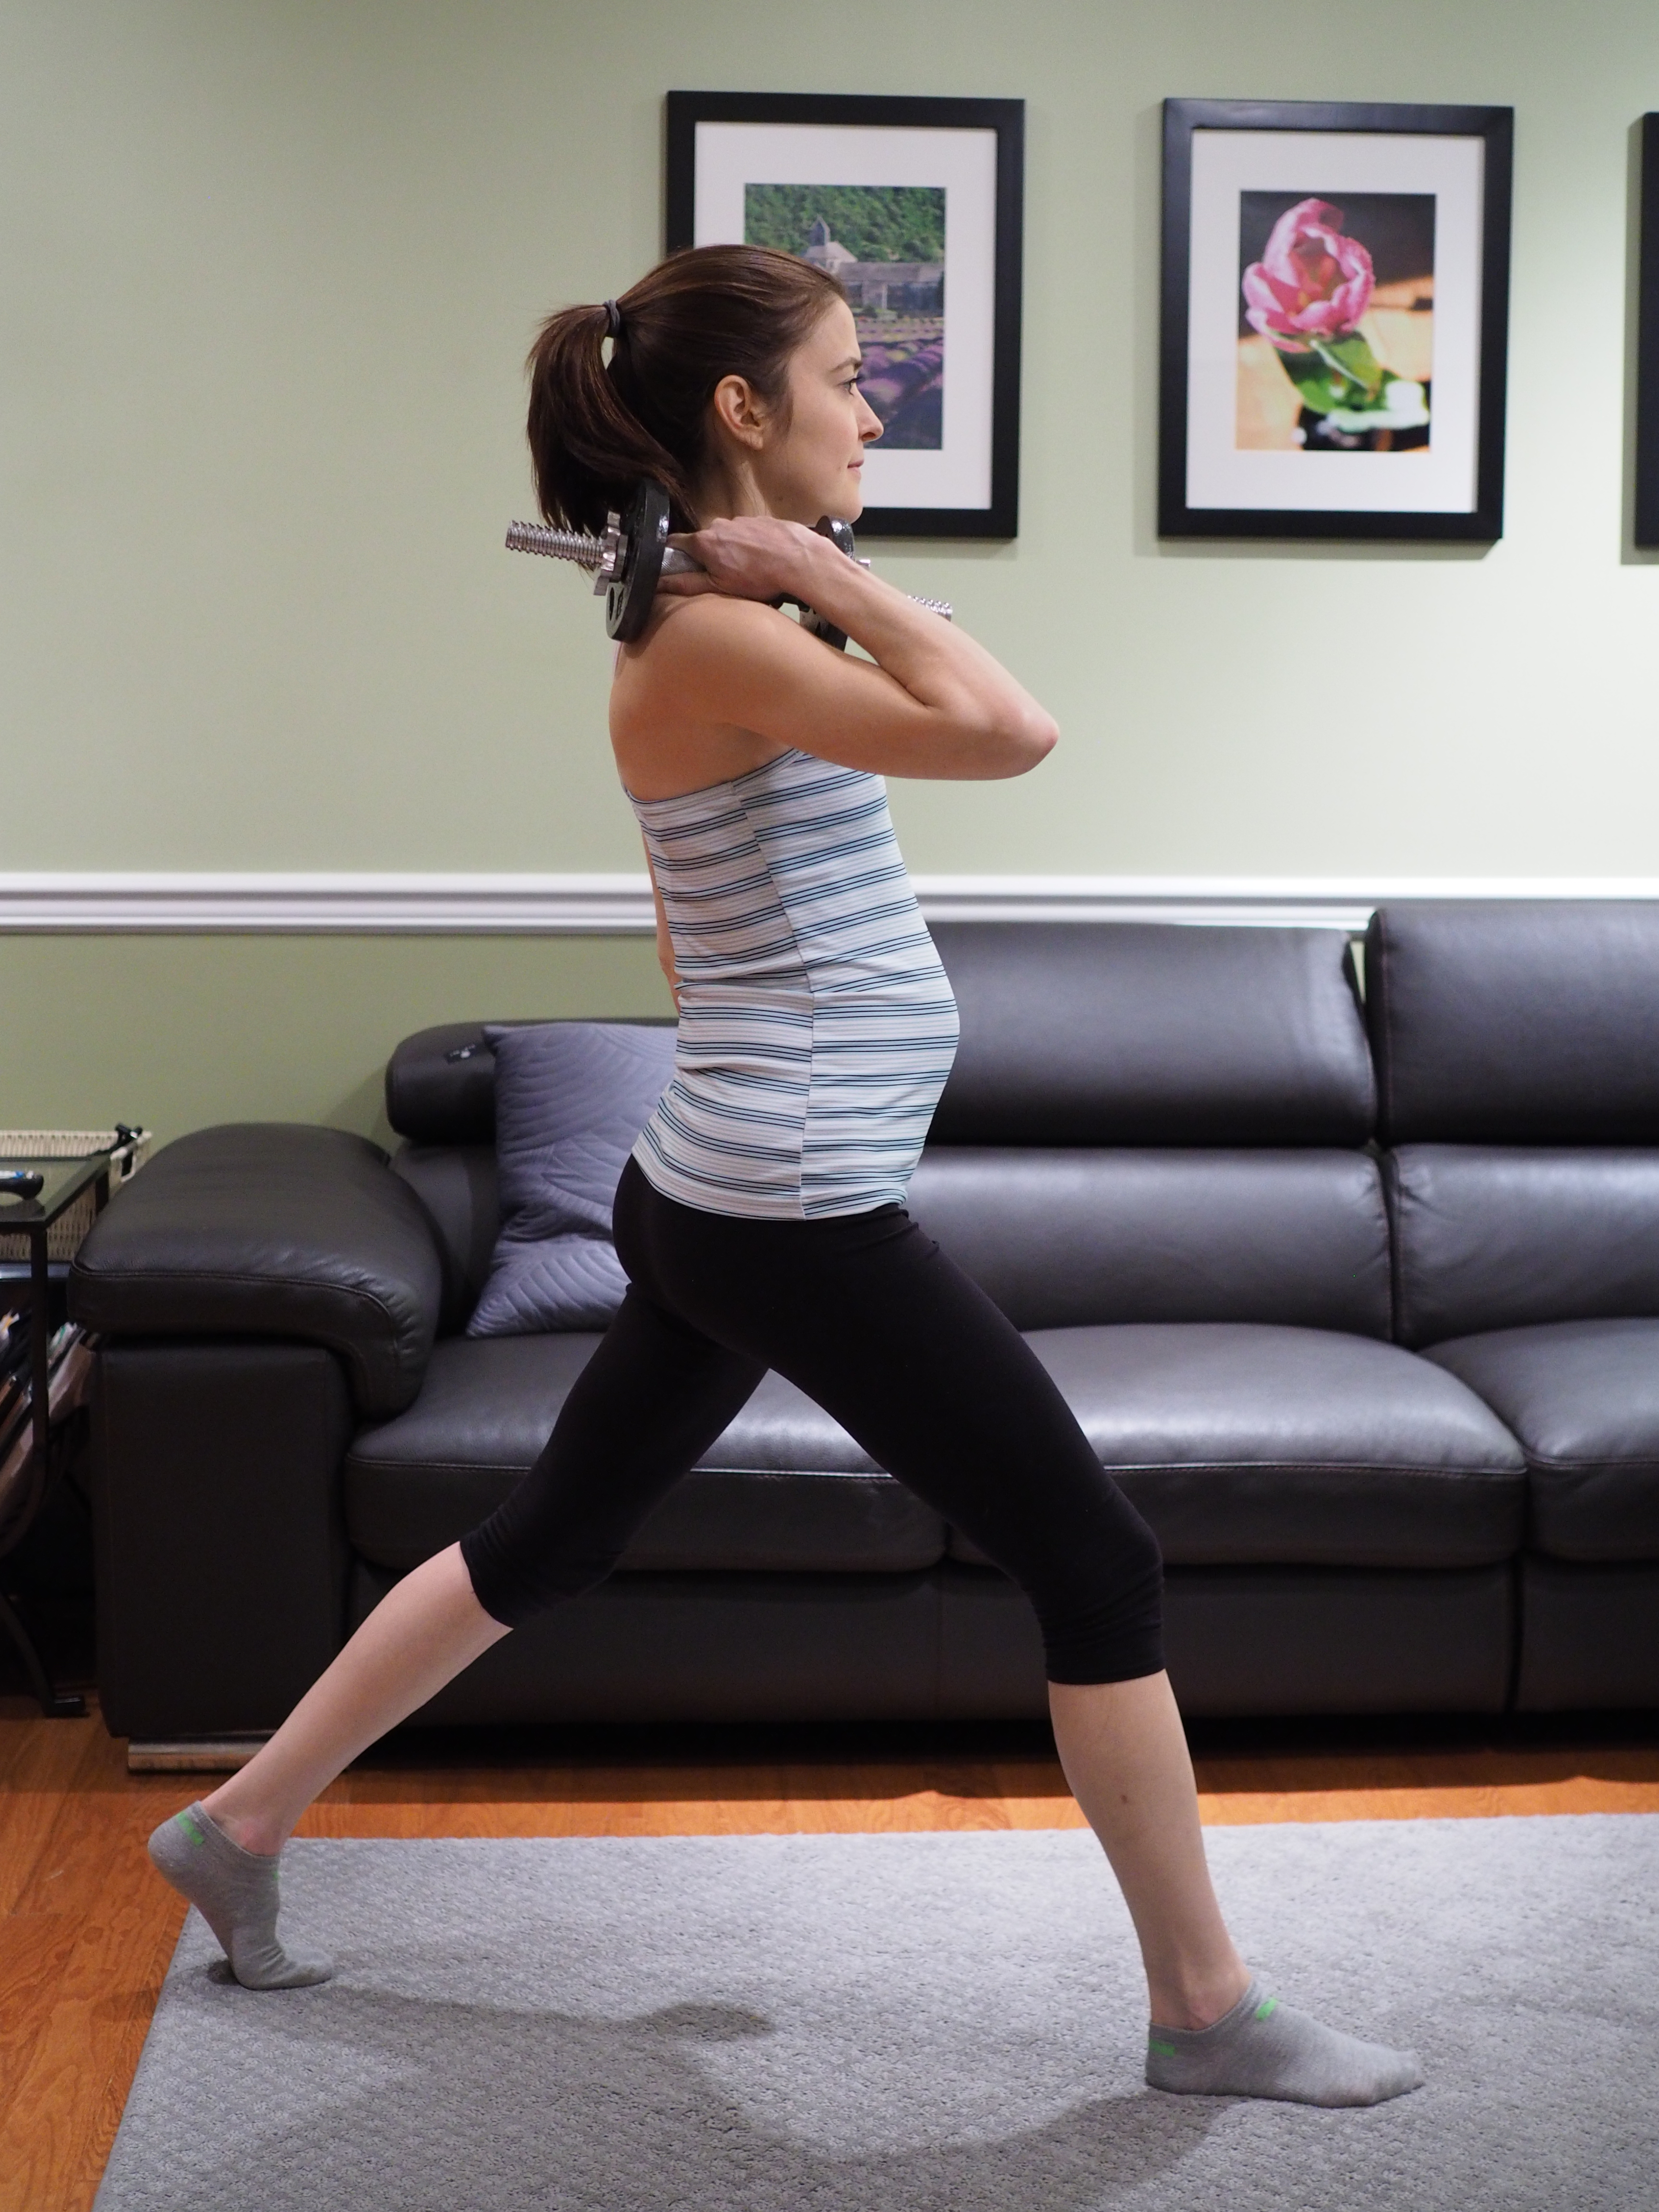
4. Static front lunge. 30 seconds with each leg leading
Cool-down
Walk for two minutes.
*****
And since I mentioned Mom Camp, here’s a picture of two of my moms from camp last week. We often round out class with some flexibility training. Doesn’t Caitlin make triangle pose look fun? 🙂
If YOU want to go to camp, drop me a line! I also offer small group training for postpartum moms where the intensity is much lower and the focus is on rehabilitation of the inner core, (pregnancy and delivery – whether vaginal or Cesarean – wreak havoc on this area of the body). I’d love to see you in my next class!
Today’s post is going out to my longest standing client, Tracy. During a recent training session, she told me she sometimes asks herself, “What would Chris think of this item?” while shopping at the Trader Joe’s. She suggested I compile a list of my “go to” Trader Joe items in a WellMom post, and I’m here today to do just that!
Tracy also noted her tendency to pick up too many “snacky” products at the store and not enough “real food.” I agree that the lure of packaged convenience foods is quite tempting, and by no means do I eat “real food” 100% of the time. But I do my best to keep processed foods to a minimum, and most of the items below fall into the “real” – or at least “minimally-processed” – category.
I’m a girl who likes a deal, so you’ll notice that a lot of the options below are inexpensive relative to comparable items at other grocery stores.
1. Salted and roasted creamy almond butter. I never understood the hype about almond butter until I tried this kind. I now realize that roasting AND salting is key. The kind I find most often is raw without salt, which tastes stale to me. And compared to other brands of roasted and salted almond butter, the Trader Joe’s variety wins out in texture too, which is rich and creamy. It’s also a great value at $7.99 per 16 oz jar. I’ve seen the same size jar cost twice as much other places! I blend this into my daughter’s oatmeal, and I like it mixed into plain yogurt along with a bit of mashed banana and cinnamon. Oh and on a spoon. I like it on a spoon. 🙂
2. Organic avocados – 4-pack. These are an awesome deal, coming in at just over a dollar per avocado! My toddler, Siyona, and I eat avocado basically every day. I typically dice it and add it to salads or omelets. Siyona likes it as a stand-alone side dish with her lunch (it was actually her first solid food). The only drawback is that I have a hard time finding ripe ones, so I often have to buy them a few days before I want to eat them.
3. Frozen berries. Frozen berries are GREAT for mixing into yogurt, smoothies, and oatmeal. They’re especially nice at this time of the year when you can’t – or shouldn’t? – get fresh ones. One of my favorites are the organic frozen wild blueberries. They’re smaller than regular blueberries, which I love. At $3.99 for a 12 ounce bag, it’s hard to find a cheaper organic blueberry anywhere!
4. Grill pack of organic chicken. The grill pack of organic chicken contains two bone-in chicken breasts and four drumsticks. I typically don’t grill with these. Instead I’ll bake the chicken breasts, shred them, then add the meat to a variety of different entrees. What do I do with the drumsticks, you ask? Well, a drumstick happens to be the perfect size for Siyona, so I’ll freeze them individually and use as needed. Comes in handy on nights when my husband and I are going out and I need something to leave home for her. Bone-in is admittedly more work than the boneless, but I happen to think it tastes a lot better, and I save the bones to make homemade chicken stock. Oh and did I mention it’s only $2.99/lb? And that’s organic chicken!
5. Organic frozen chopped spinach. This is such a versatile product. I put it in everything from smoothies, to eggs, to pastas and stir frys. I’ve even been known to put it in my chicken enchiladas. It’s a great way to up to veggie content of your favorite dishes!
6. Organic Power to the Greens. This is Trader Joe’s blend of kale, spinach, and Swiss chard – three dark leafy greens rich in vitamins and minerals. It’s the base for a lot of my salads. $2.49.
7. Barbara’s Multigrain Spoonfuls. Ok, ok. So this one comes in a box. Michael Pollen might be ashamed. Cereal is a notable exception to my general tendency to abide by his mantra, “eat food, not food products.” I guess you can call it my Achilles heel – I love starting my day with a bowl of it splashed with unsweetened almond milk. And as far as I’m concerned, there are worse vices, especially when Barbara’s Multigrain Spoonfuls is one of my cereals of choice. It’s pretty natural as boxed cereals go (read: no icky preservatives) and has only 5 grams of sugar per serving. If you enjoy Quaker Life cereal you will like this one, and your body will thank you for the omission of BHT, Yellow 5, Yellow 6…). And a HUGE 24-ounce box costs me a mere $3.99!
8. Canned salmon. Some of you serious seafood eaters might balk at this one, but you’ll almost always find a can of TJ salmon in my pantry. No, it’s not nearly as tasty as a fresh filet, but I really enjoy it as a salad where I combine the salmon with plain yogurt, kalamata olives, and capers. If I have lemon on hand, I sometimes add that too. Trader Joe’s also sells a nice kalamata olive tapenade spread that I sometimes substitute for the capers and olives. Canned salmon is an economical way to get in those healthy omega-3’s! $2.49.
9. Brown rice and quinoa fusilli. You’ve got me again. This one also comes in a box. Well, a bag actually. But I’m giving it a pass because it has just two ingredients (I’ll let you guess what they are. Hint: they’re in the name of the product). And while no one in my family has a gluten problem, I happen to think we can all stand to eat a little less wheat. I have no scientific basis for saying this, but I can’t help but wonder if the rise we’ve seen in gluten allergies is a result of the rise in gluten in our diets. Someone should fund this study. $2.99.
10. Bagged nuts. I have four go-to types of nuts at the TJ: roasted and half salted peanuts, roasted and half salted cashews, raw almonds, and raw pine nuts. Nuts are a great “real food” snack, and we eat the peanuts, cashews, and almonds for that purpose. I find the half salt a nice compromise – no salt is so bland, but full salt is so salty! I toast the raw almonds in my toaster oven and eat them warm. You have to try this! They’re done when they start to crackle. They don’t need salt! I like the pine nuts for my homemade pesto. I’m including my recipe for that below, just for good measure. 🙂
Basic Pesto
2 cups basil, packed
1.5 T minced garlic (about 3 cloves)
½ cup pine nuts
1 t crushed red pepper flakes
1 t salt
⅔ cup extra virgin olive oil
⅔ cup Pecorino Romano cheese,* grated
Combine basil through salt in a large food processor. While blending the dry ingredients, drizzle in the olive oil until smooth. Then stir in the cheese.
*Frugal tip: Traditionally pesto is made with Parmesan cheese, but Pecorino Romano is WAAAY cheaper. The flavors aren’t identical, but with all the other strong flavors in the pesto, my palate can’t detect a difference.
Diastasis what-ti? If that’s what you’re thinking, you’re not alone. Even I hadn’t heard of it before my training in pre- and postnatal exercise. Let’s start with an anatomy lesson, move onto a definition, then discuss what to do about it.
When we talk about the core, we often think of the rectus abdominis – i.e. the “six pack” – or the outermost abdominal muscles. The deepest of all the abdominal muscles is the transversus abdominis, or the TVA. While the muscles of the rectus abdominis run vertically, the muscles of the TVA run horizontally, acting like a corset to pull all four side of the body together. The linea alba is the fascia (tissue) that connects the left and right halves of the rectus abdominis.
A primary role of the TVA is to provide spinal stability. When the TVA is weak, our bodies compensate and provide stability in other ways. This has a variety of negative consequences, including lower back pain, muscular imbalances, and poor posture.
Image taken from diastasisrehab.com
Diastasis Recti refers to the separation of the rectus abdominis into left and right halves. Although anyone can have a diastasis, it’s common in pregnant and postpartum women because the growing uterus leaves the TVA overstretched and undertoned. The rise in the hormone, relaxin, during pregnancy also facilitates a diastasis because it softens and relaxes fascia all over the body, including the linea alba. The TVA is further traumatized in women who deliver via c-section, as the surgery cuts through the muscles.
Not sure if you have a diastasis? Not to worry. You can ask your OB or midwife to evaluate you at your next appointment, or you can do it yourself. If you want to self-diagnose, here’s one video I recommend. Oh, and if you have a “mummy tummy” (y’all know what I’m talking about, right ladies?), there’s a VERY good chance you have a diastasis.
Estimates of the prevalence of diastasis recti are high, ranging from two-thirds to 100 percent of women in their third trimester.* While you may not be able to avoid the condition, research shows that diastasis is less prevalent and less severe among women who exercise regularly. The best exercises are those that focus on strengthening – you guessed it – the TVA.
Recall that the muscle fibers of the TVA act like a corset, pulling the four sides of the body together. To strengthen the TVA, you need to tighten and relax that corset, much like you tighten and relax your bicep muscles when doing bicep curls in order to strengthen them.
Below are pictures of me illustrating this contraction. As it turns out, I’m not only the owner and founder of WellMom, I’m also a client. 🙂 I have a two year old daughter, and I’m expecting my second in July. The pictures below were taken when I was 17 weeks and four days pregnant with number two. I’m drawing in my abdominals (i.e. tightening the corset) in the picture on the left and relaxing my abdominal muscles in the picture on the right.
The pelvic tilt is an EXCELLENT exercise to strengthen the TVA. If you have an existing diastasis, it’s also a very useful for rehabilitation. Here’s one way to perform the exercise:
Lie on your back with your knees bent and your feet flat on the floor. Begin in a neutral spinal position (you should be able to slide your hand between the small of your back and the floor). Take a deep breath in. As you begin to exhale, tilt your pelvis back, shifting your tailbone up. Press the small of your back firmly into the floor and imagine drawing your navel in towards your spine and drawing the two sides of your rib cage together. Take another deep breath in, releasing the tilt and returning to a neutral spinal position.
You can make this exercise more challenging with the addition of heel slides. To do this, while your pelvis is tilted back, slowly slide one heel along the floor until the leg is fully extended, then slowly draw it back in. Release the tilt, returning to a neutral spinal position, then repeat on the opposite side. For an even greater challenge, slide both heels simultaneously.
If you’re pregnant and uncomfortable lying on your back, you can also perform this exercise standing. Stand with your head, shoulders, and hips against the wall, but with your feet away from the wall and your knees bent. Tilt the pelvis and draw your navel toward your spine, as for the supine version.
I prescribe pelvic tilts to my clients, and I’ve been doing them daily as a part of my TVA strengthening routine since learning of my current pregnancy. In fact, this technique has helped me to close the small diastasis that I had at the start of this pregnancy. So get your pelvic tilt on!
*Benjamin, D.R. et al. 2013. Effects of Exercise on Diastasis of the Rectus Abdominis Muscle in the Antenatal and Postnatal Periods: A Systematic Review. Physiotherapy 100(1): 1-8.
I am very much a warm weather person. There is basically nothing I like about the winter. I’m pretty sure my blood is about the consistency of water. I am always cold!
One coping mechanism that gets me through the long, cold winters is soup. I used to find them intimidating to make until I realized that there’s really no wrong way to make a soup. It’s kind of like making a salad. There really aren’t any rules.
Recently I whipped up this recipe for hearty chicken sausage soup. I like it for many reasons. First, I love the in-house sausage sold at the Whole Foods. I tend to steer clear of most packaged sausages because of the junk that comes along with them (nitrates/nitrates, MSG, propyl gallate — say what?). But the Whole Foods sausage I buy contains none of these mysterious items.
Second, the recipe contains only “good carbs,” by which I mean beans, legumes, whole grains, and starchy vegetables. Both the barley and the chickpeas in this recipe are loaded with fiber – important for digestive health and also good for fat loss – and vitamins and minerals. In fact, I find soups are a great way to experiment with all those good carbs you can find in the bulk bins at the grocery store. Ever try cooking with wheatberries? You should! You could easily swap out the barley for them in this recipe.
Oh and here’s a cook’s tip: barley and a lot of other whole grains can take a LONG time to cook. Make a huge batch and then freeze leftovers in smaller portions for future use. I find that it helps to freeze them in zip-top plastic bags in a thin layer, as the increased surface area makes for faster thawing.
The third thing I like about this recipe is the rainbow chard. I think I read recently that “chard is the new kale.” When you look at all it has to offer, the reputation is warranted. One cup of cooked chard has four grams of dietary fiber (15% DV) and is also a good source of vitamins A, C, and K, among others. Pregnant women – who need about 50% more iron in their diets than non-pregnant women – should know that a one cup cooked serving offers four milligrams of iron, or 15 percent of their DV (22 percent for non-pregnant women).
Now, I always make my own chicken stock, but I appreciate that I’m a bit of an odd duck when it comes to this sort of thing. 🙂 I really do think it tastes way better than what you buy in a can or carton, but I appreciate the time and effort that goes into making it. This may spell F-U-N for me, but it won’t for everyone! So feel free to use what makes most sense for you!
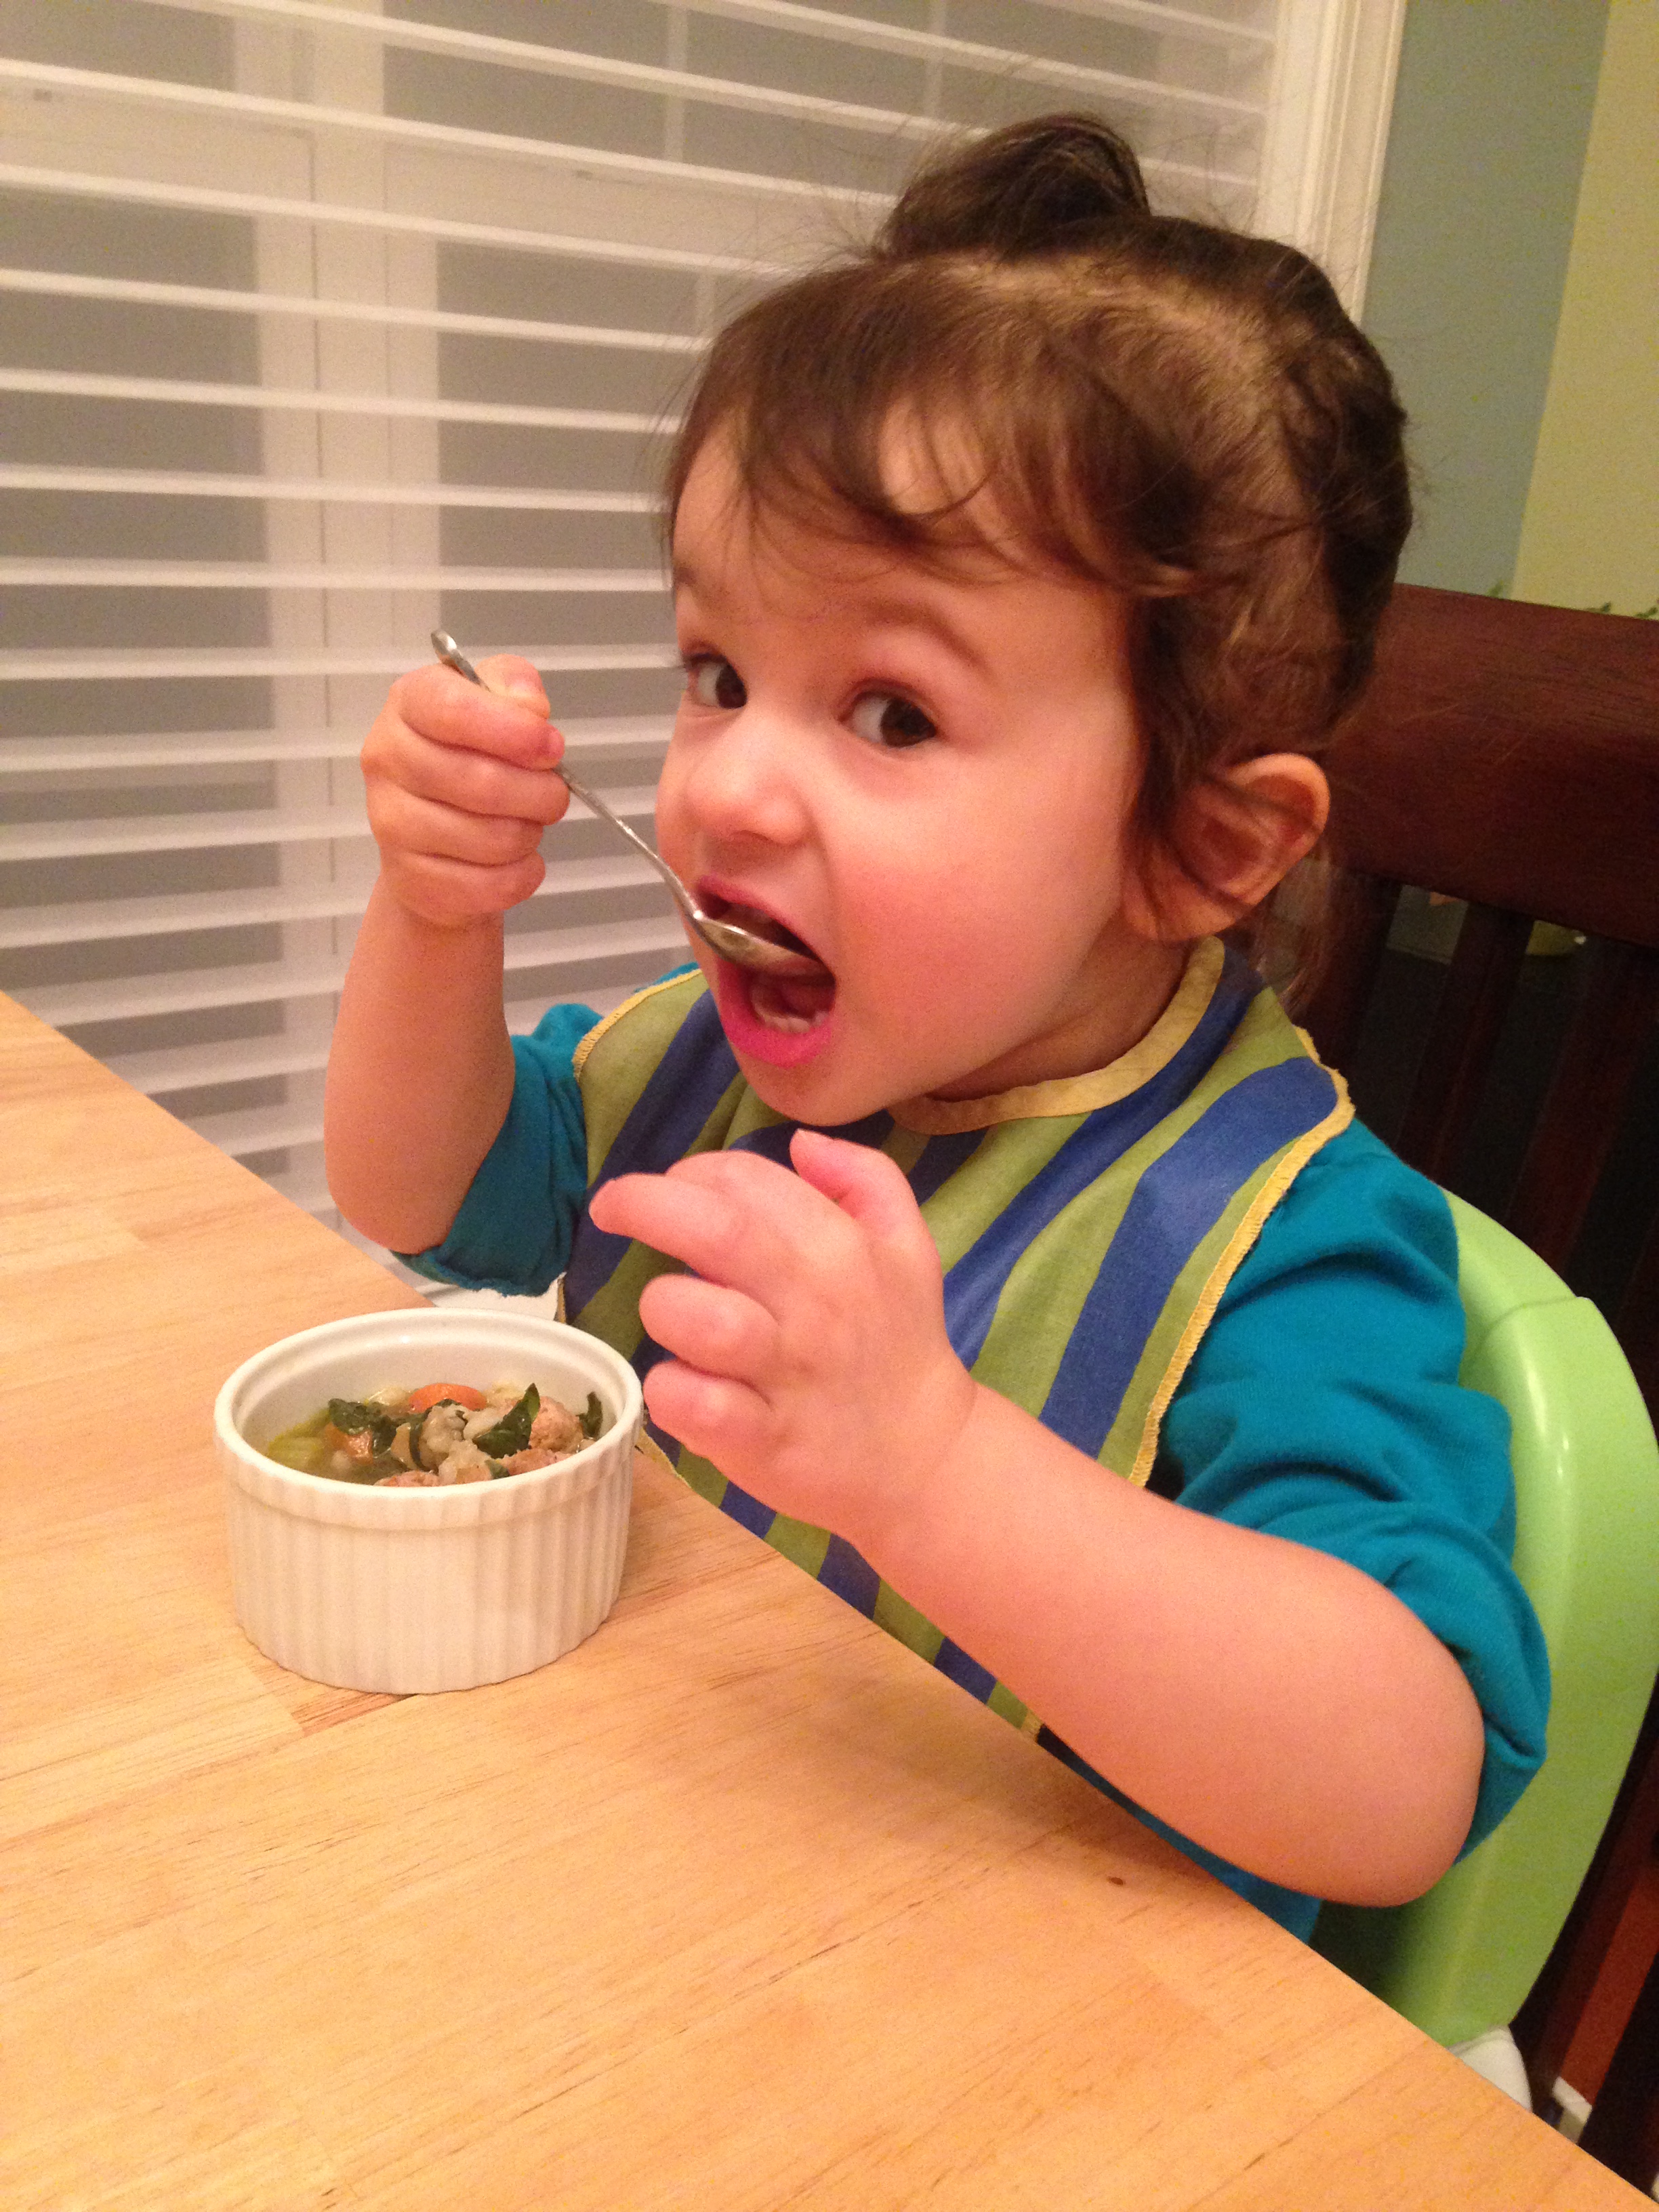
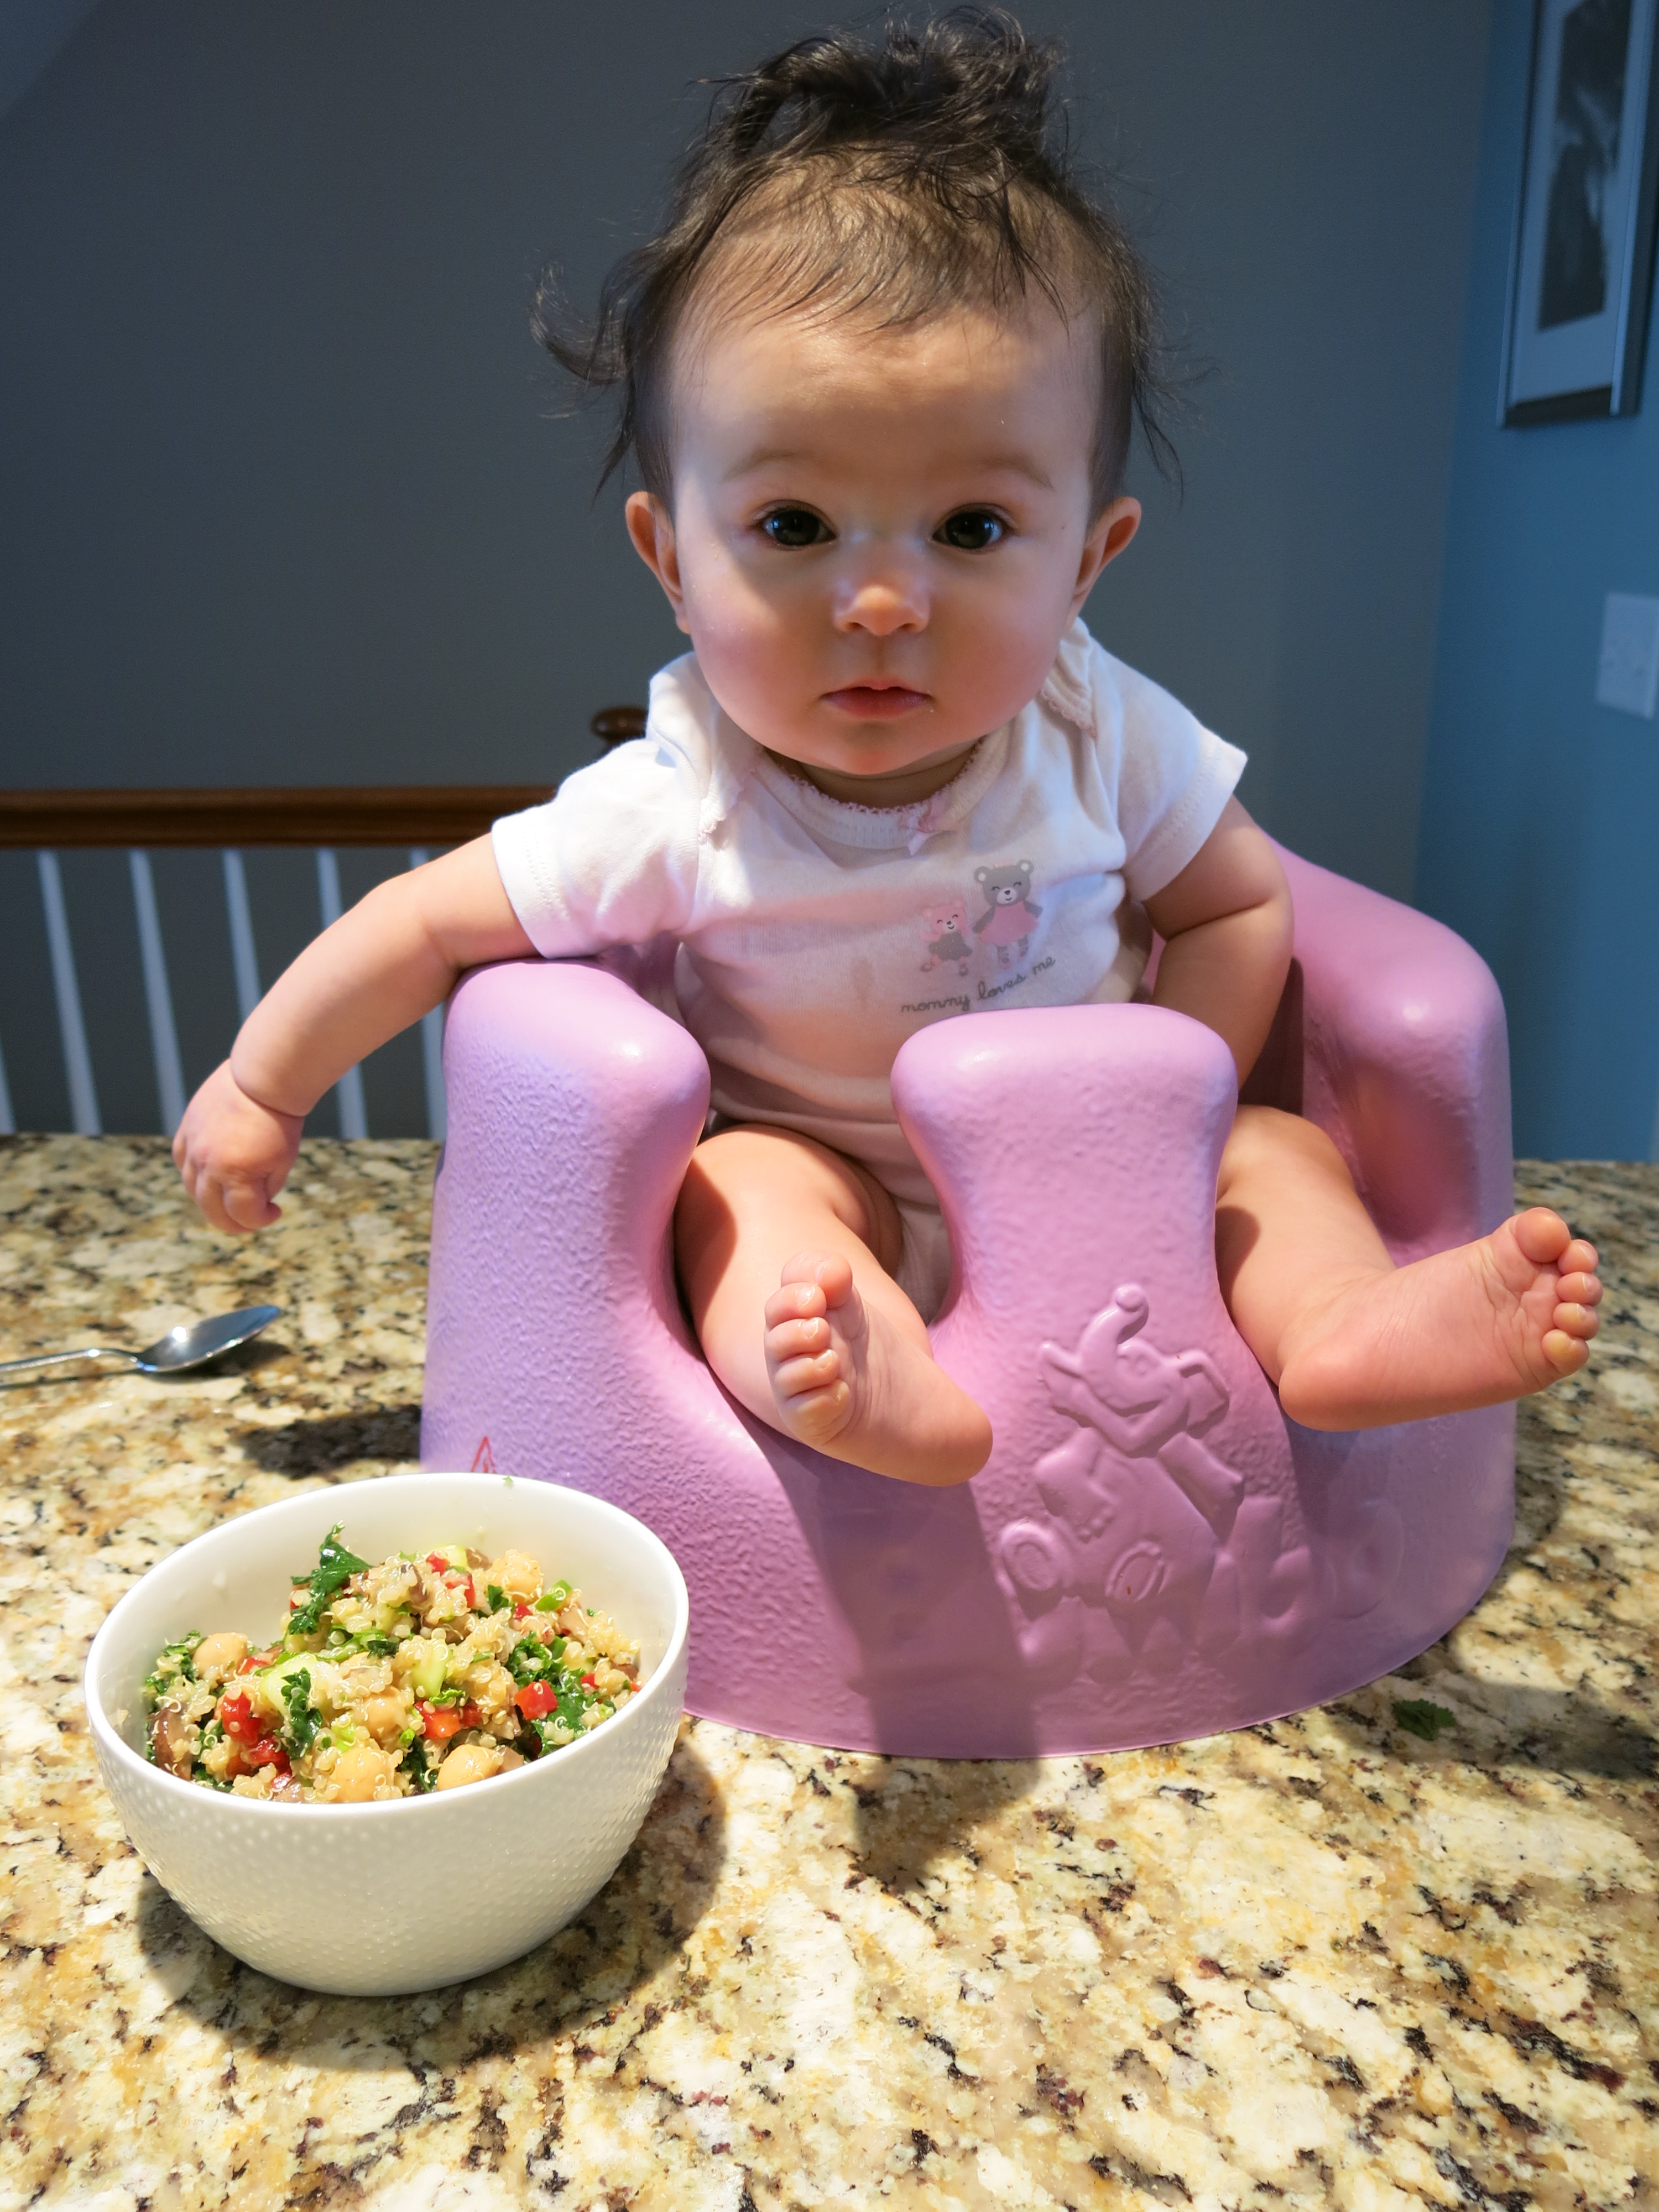
And if you have little ones and you’re worried they won’t eat it, here’s a picture that begs you to reconsider. 🙂
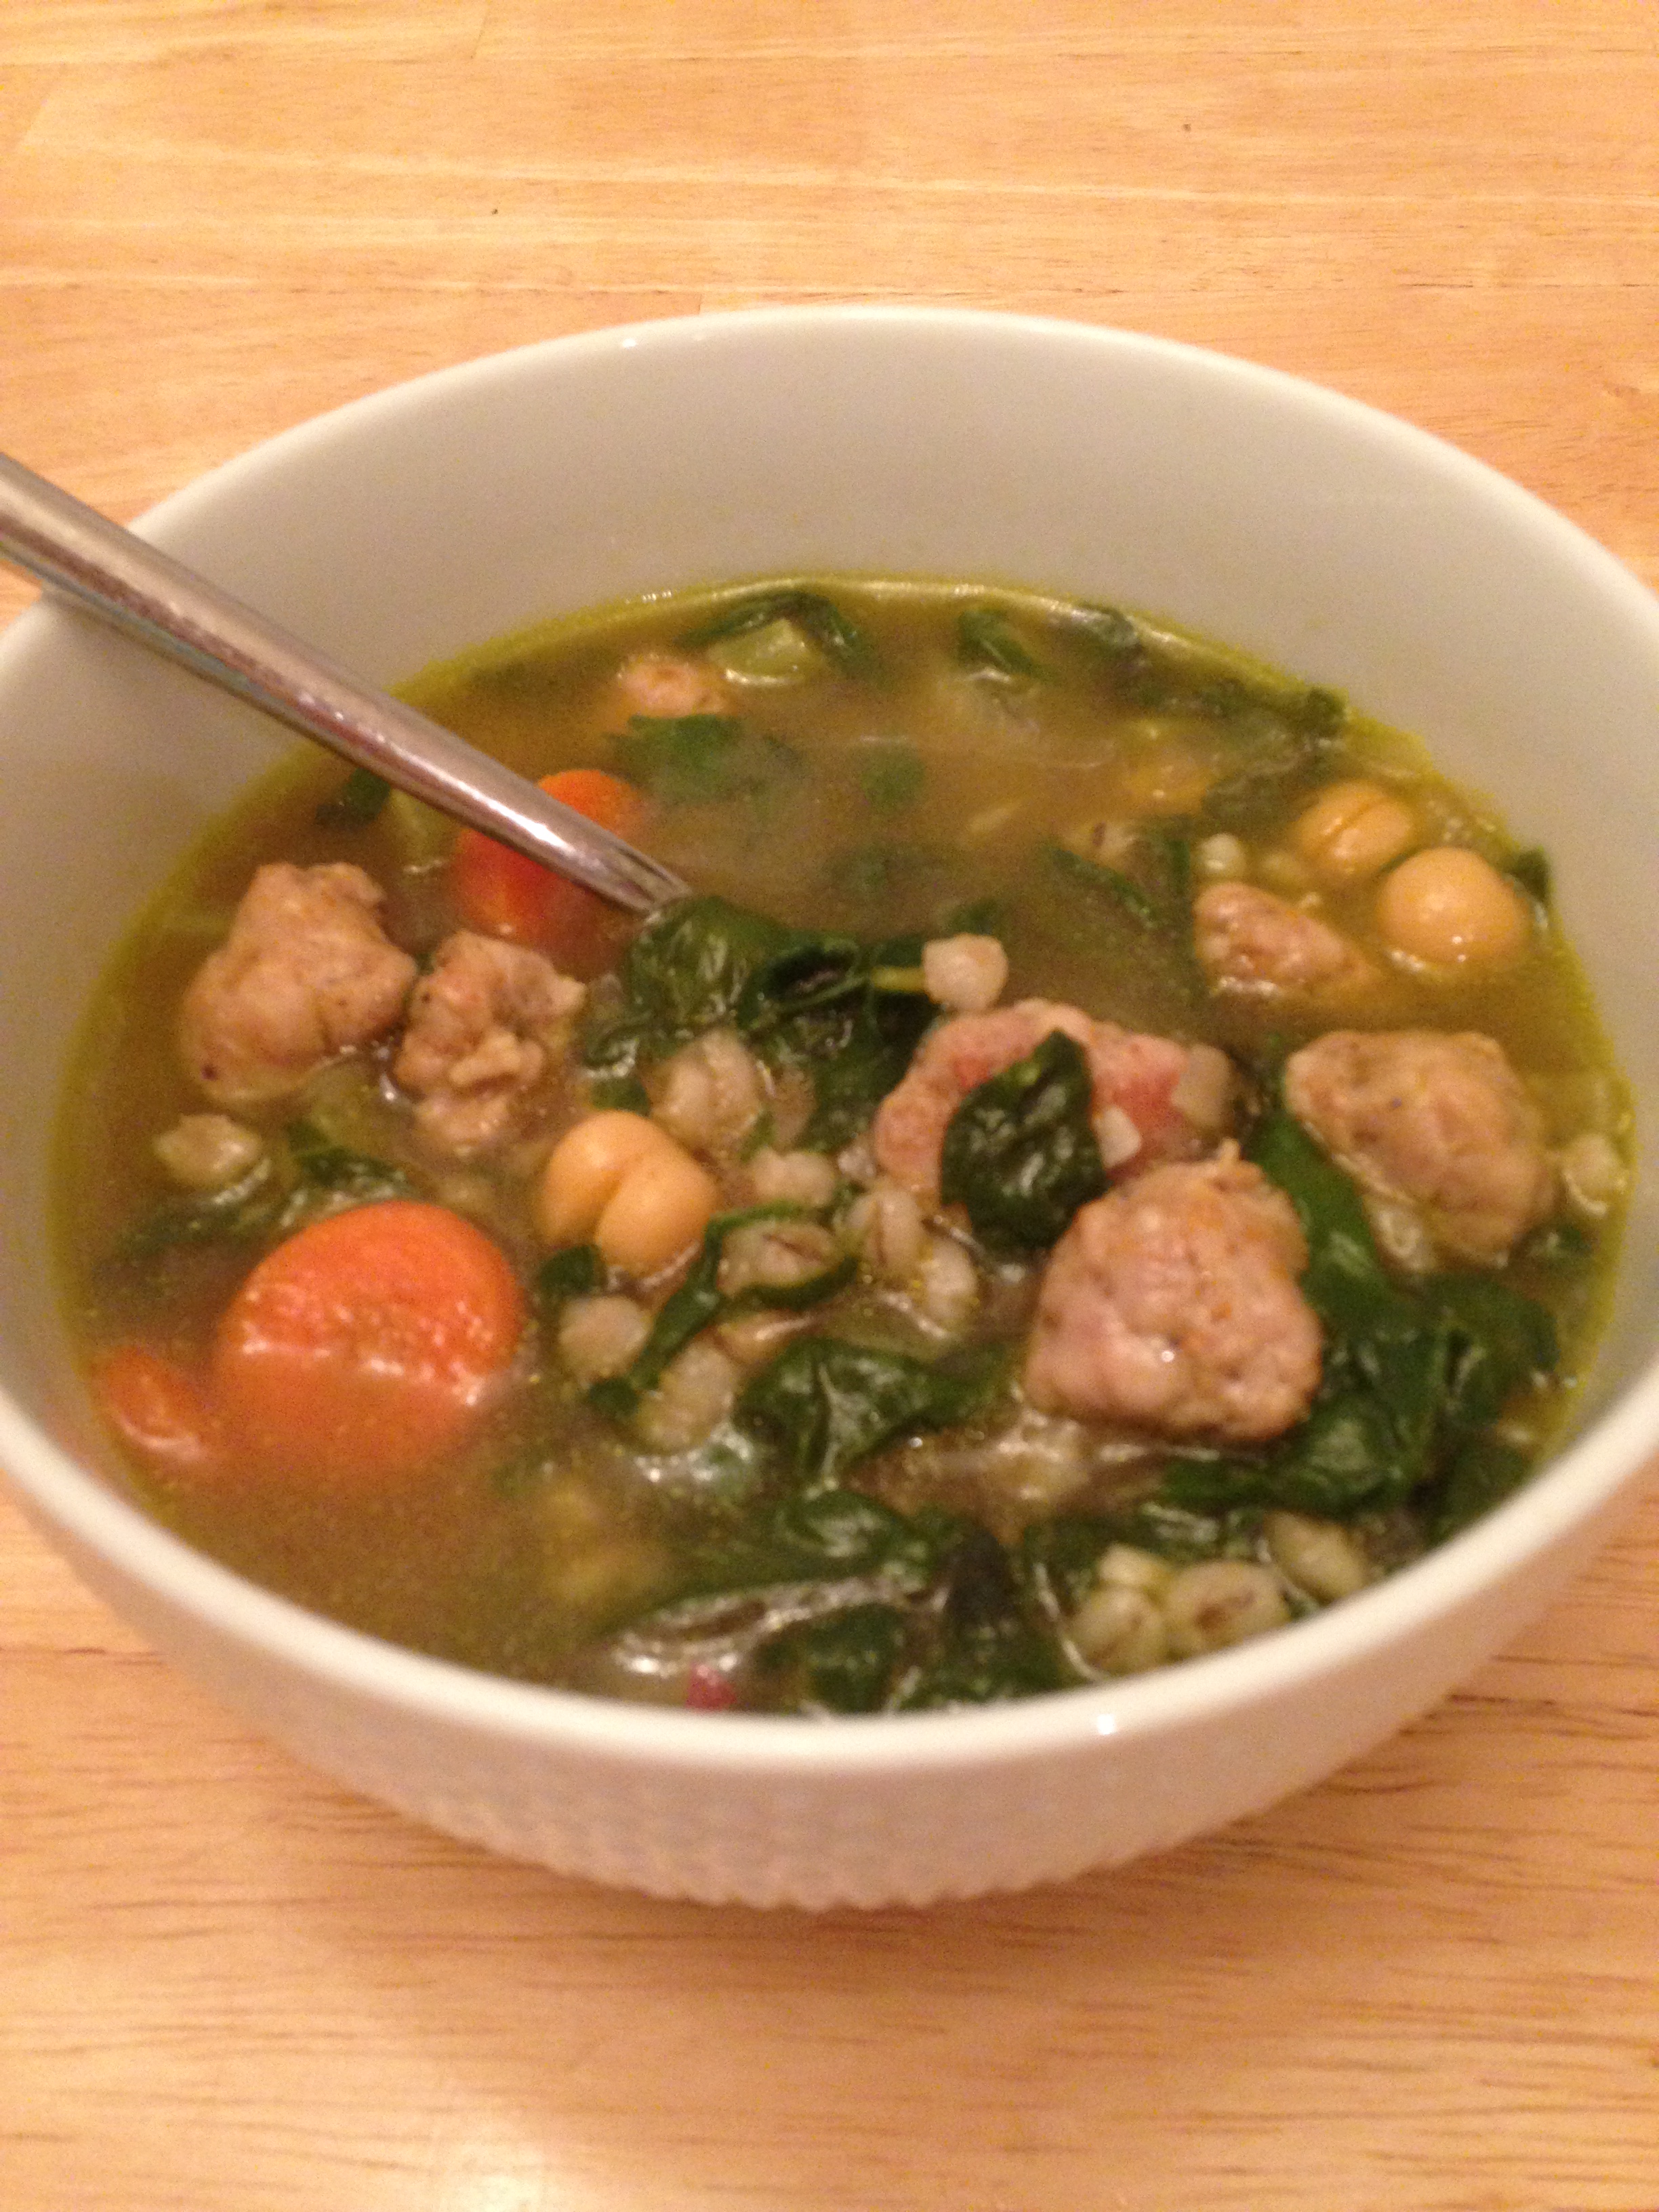
Hearty Chicken Sausage Soup
1 tablespoon olive oil
4 links Whole Foods made in-house spicy Italian chicken sausage (about 1 – 1 ¼ lb)
1 onion, diced
3 celery stalks, diced
3 carrots, diced
1 bunch rainbow chard, roughly chopped
6 cups chicken stock, preferably homemade
3 cloves garlic, minced
3 cups barley, cooked
2 cans chickpeas, rinsed and drained
salt and pepper to taste
Heat 1 tablespoon olive oil in a stainless steel dutch oven over medium heat. Slice the sausage into rings, then cut the rings in half. Add the sausage to the pan and saute until cooked through, about 4-5 minutes. Remove the sausage from the pain but leave any remnants behind.
Stir in the onion, celery, carrots, and a bit of salt to the pan, scraping the bottom of the pan to free up any sausage remnants. Saute until the vegetables are tender, about 5-10 minutes. And the rainbow chard and saute until wilted, about 3 minutes. Mix in the garlic and stir until fragrant, about 1 minute. And the chicken stock, barley, and chickpeas. Stir. Bring to a low simmer. Add salt and pepper to taste and serve. Feel warm and happy.
Just about everyone has some type of muscular imbalance. This might take the form of one set of muscles being relatively strong compared to another, such as having a strong chest relative to the back or strong quads relative to glutes and hamstrings. A client might also have asymmetrical muscular imbalances, such as when the right glute is stronger than the left glute.
A given muscular imbalance tends to create a domino effect because our nerves, muscles and bones are all connected via the kinetic chain. For instance, the lats attach to the pelvis and shoulders. If the lats are short and tight, it anteriorly rotates the hips, rounding the lower back. This loosens and inhibits/weakens the glutes. The hip flexors, including the tensor fasciae latae, are then shorter and tighter, causing the knees to roll in and the arches of the feet to collapse.
So who cares and so what? Well, muscular imbalances are often the root cause of common ailments. Have lower back pain? Suffer from joint pain, maybe in your knees? There’s a good chance a muscular imbalance is at play.
Moms have a special reason to suffer from muscular imbalances: the way we carry our babies. If you’re standing and holding your baby, you probably always place her on the same hip and sink into that hip. This can cause pain in your lower back, hips, and knees, among other things. If you’re walking around with your baby, you probably always carry him on that same side of the body. This can tighten your chest muscles and weaken and loosen your upper back muscles on the carrying side.
WellMom takes a corrective approach to resistance training that addresses these muscular imbalances. In addition to focusing on strengthening weak muscle groups and stretching tight ones, I employ unilateral exercises – those that work one side of the body at a time – whenever possible to correct those asymmetrical, left-right imbalances.
Below are five of my favorite unilateral exercises. In some of them, notice that I’m holding a dumbbell in one hand only. This forces your core to work harder (a good thing!) because you’re activating the muscles of your posterior oblique chain – the latissimus dorsi and oblique on the side of your body with the dumbbell, and the gluteus maximus on the opposing side.
Incorporate a few of these exercises into your next workout and let me know how it goes!
Five of My Favorite Unilateral Exercises
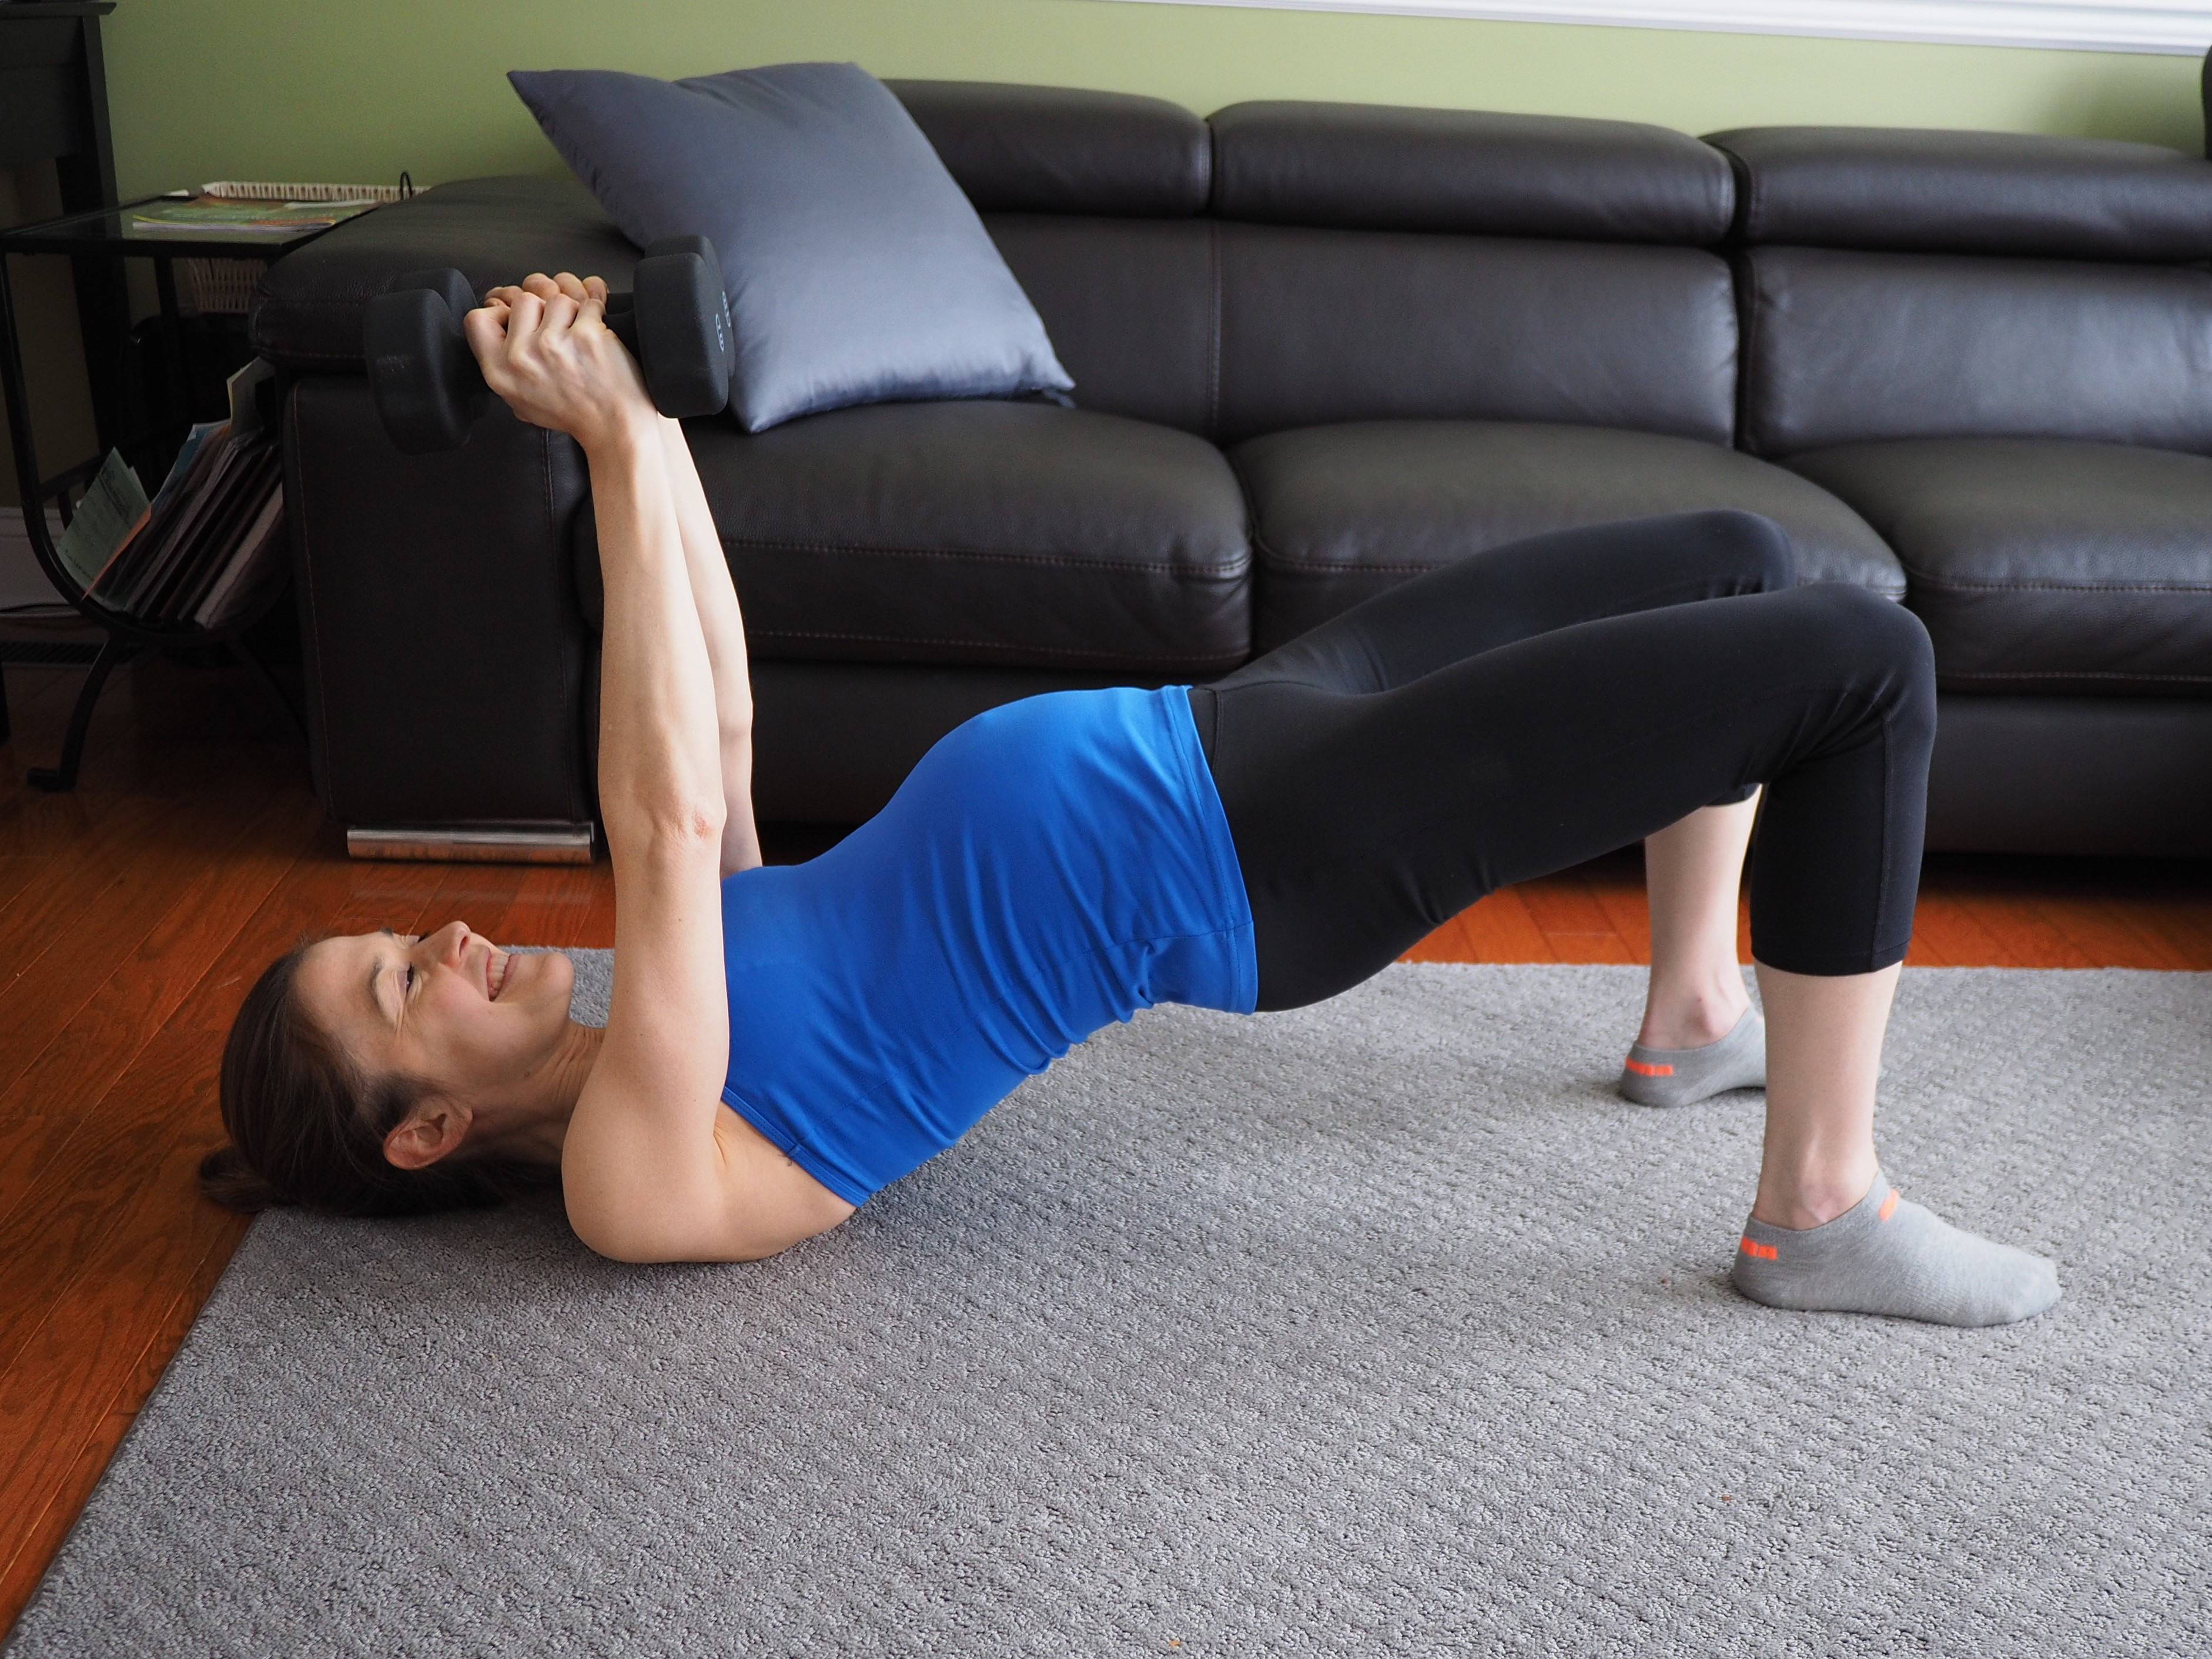
1. Single arm chest press on Swiss ball
2. Single leg squat
3. Single arm bentover row
It’s a little hard to tell here, but I’m holding the dumbbell in one arm only.
4. Single leg deadlift
If you don’t have a Swiss ball or find this exercise too challenging when using it, place your rear foot on a more stable surface, such as a chair or step.
5. Lunge with “baby” on one shoulder
This is another one with just one dumbbell (errrr, baby!). And, uh, speaking of babies, I’ve been keeping a secret. But judging by these pictures, it’s kind of looking like that secret is out. 🙂
I love salads. In part because there are no rules. A salad is the perfect thing to make when you need to clean out your pantry or produce drawer.
Salads are also great if you’re an expectant mom suffering from food aversions because of their flexibility. Distasteful ingredients can be easily swapped out for others that you find more palatable, if not dropped altogether. Can’t stomach garbanzo beans? No worries. How about cannellini beans or maybe some green lentils? Mushrooms make your face turn green? Perhaps some roasted squash is in order instead.
And you know, I actually like to think of food aversions as food opportunities. When your formerly A-list foods drop to the D-list, pick up something completely new (to you) the next time you’re at the grocery store, and start experimenting with it. You can even start your experimentation with this recipe!
Speaking of that recipe, the one I’m providing today happens to be vegan, which is perfect for breastfeeding moms with a baby who suffers from a cow’s milk protein intolerance, a common allergy in babies and children. I actually whipped up this recipe when my own daughter suffered from this allergy, which she (thankfully!) outgrew (See photo to right. I miss the hair).
And this salad is so nutritious! It’s packed with kale, which has been hailed as a pregnancy “superfood.” One cup of it contains over 100% of the recommended daily value of three key antioxidants: Vitamin A, Vitamin C, and Vitamin K. Expectant moms suffering from constipation may find relief from its five grams of fiber. Kale also provides 15 percent of your daily value of calcium per cup.
This dish is also quite high in protein, despite being vegan. This is especially important for pregnant or breastfeeding moms who struggle to get enough protein in their diets, either because they can’t eat meat or dairy or because they prefer to avoid it. Owing in large part to the garbanzo beans and quinoa, the dish has 19 total grams of protein, which is 27 percent of the recommended intake for pregnant women and 42 percent of the recommended intake for non-pregnant women.
Shortcuts: If all the chopping below sounds too arduous, don’t forget you can typically find your veggies pre-diced in the grocery store. I’m a bit of an odd duck – I find the chopping kind of therapeutic. 🙂 And frozen chopped kale works equally well as fresh.
Quinoa Salad (Vegan)
1 cup cucumber, diced (about 1/2 large or 1 small cucumber)
1 cup red bell pepper, diced (about 1 bell pepper)
3/4 cup green onion, chopped (about 3 green onions)
3 cups cooked quinoa (1 cup dry)
1 15 oz can garbanzo beans, drained and rinsed
1/2 cup cilantro, chopped
4 cups crimini mushrooms, diced (1 1/3 cooked)
2 T olive oil, divided
1 t salt, divided
9 cups kale, chopped
1/4 cup water
4 teaspoons of garlic,divided
1 lemon, juiced and grated
2 T olive oil
salt and pepper, to taste
Combine cucumber, bell pepper, green onions, cilantro, garbanzo beans, and cooked quinoa in a large bowl. Set aside.
Heat 1 tablespoon of olive oil in a saute pan over medium heat. Add mushrooms and half teaspoon of salt and saute for about 10 minutes, until mushrooms shrink to 1/3 their original size. Add 2 teaspoons of garlic and immediately turn off the heat. Stir 1 additional minute. Add to the salad bowl.
Saute kale in 1 tablespoon of olive oil, 1/4 cup water, and 1/2 teaspoon salt over medium high heat for five minutes, or until desired doneness. Add 2 teaspoons of garlic and immediately turn off the heat. Stir 1 additional minute. Add to the salad bowl.
Stir salad ingredients. Add lemon juice, lemon zest, and two tablespoons of olive oil. Stir to combine. Add additional salt and pepper to taste. Serve hot, at room temperature, or cold.
Nutritional Information (per serving)*
Energy (calories): 372
Total Fat: 4 grams (5% DV)
Saturated Fat: 0 grams (0% DV)
Carbohydrates: 69 grams (22% DV)
Dietary Fiber: 11 grams (52% DV)
Protein: 19 grams
*Daily values (DV) are for the general population. Women who are pregnant or breastfeeding need additional energy, particularly in the form of protein, than non-pregnant, non-breastfeeding women.
A common muscular imbalance I see with my clients is weak glutes relative to quadriceps. This is problematic because weak glutes often lead to body aches, including both knee and lower back pain. Because physiological changes during pregnancy tend to exacerbate existing muscular imbalances, pre- and postnatal moms are at a greater risk of experiencing these aches and pains.
People often gravitate towards front squats and static front lunges when they try to strengthen their glutes. While these exercises do recruit the gluteals, the quadriceps are the prime movers. And if you’re already quad dominant, you are likely to compromise your form in order to unconsciously recruit your quadriceps even more. I see this all the time with clients when they squat or lunge and their knees extend well beyond their toes.
Another limitation of front squats and static front lunges is their inability to effectively work all three muscles that comprise the glutes – maximus, medius, and minimus. That’s right – there are three muscles back there! Any gluteal activation is pretty much limited to the gluteus maximus during front squats and static front lunges. The deeper gluteal muscles – the medius and especially the minimus – activate little if at all.
So what’s the solution? Do alternative strengthening exercises that strengthen the gluteal muscles, especially the medius and minimus. Below are five of my favorites!
Even though I demonstrate some of these exercises with a resistance band or tube, all of these exercises can be performed effectively using body weight only. I suggest you start off using just your body weight if you don’t have access to the equipment. You can always invest in a tube or band later on to add an extra challenge. Both are very inexpensive.
Five Great Glute Exercises!
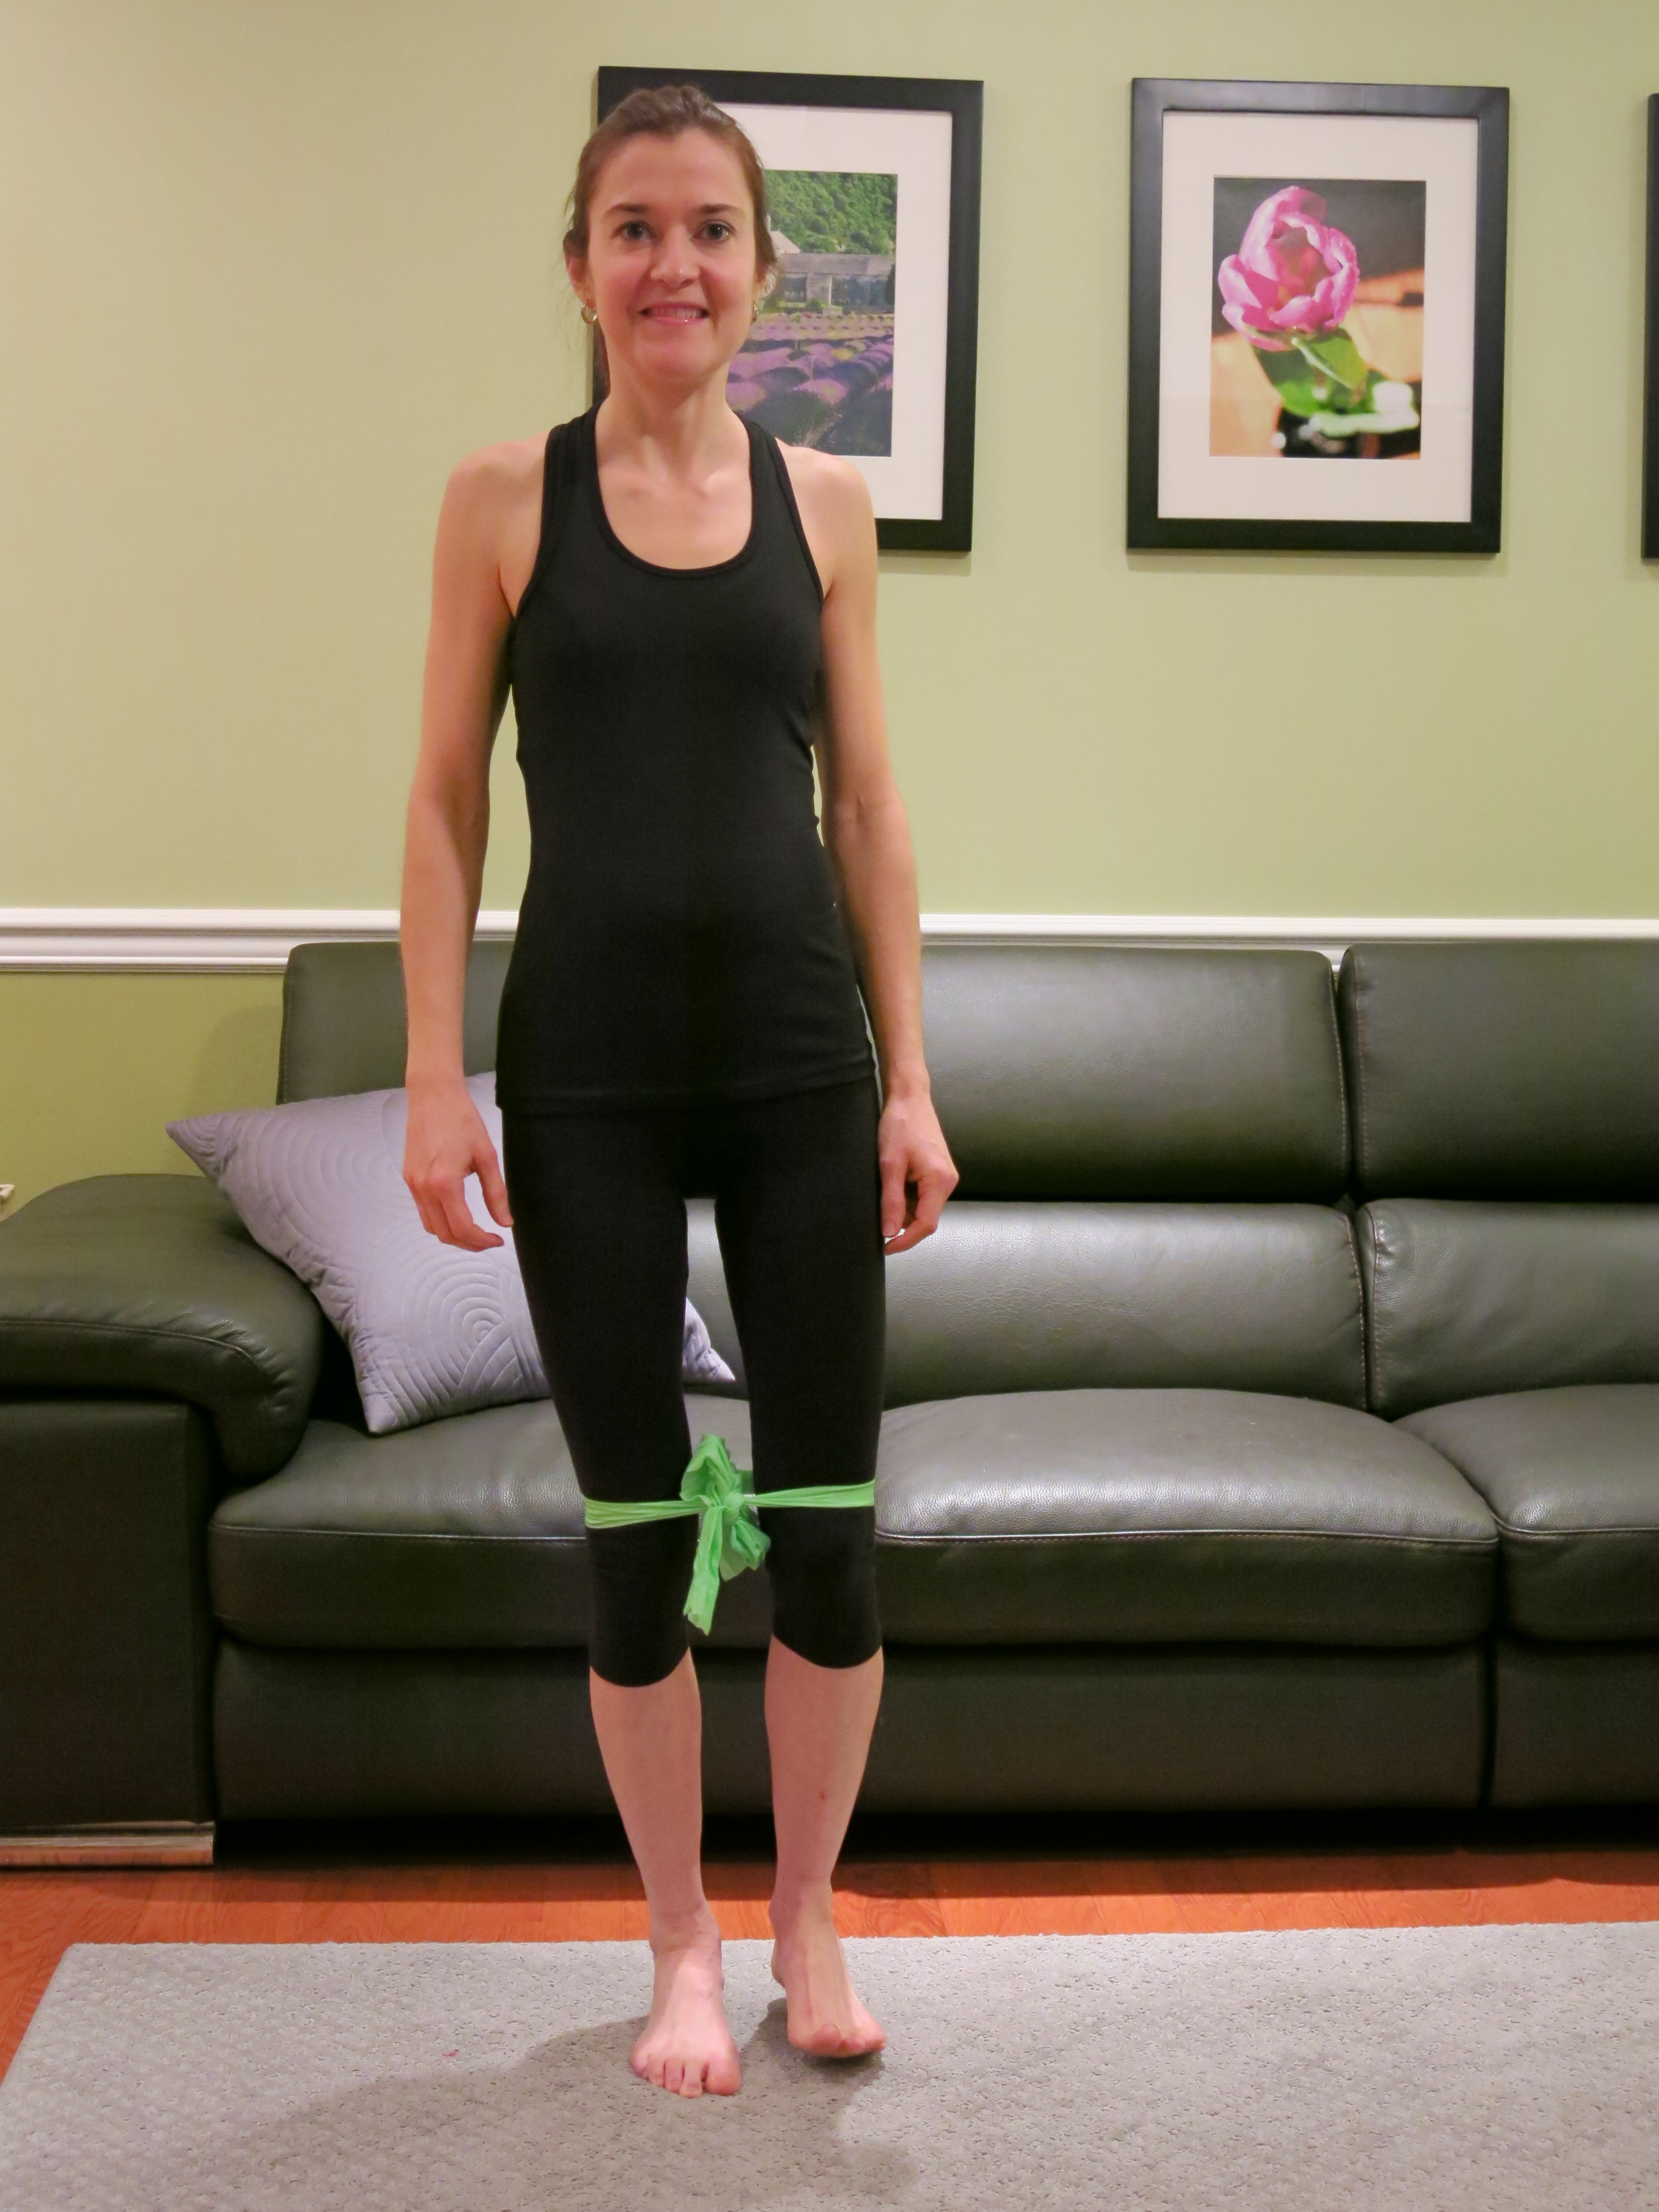
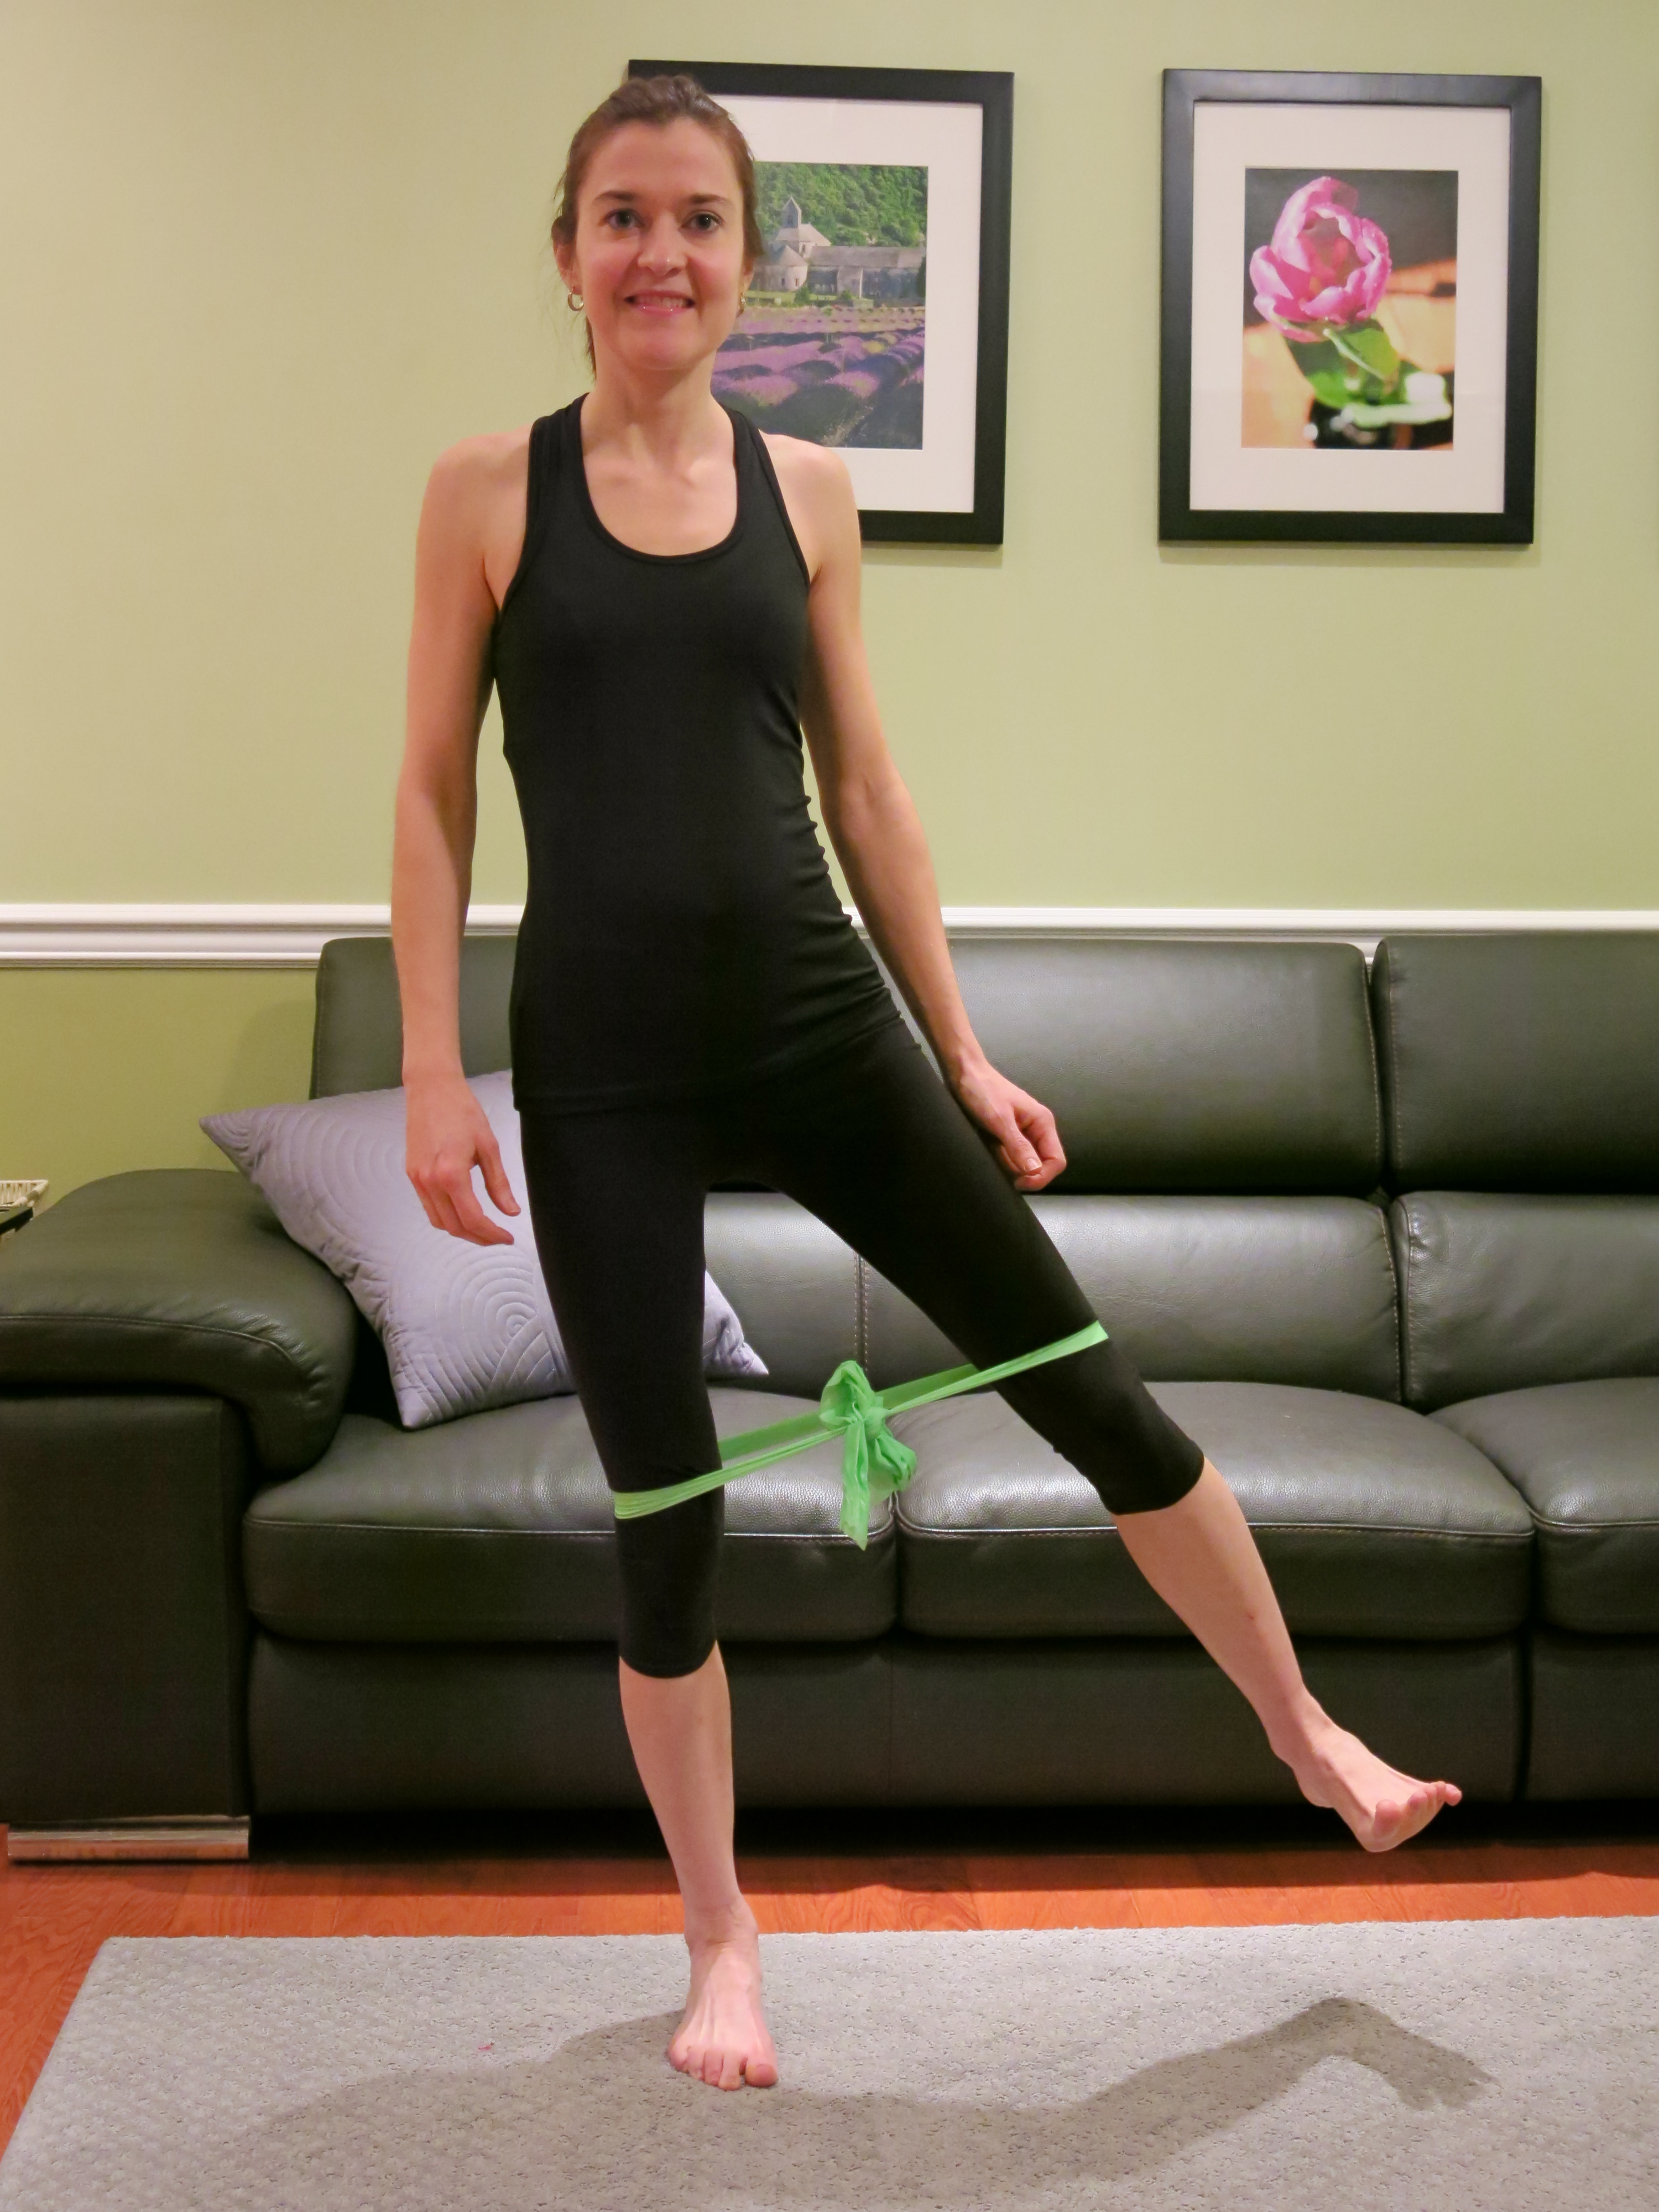
1. Standing Hip Abduction
You can also do this side-lying on the floor, but the standing version has the benefit of also working the standing leg and improving balance.
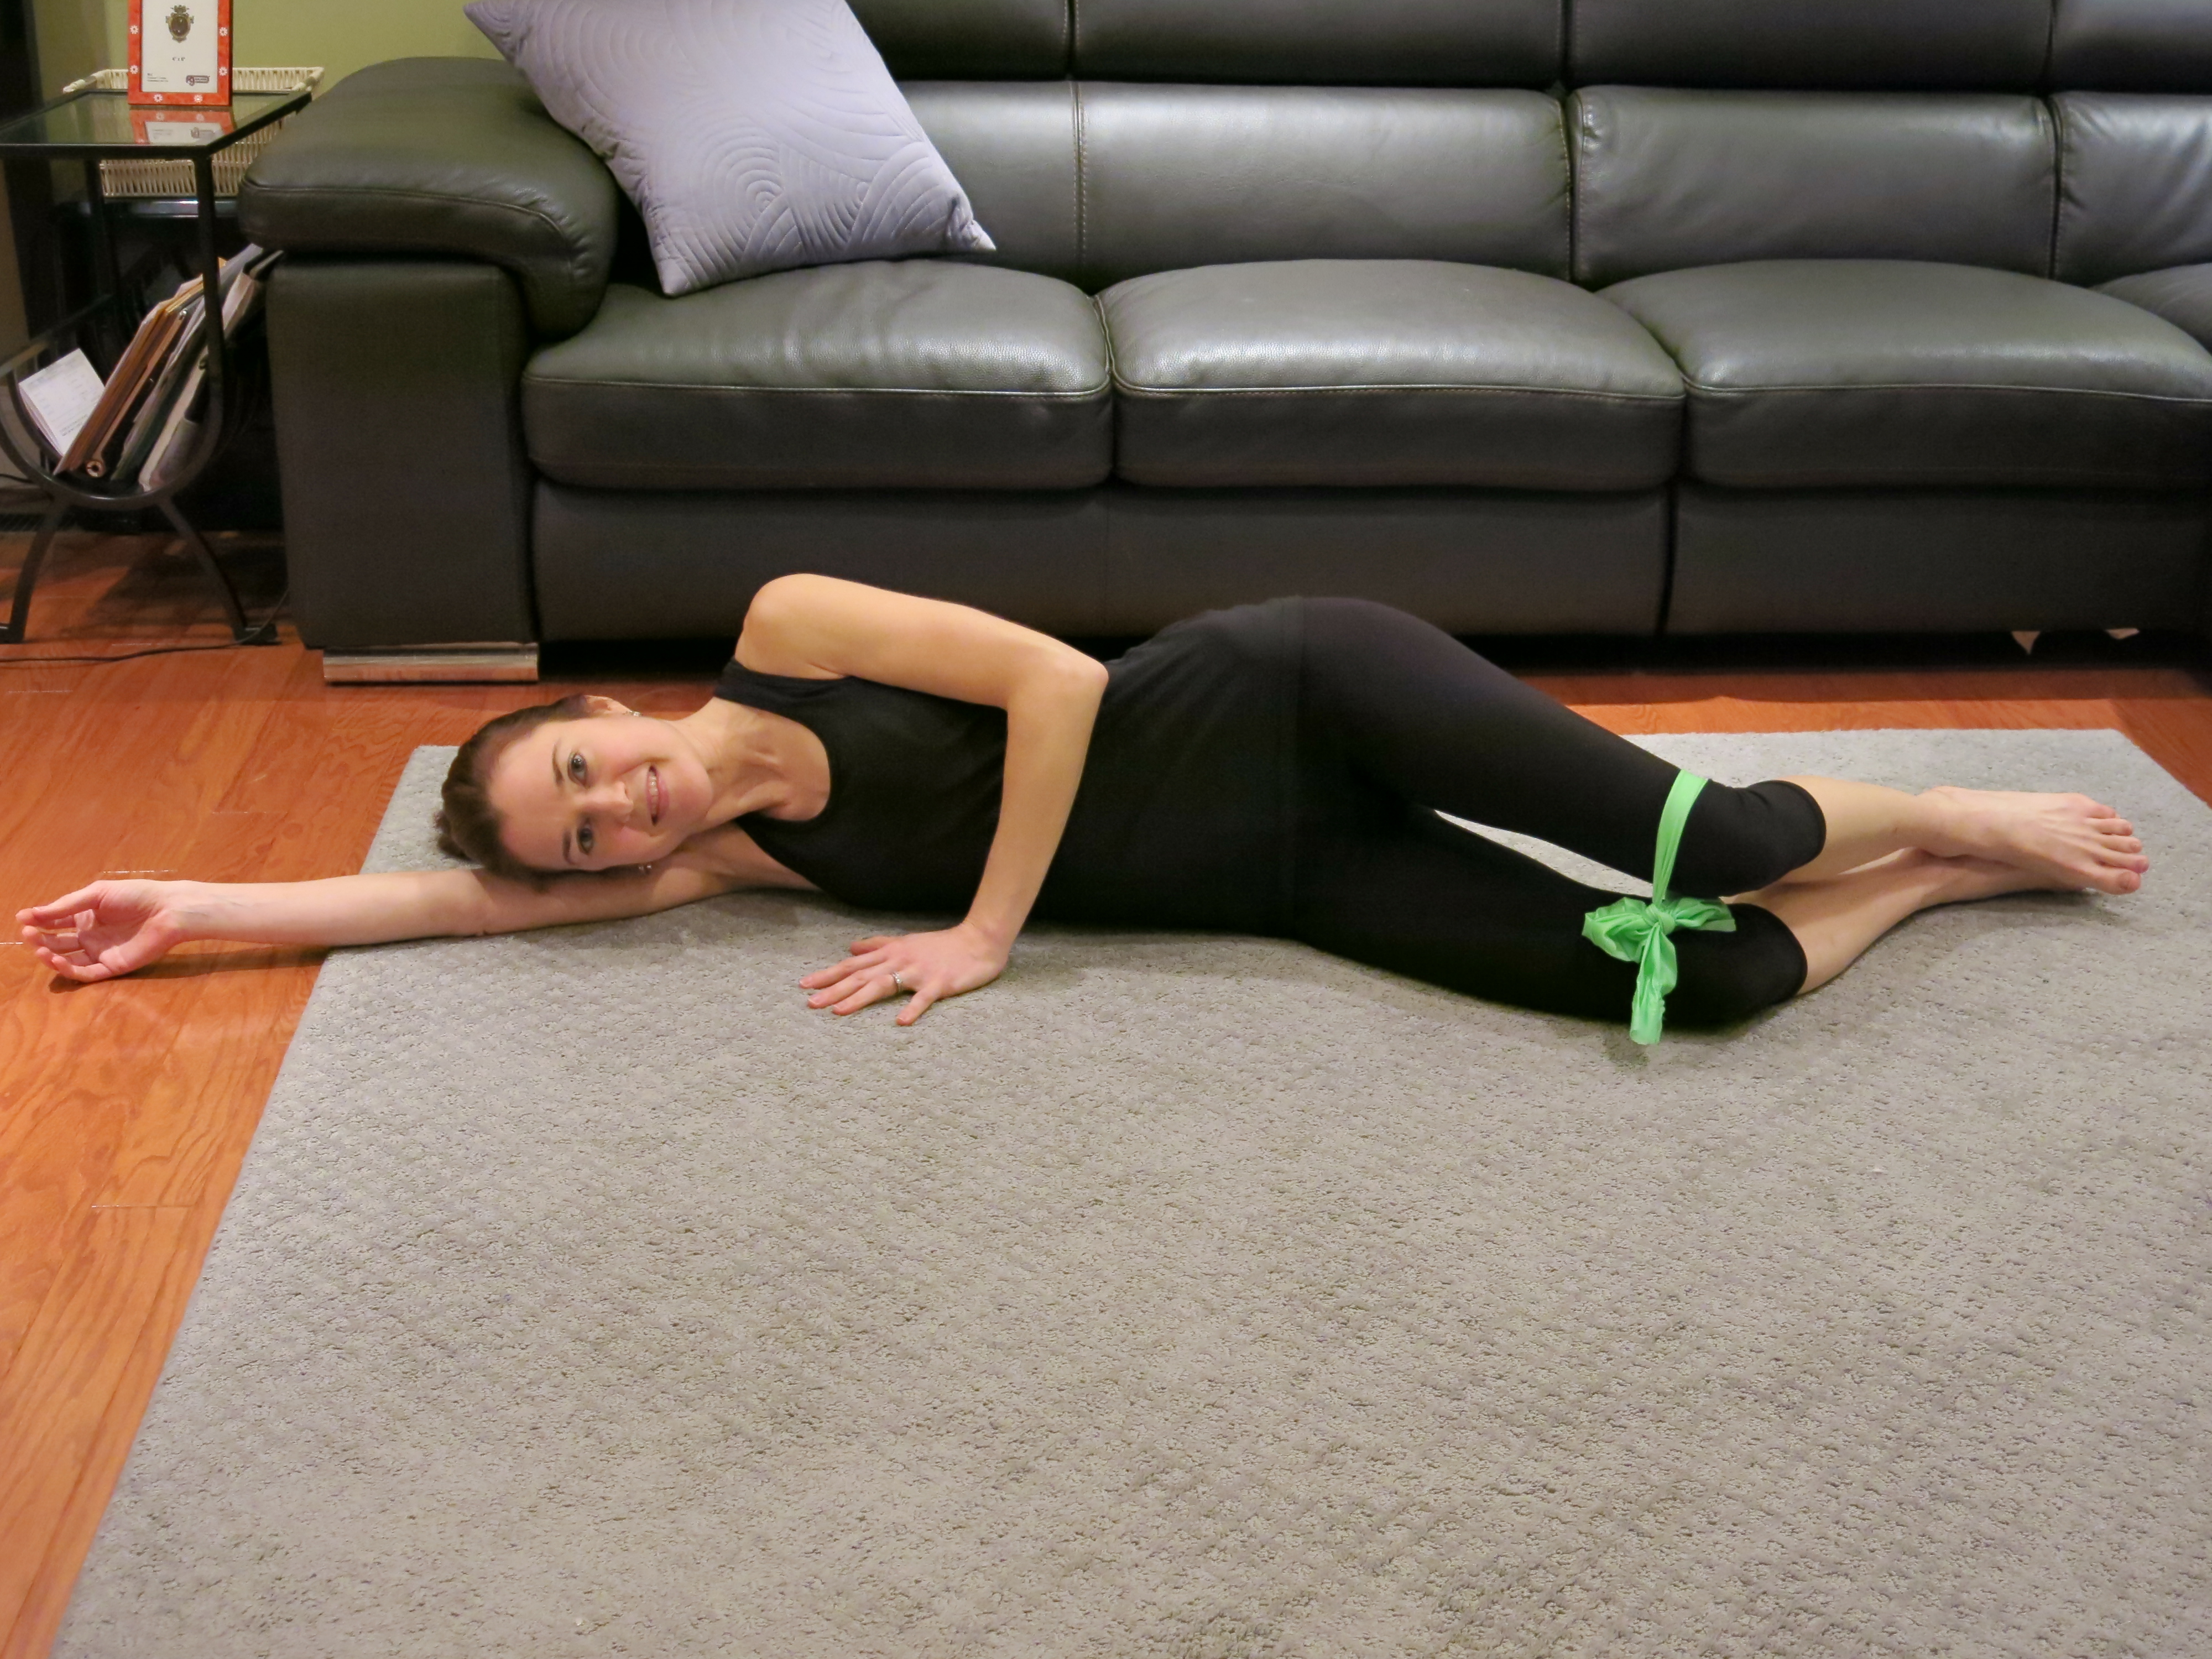
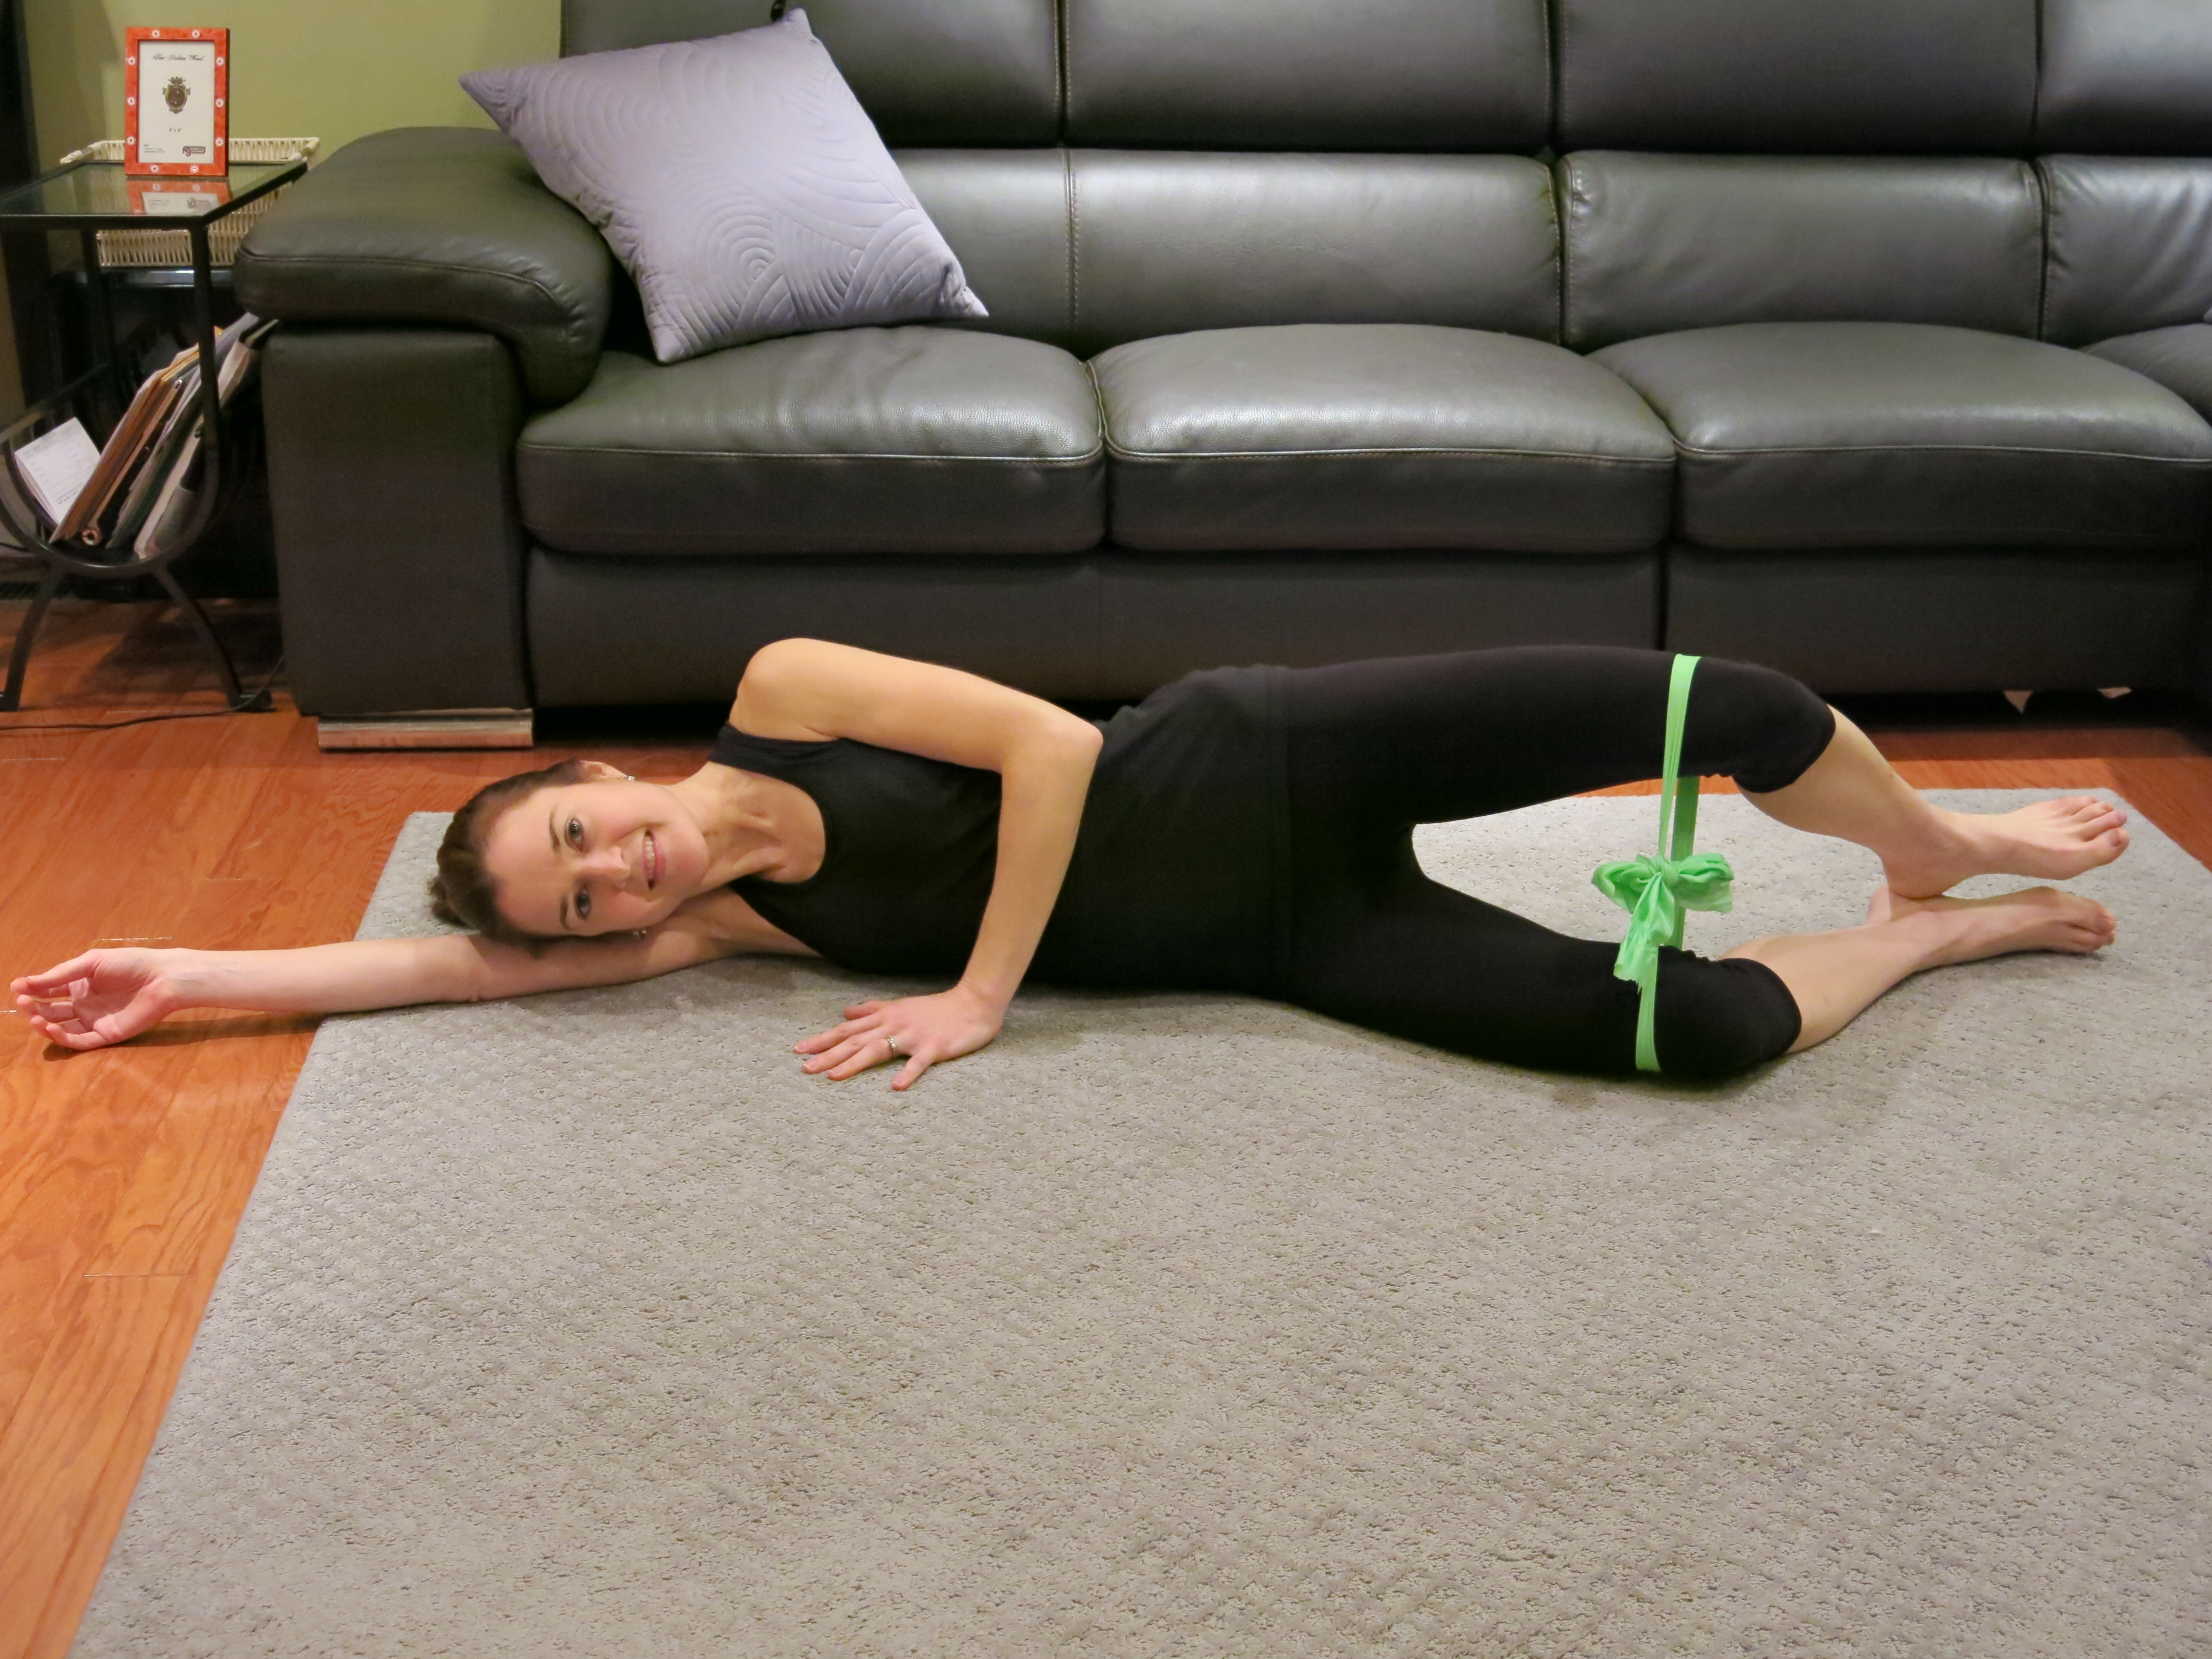
2. Clamshells
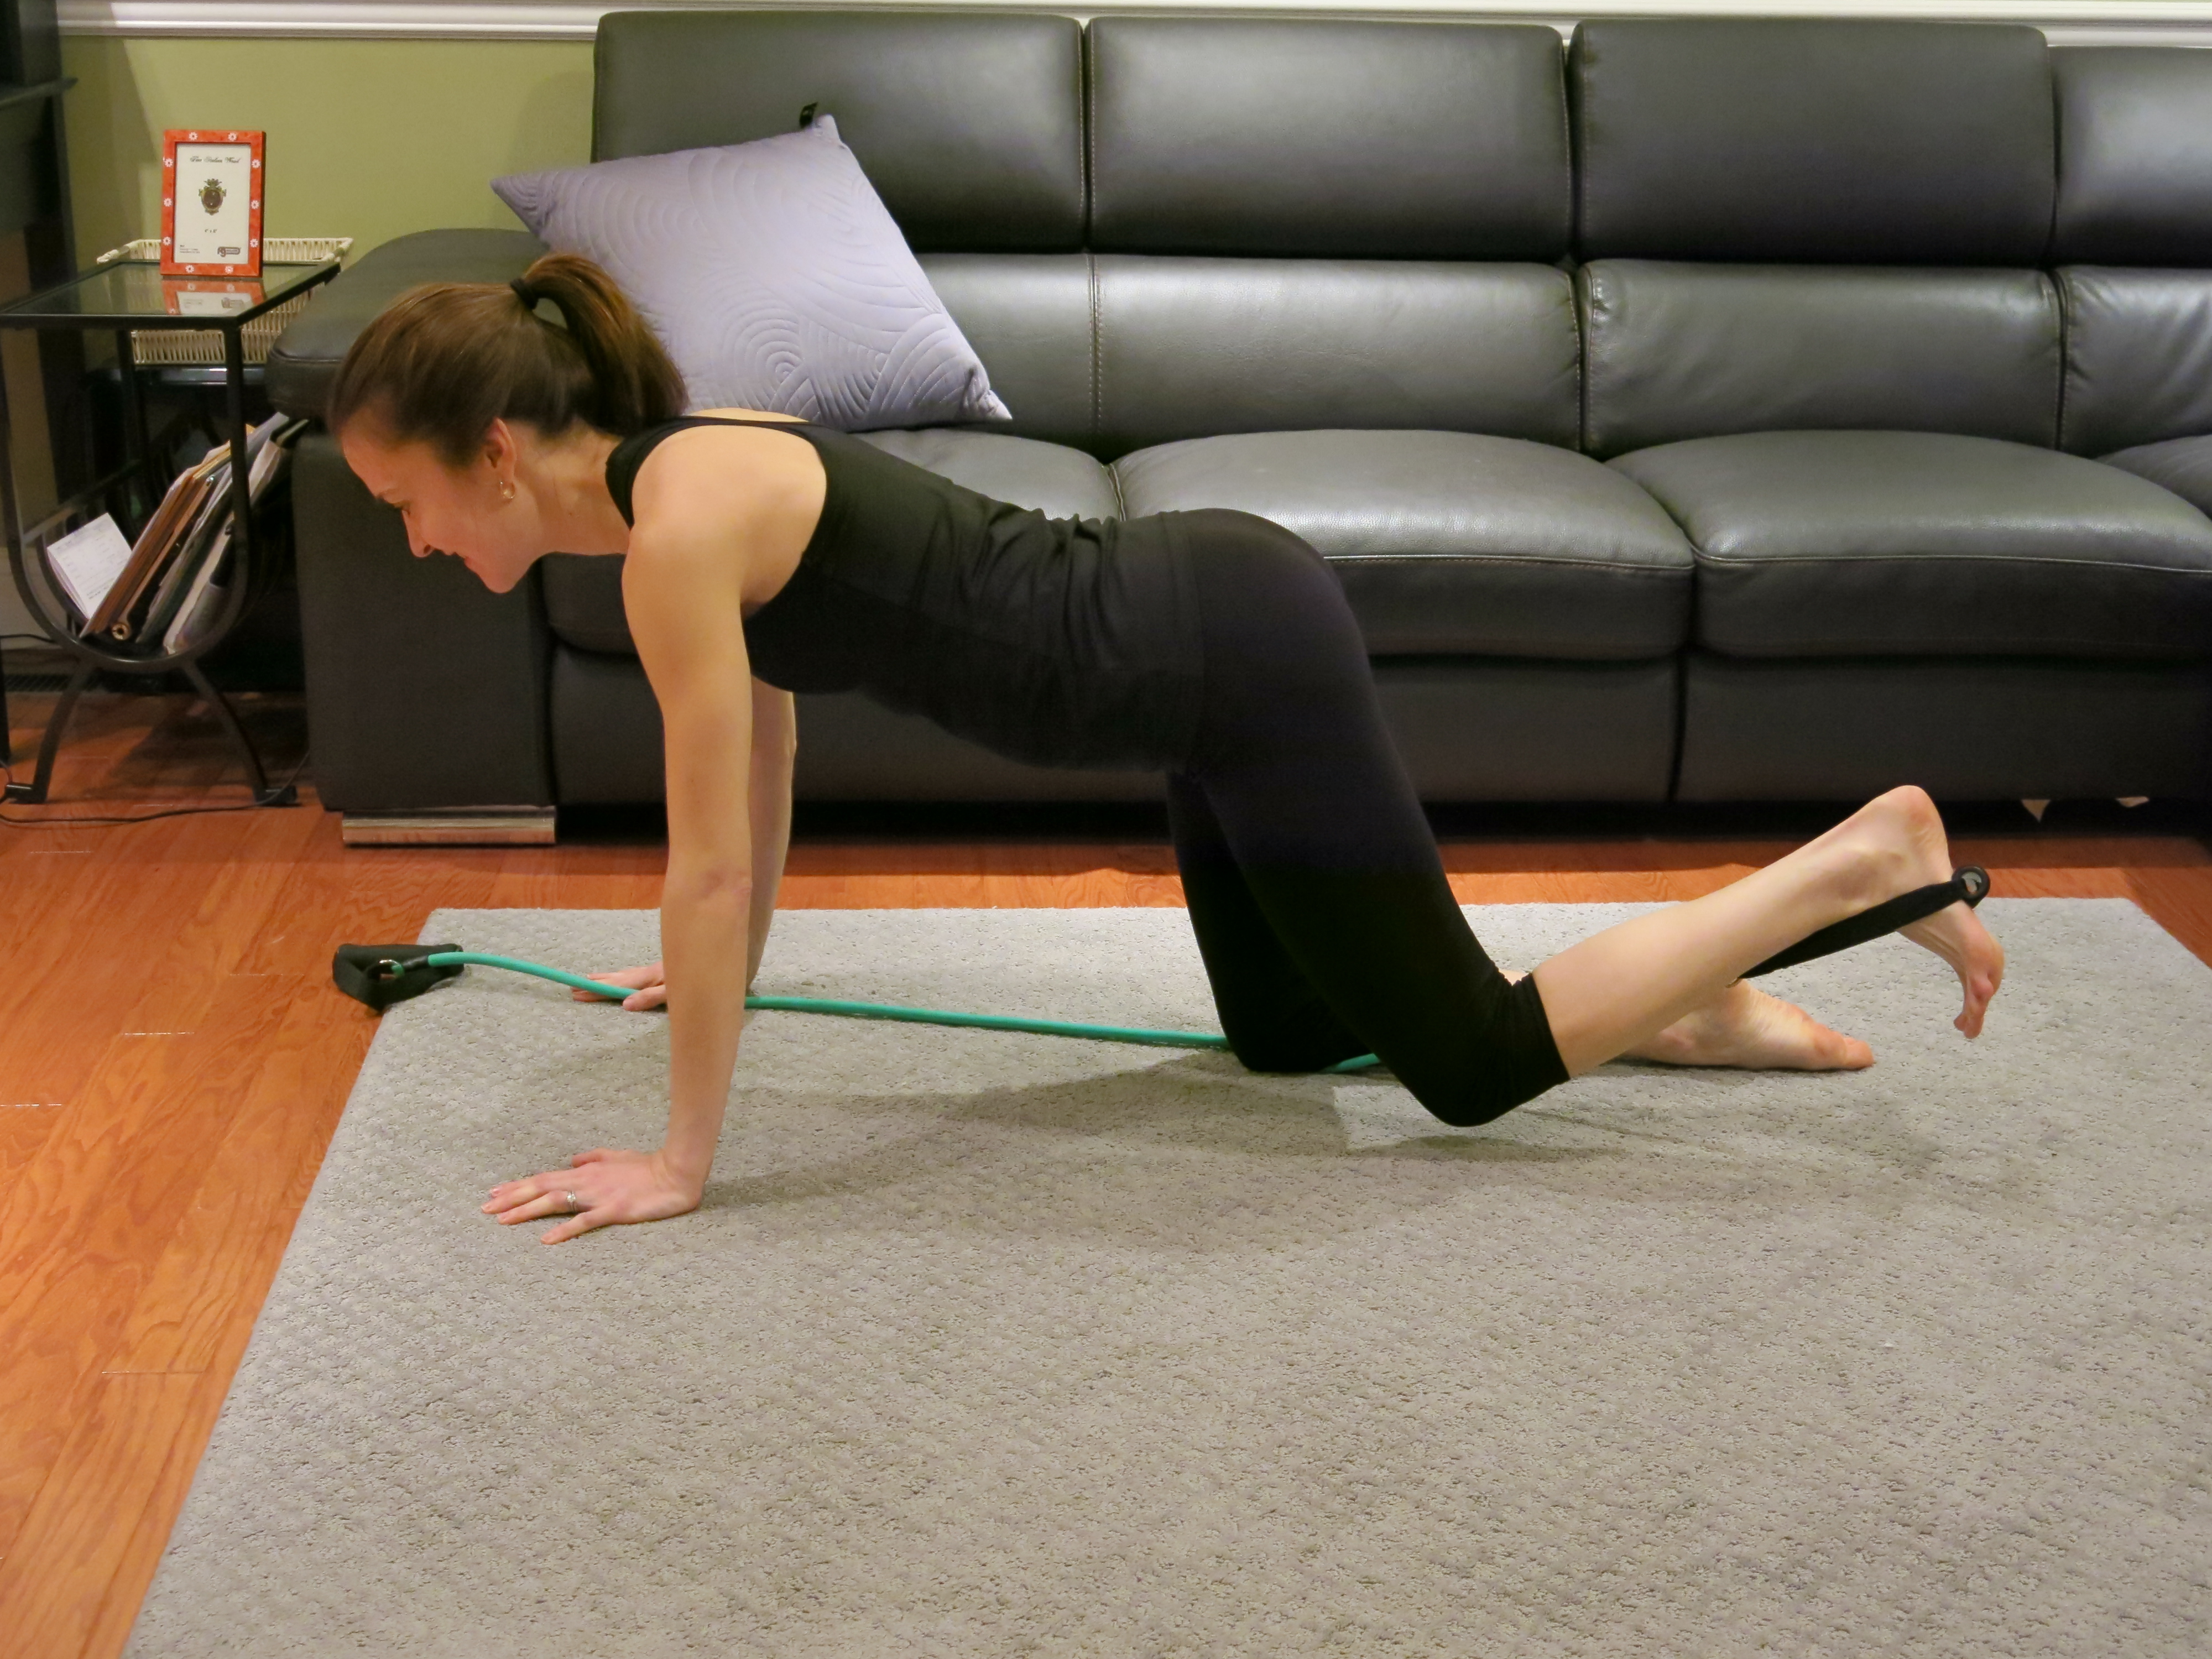
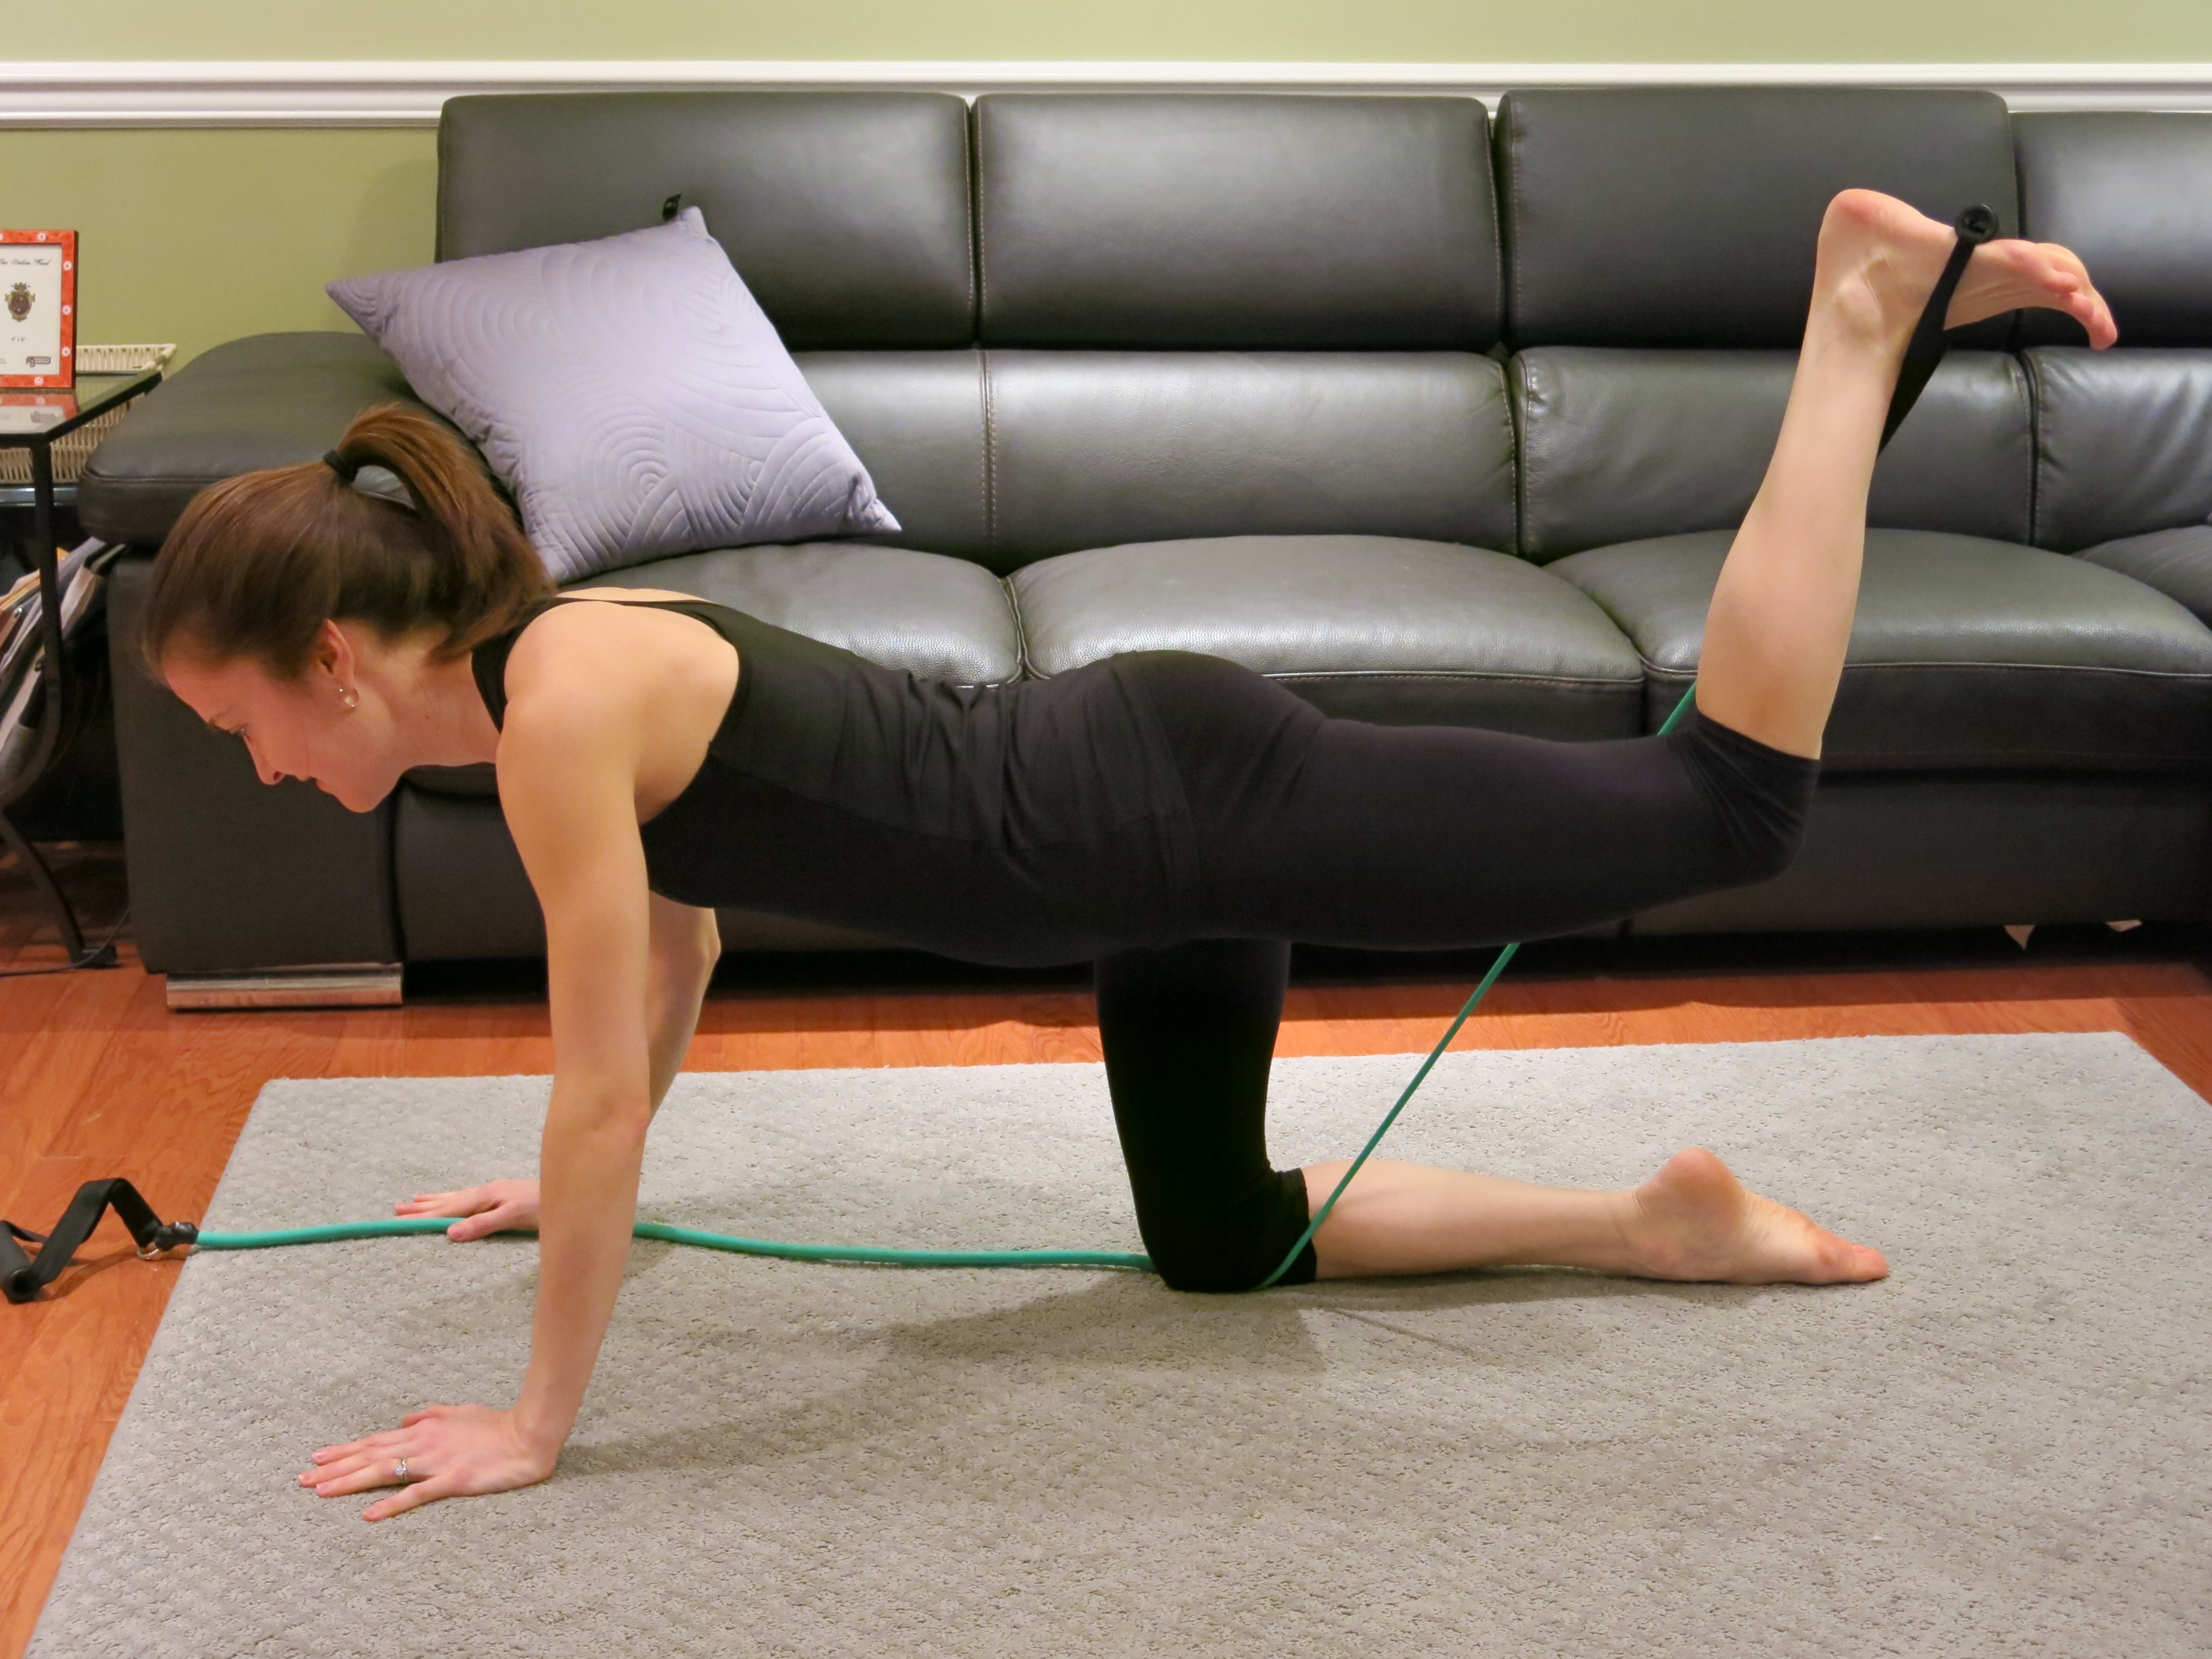
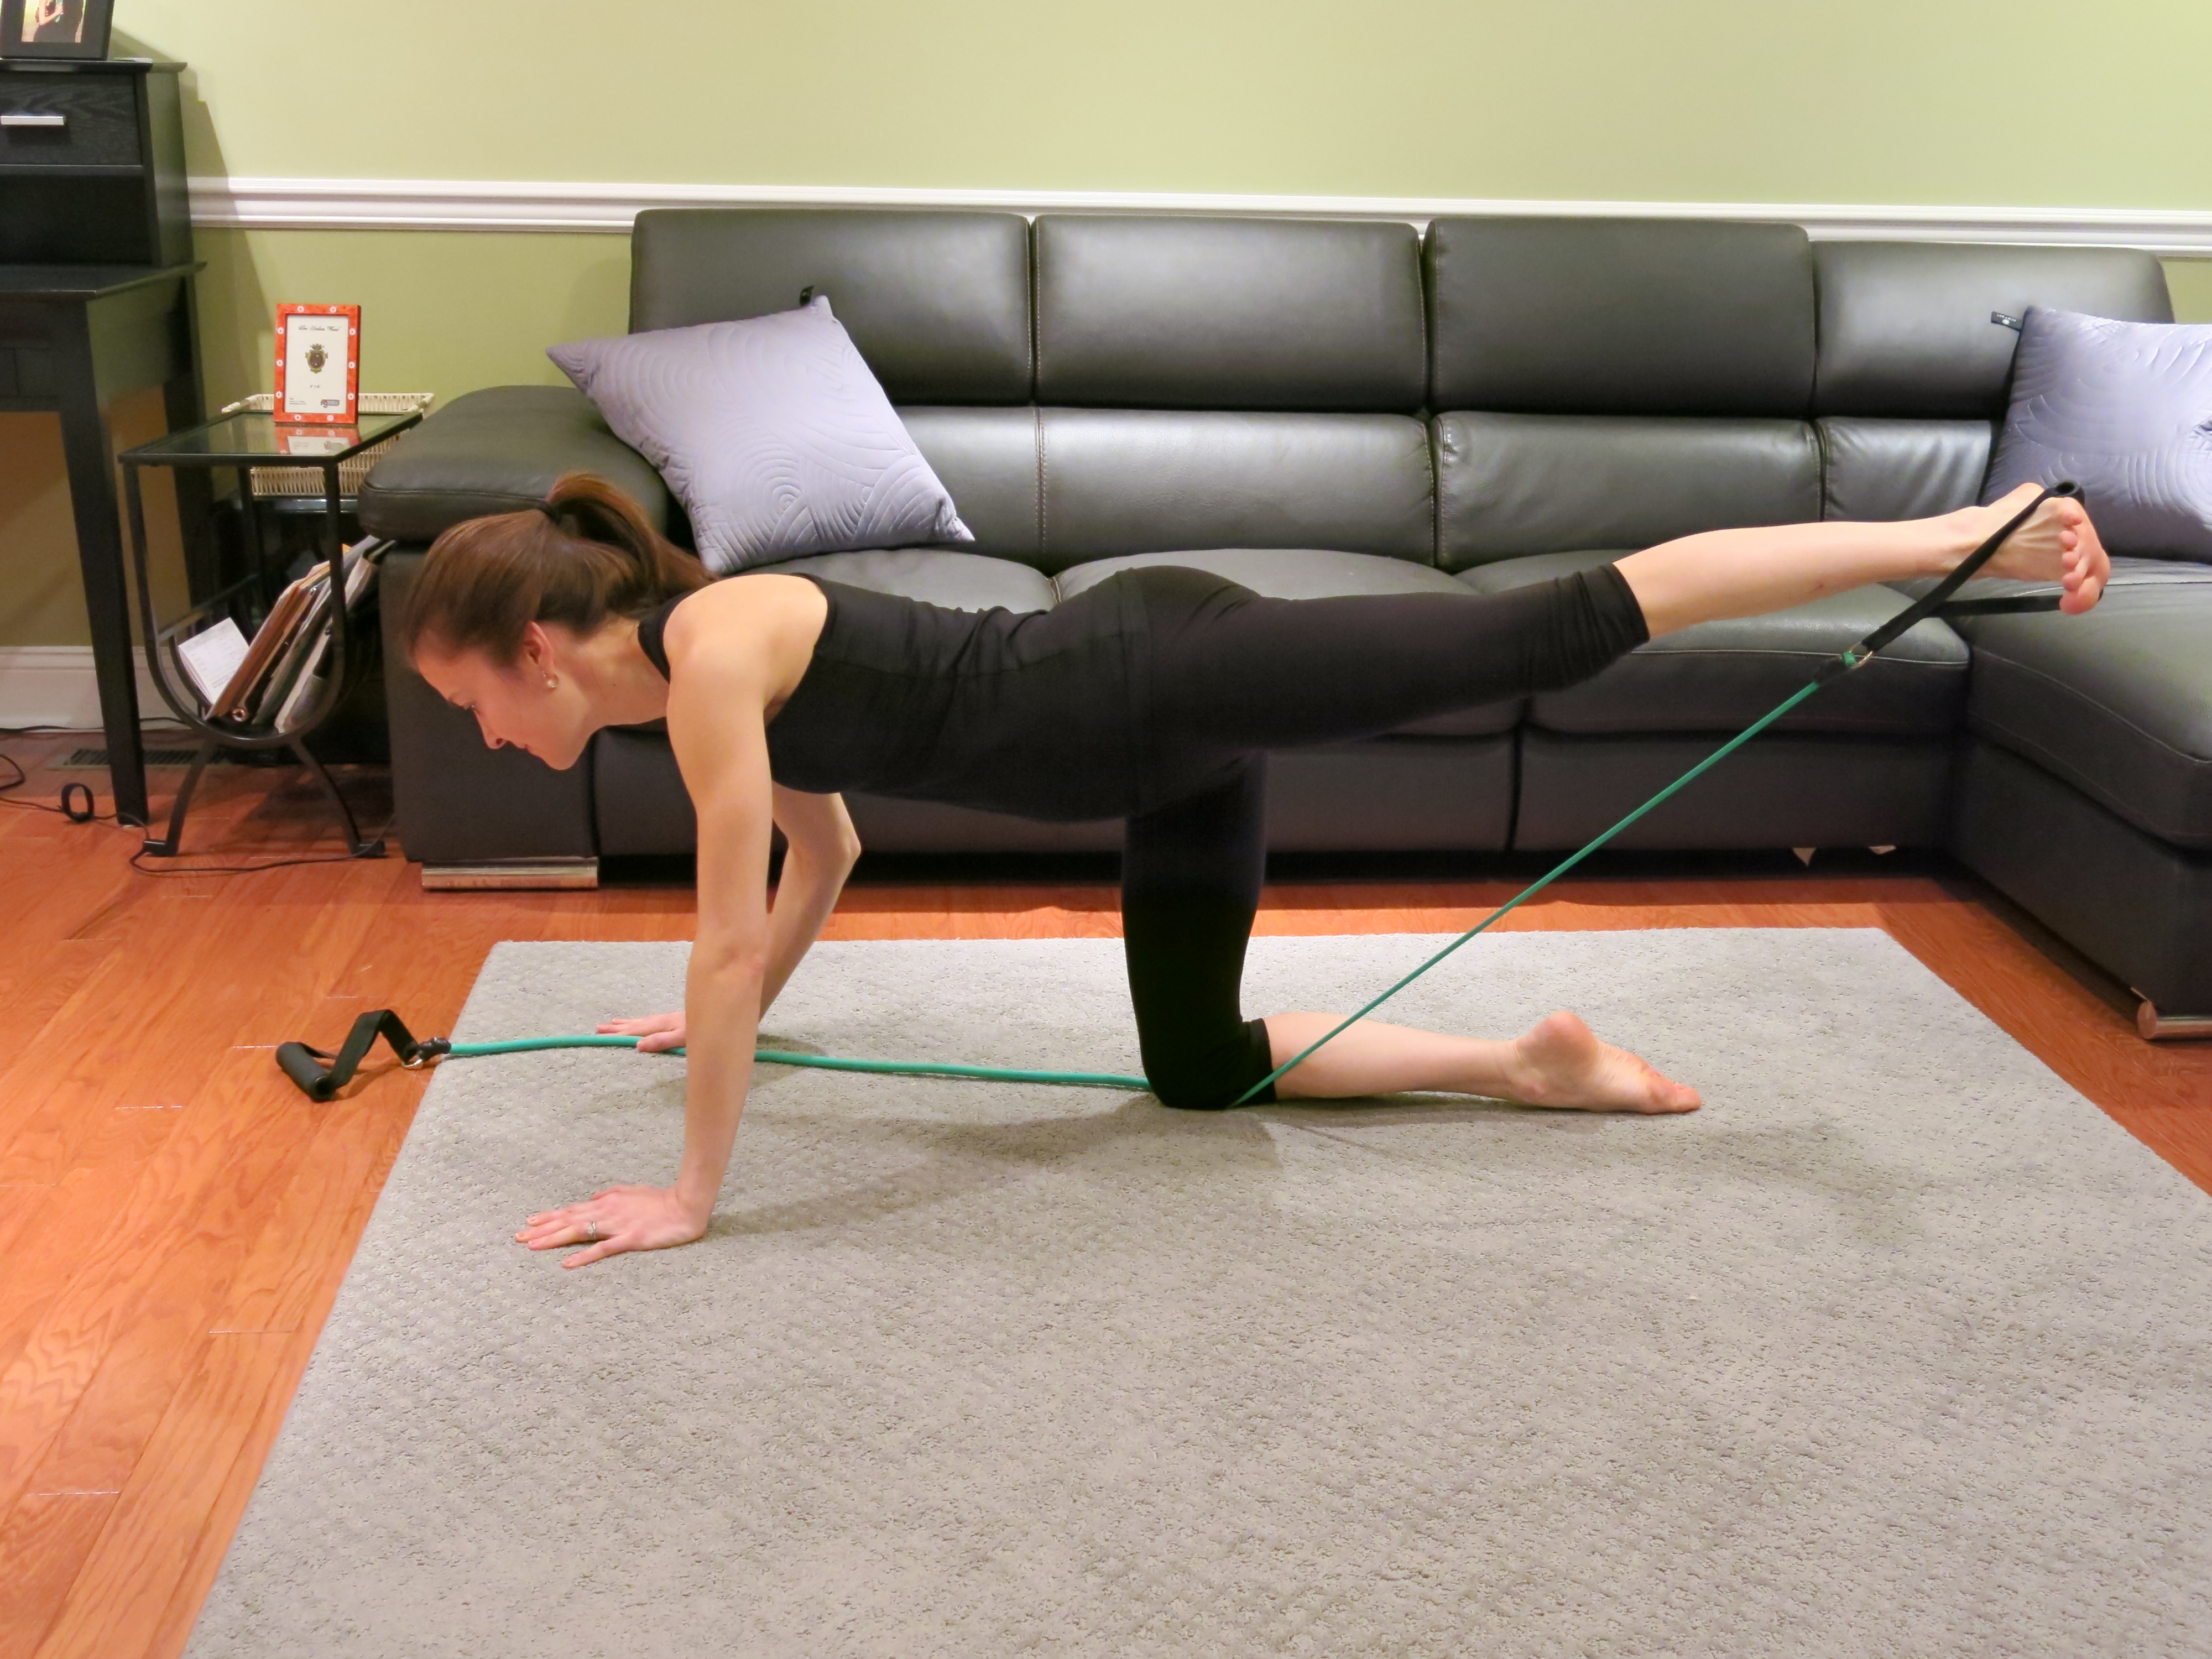
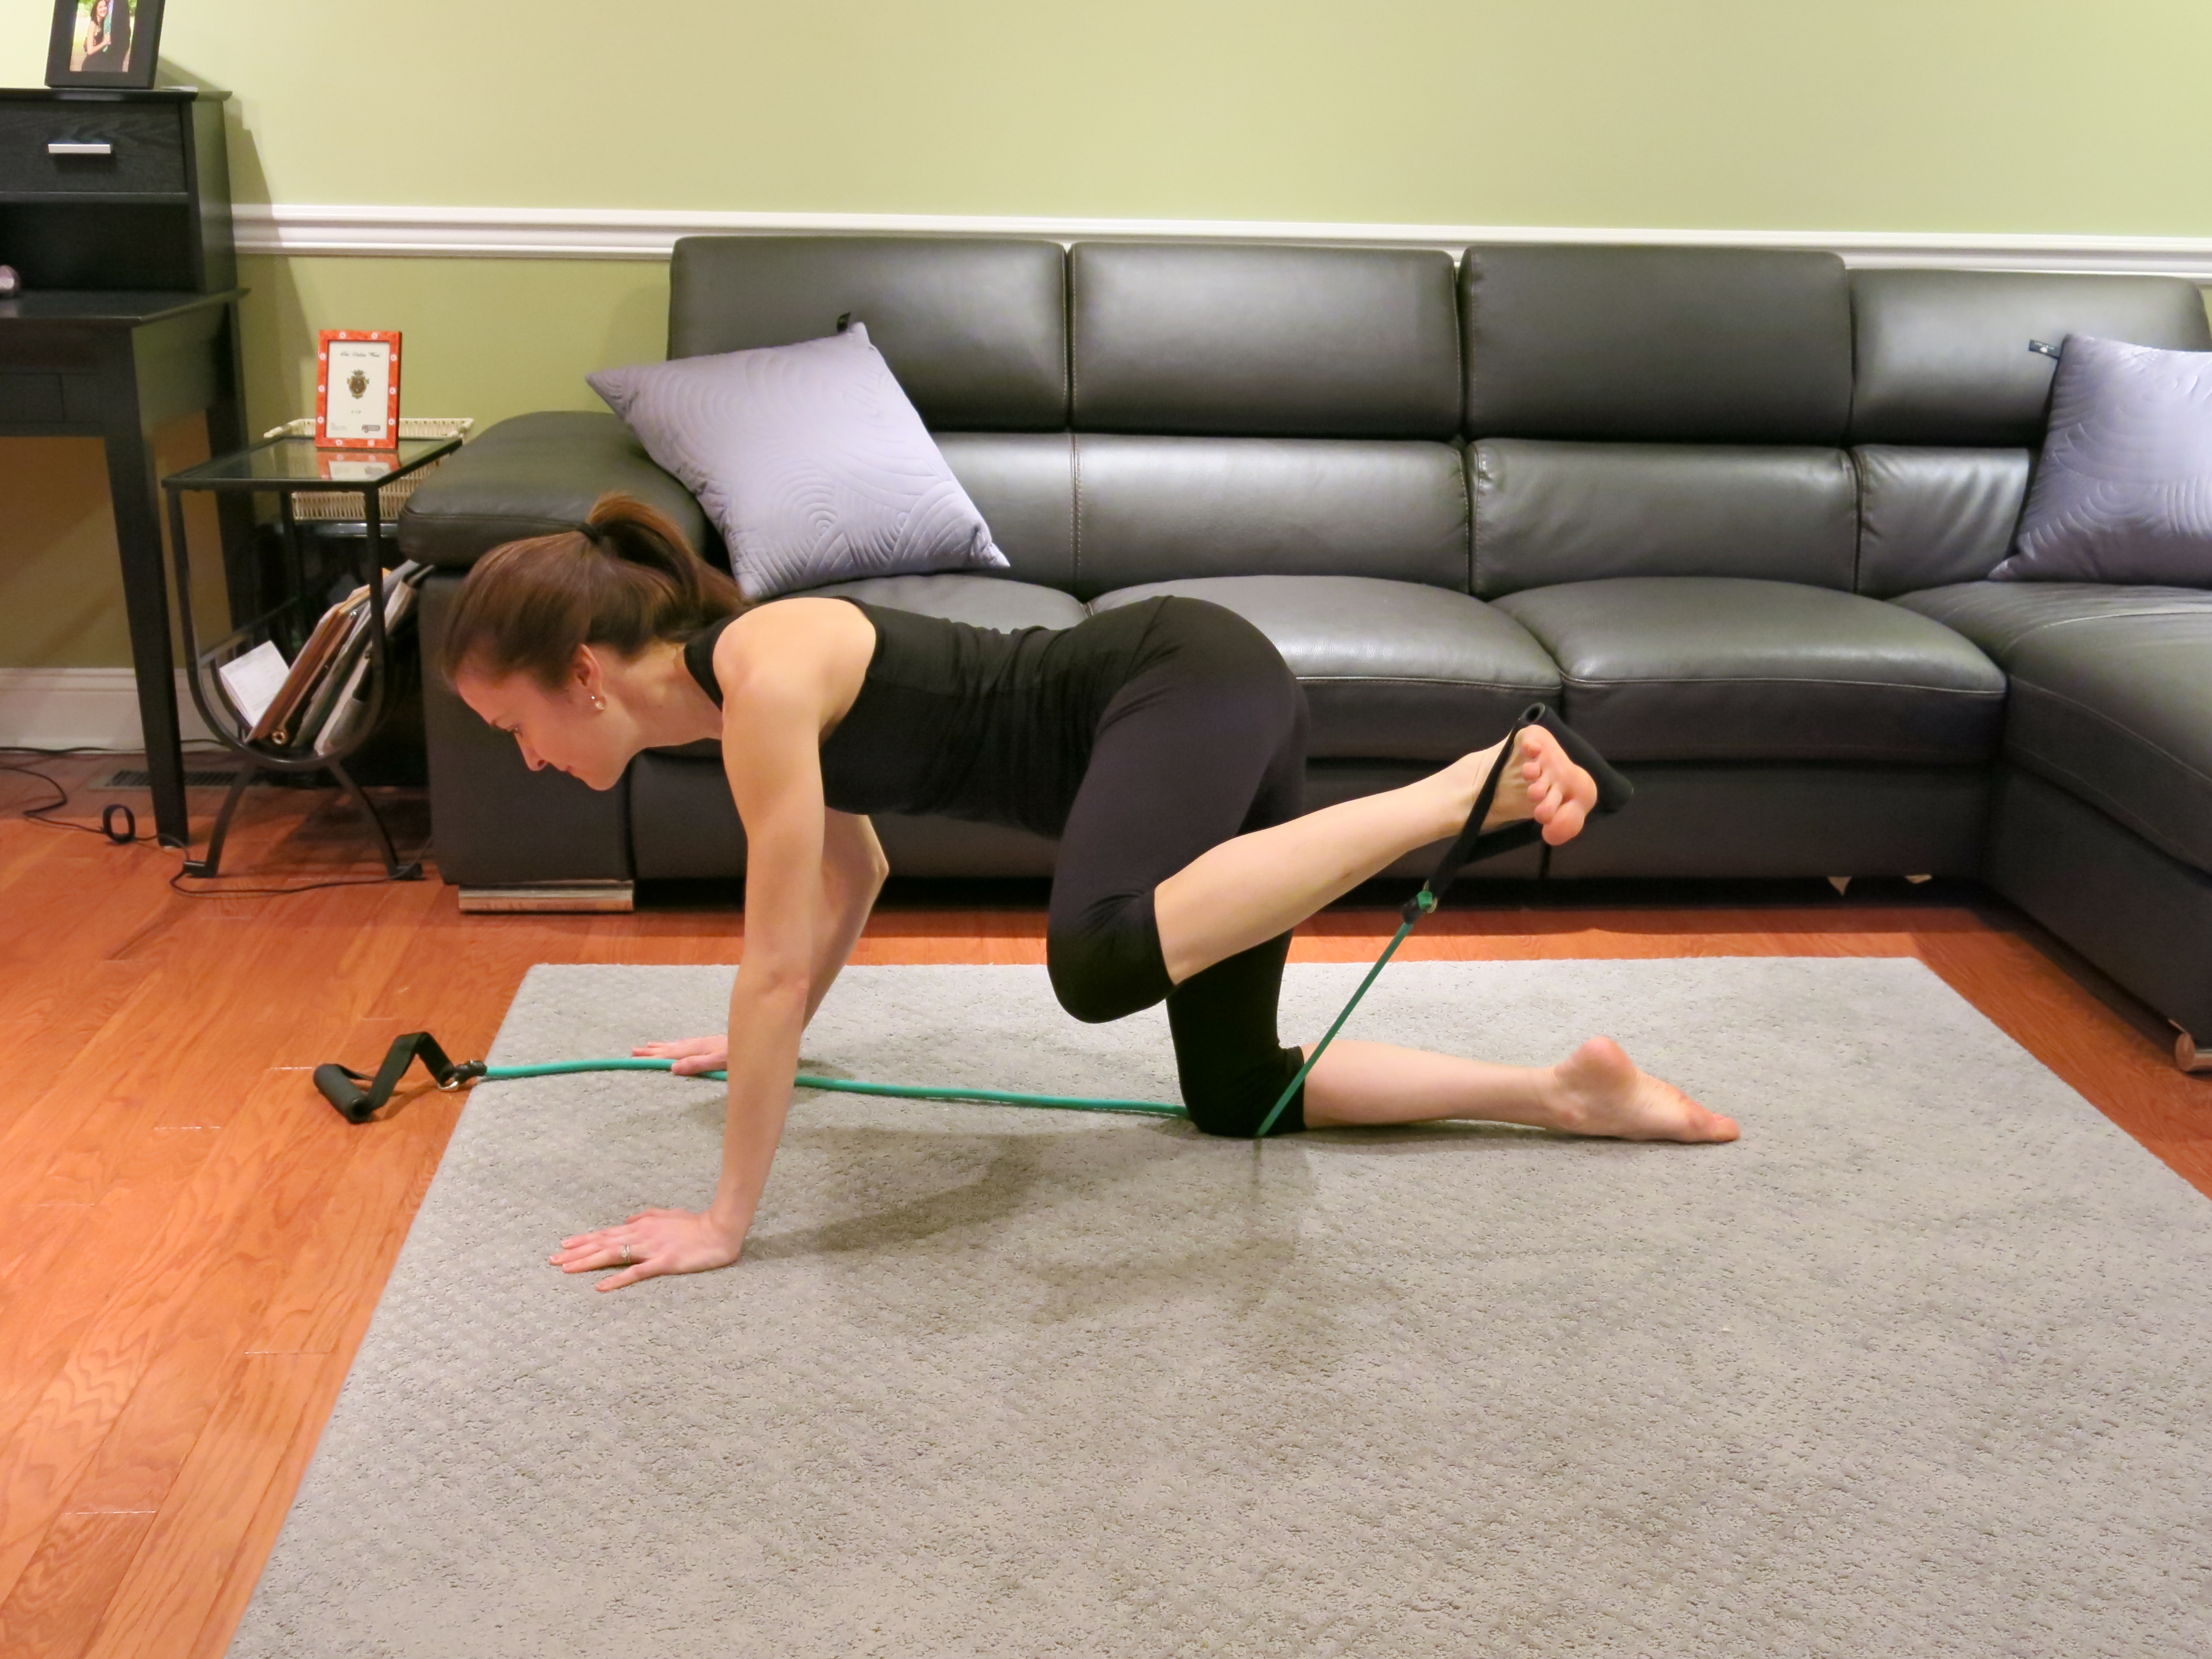
3. Donkey Kicks
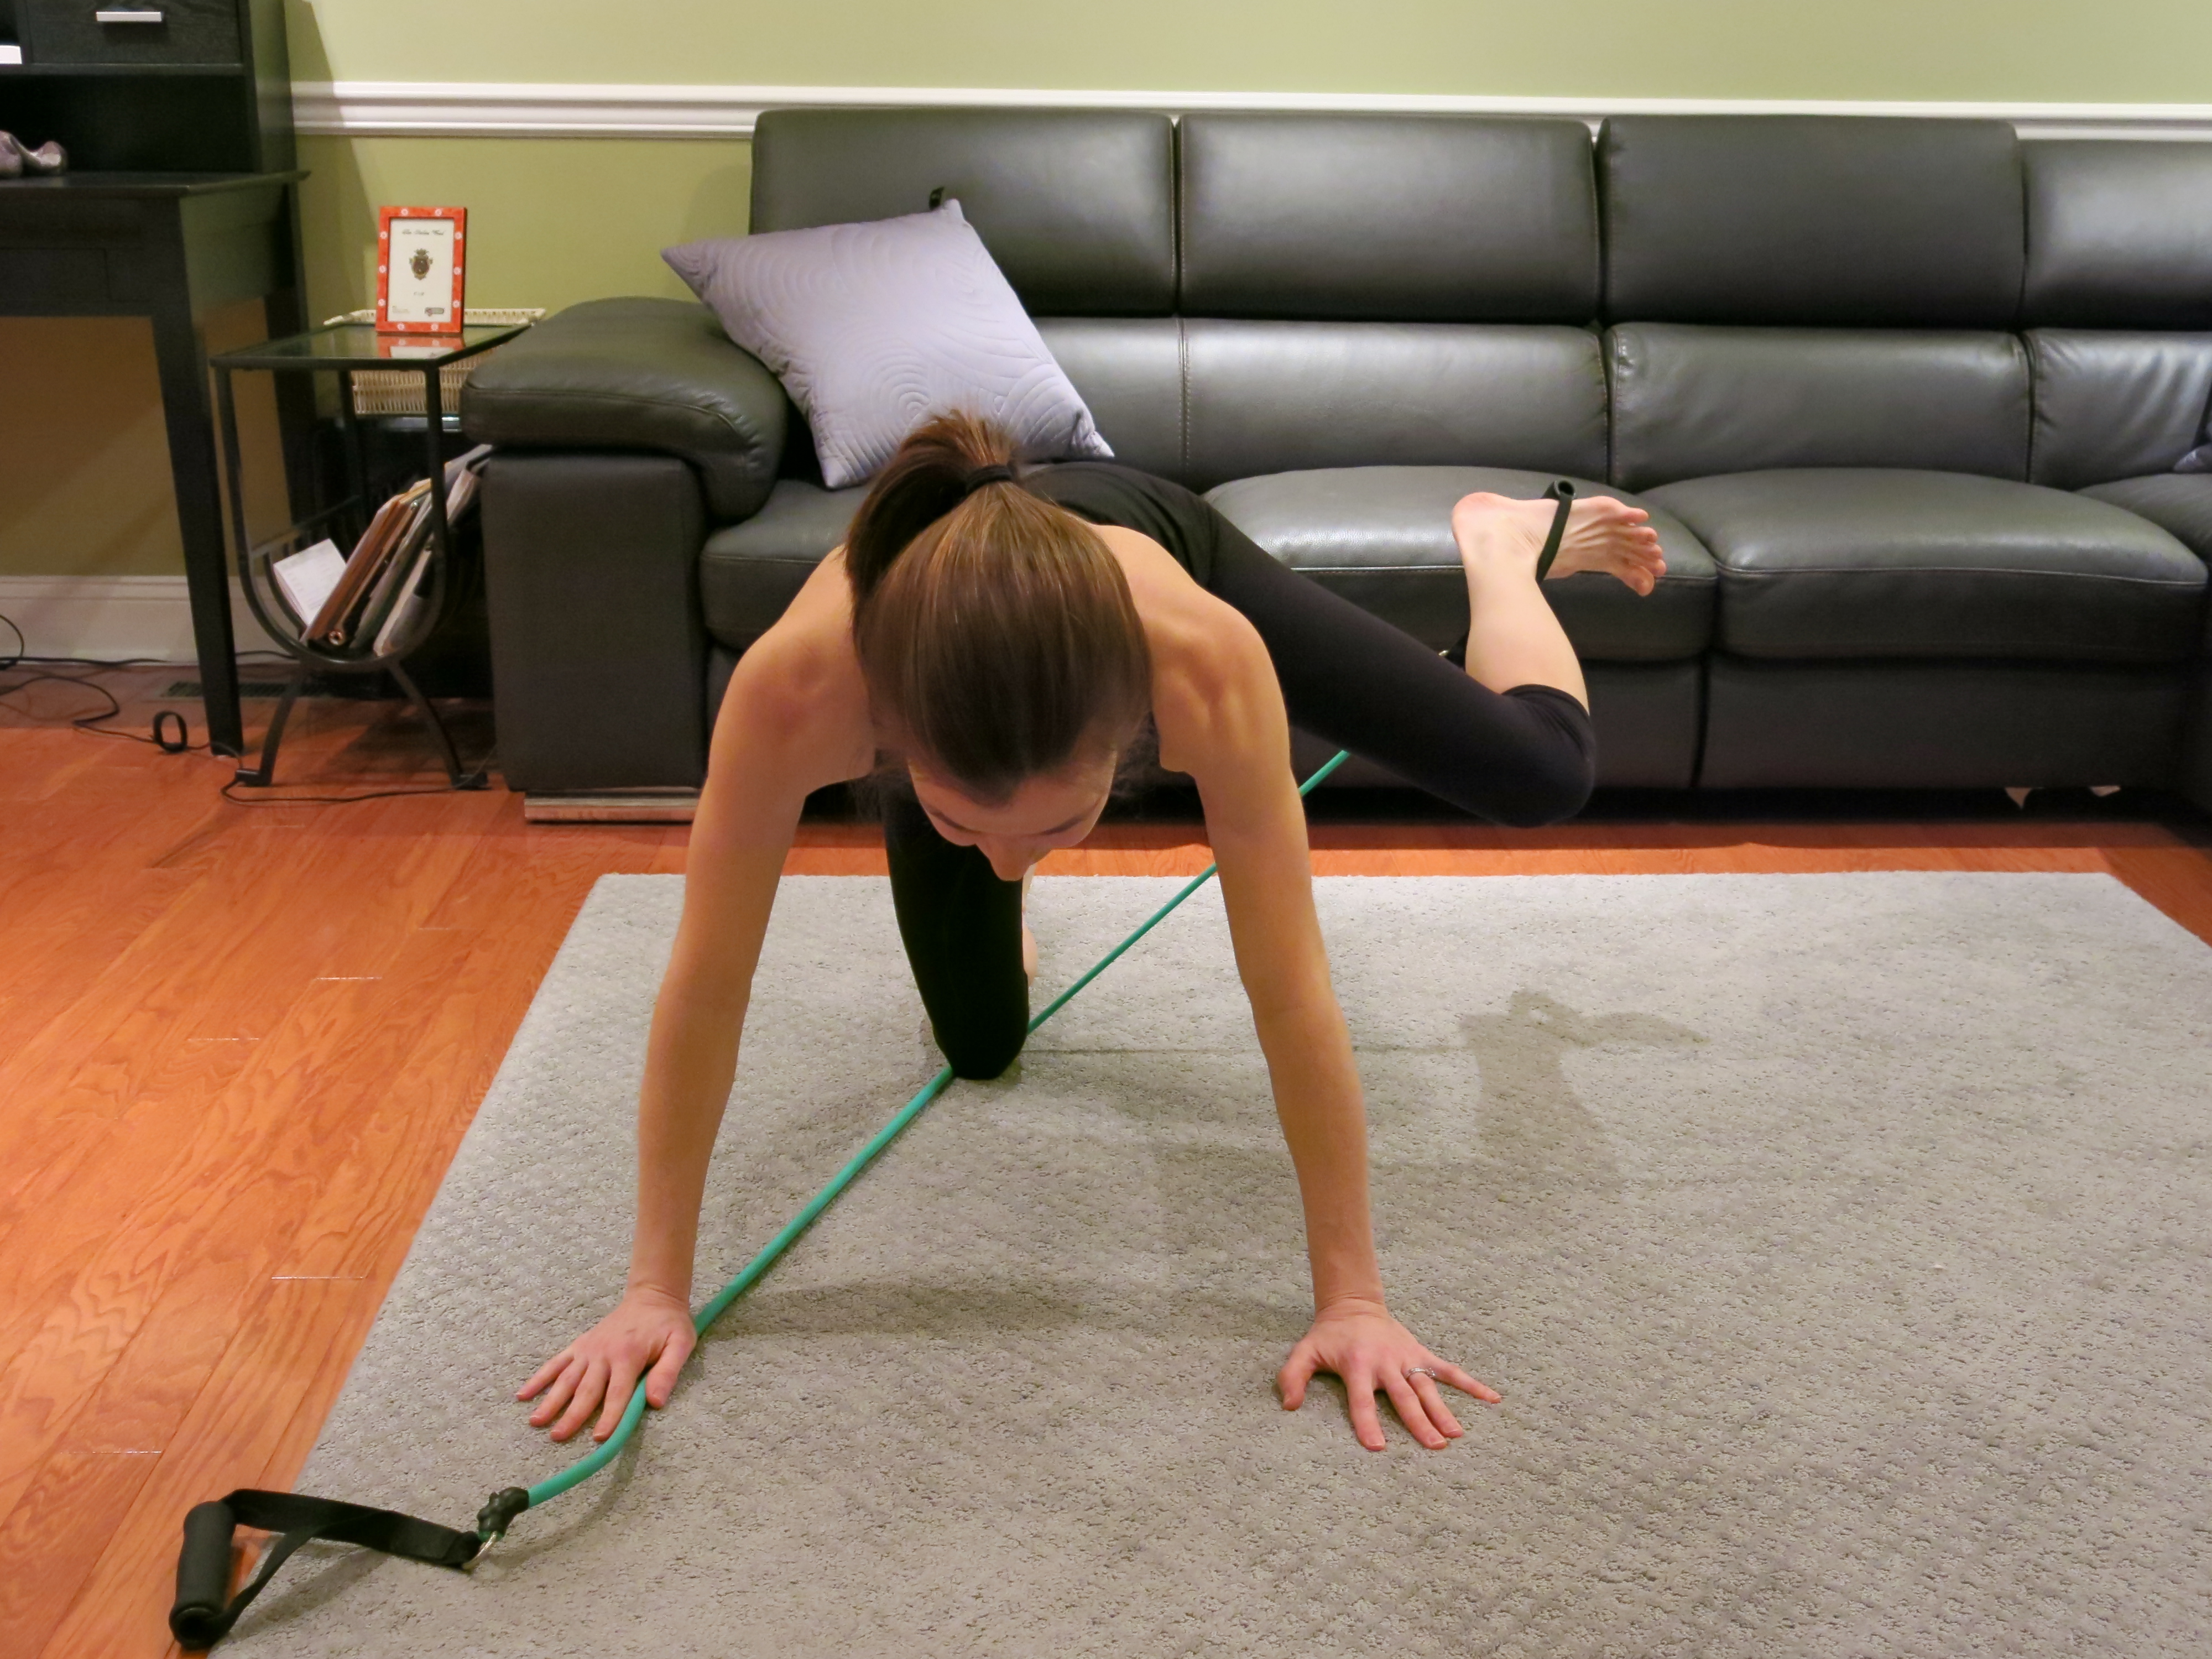
4. Fire Hydrants (aptly named, eh? side and front views)
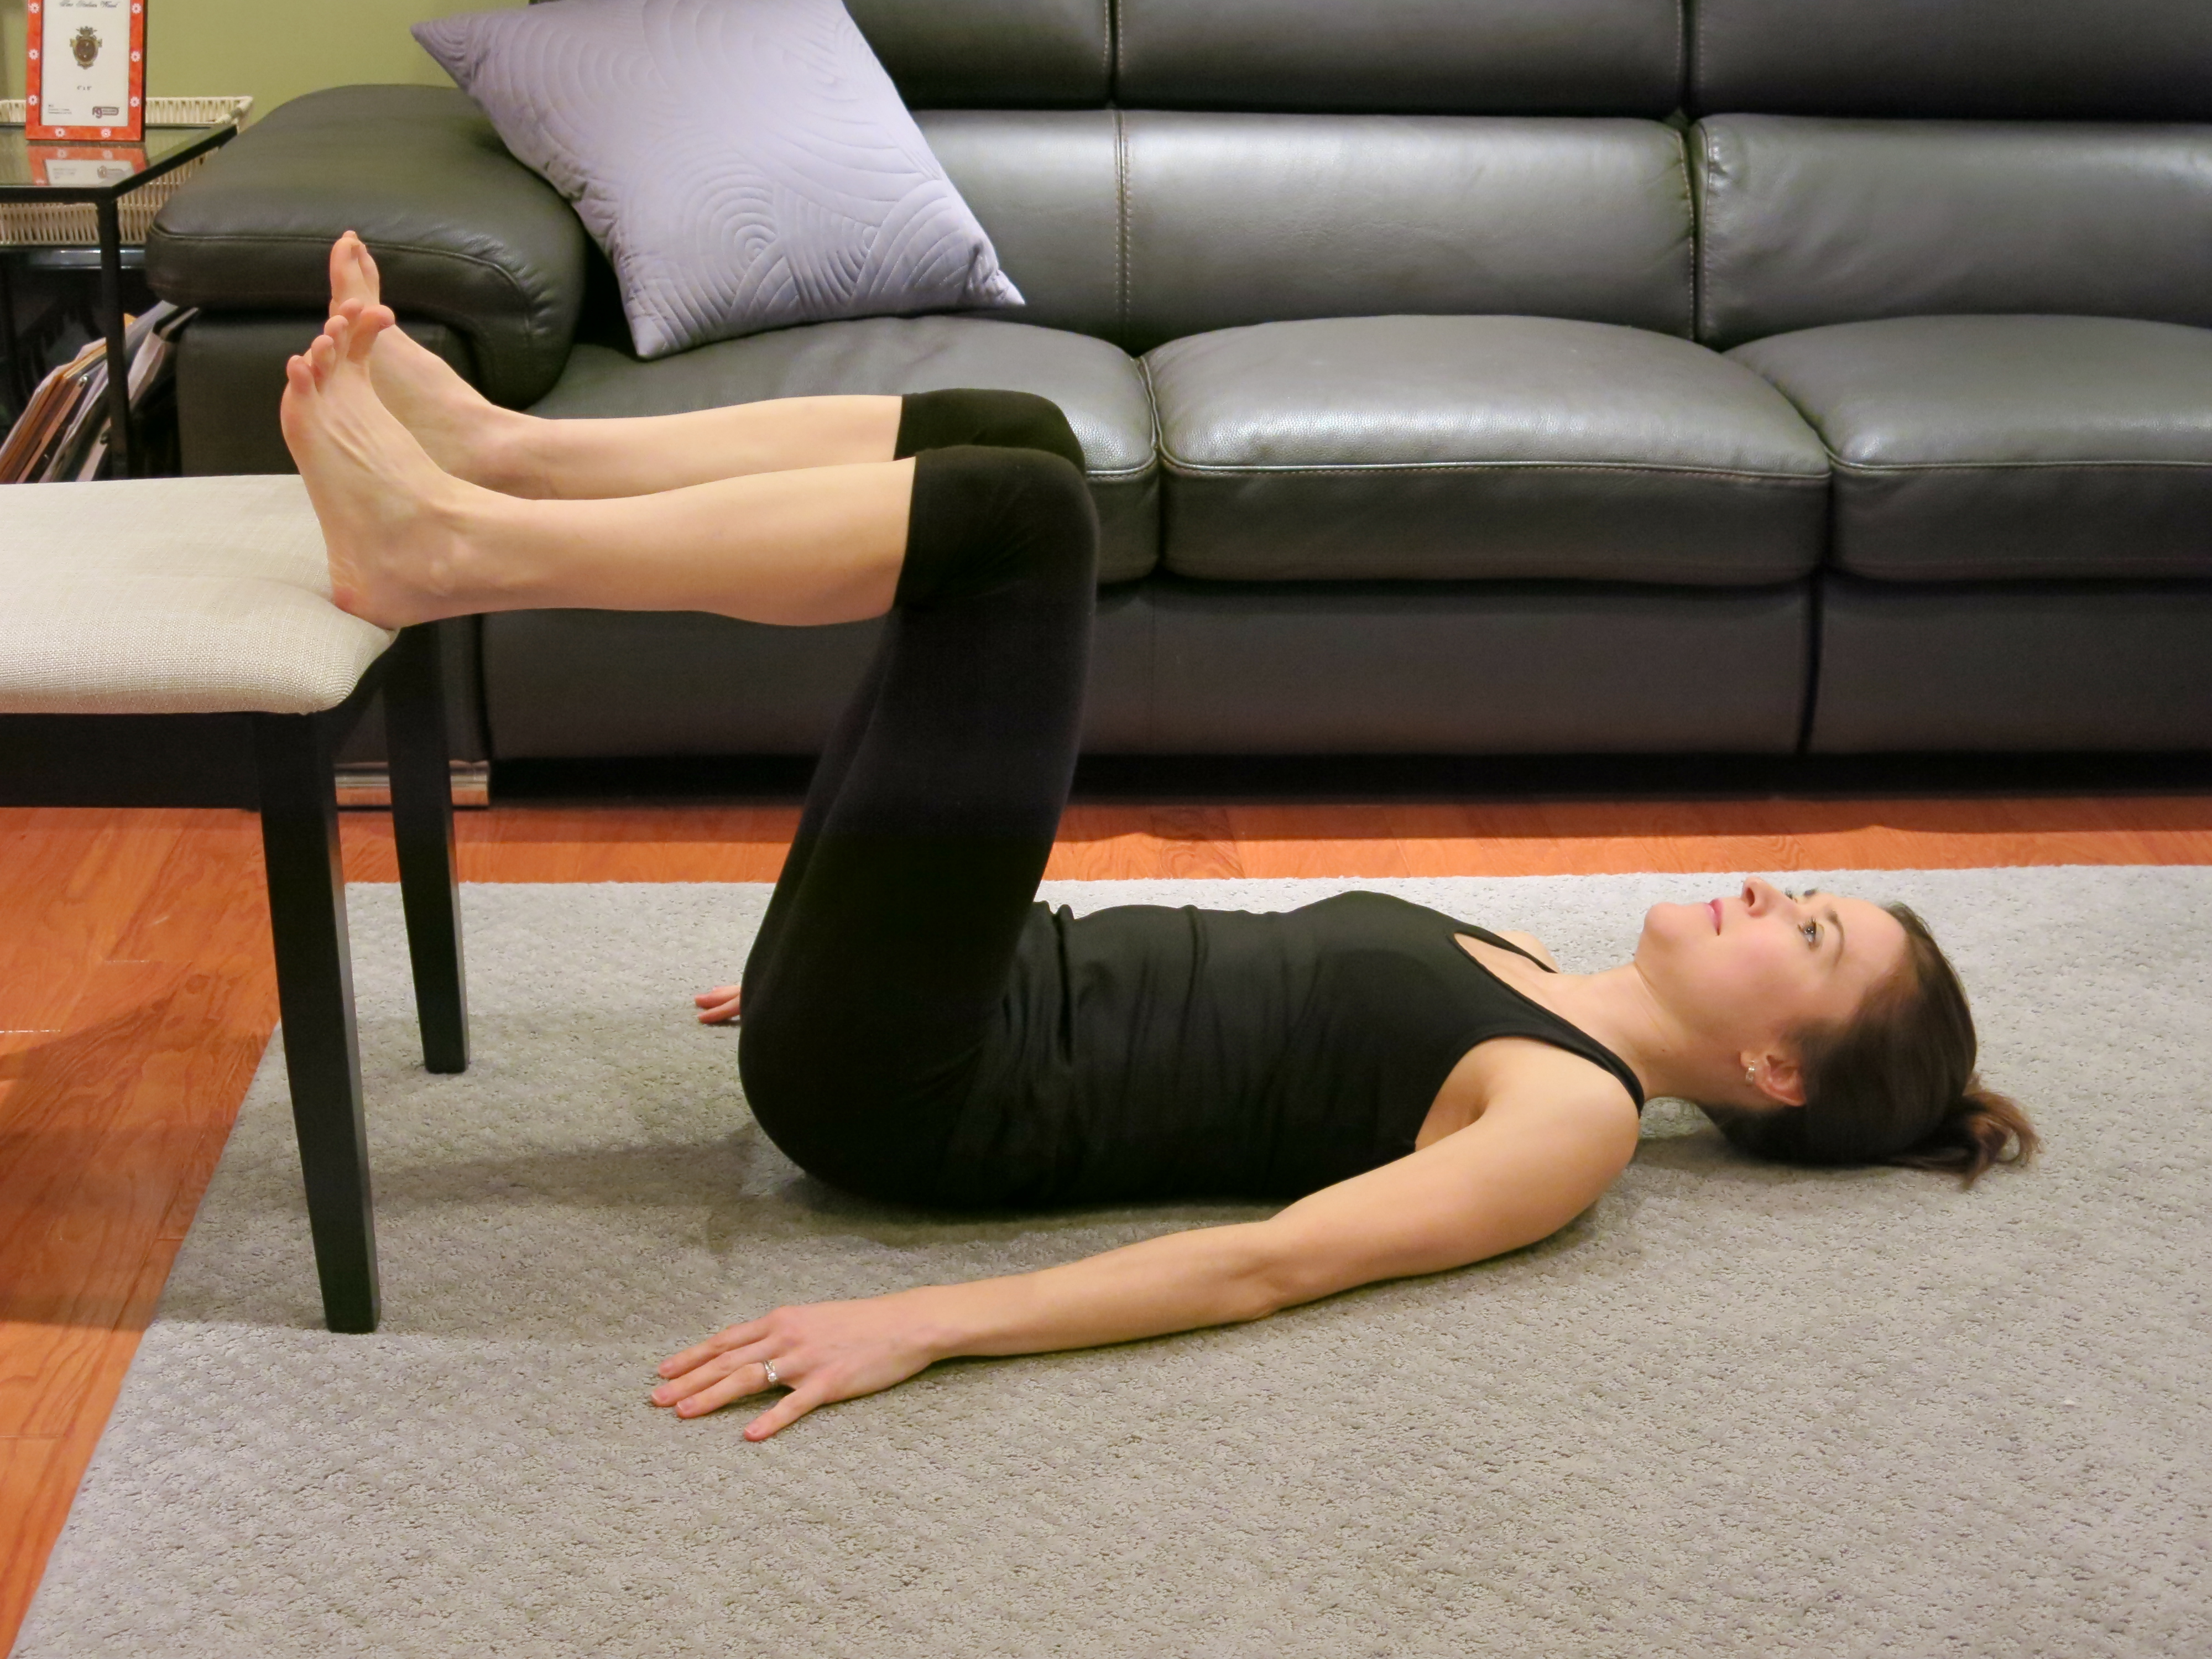
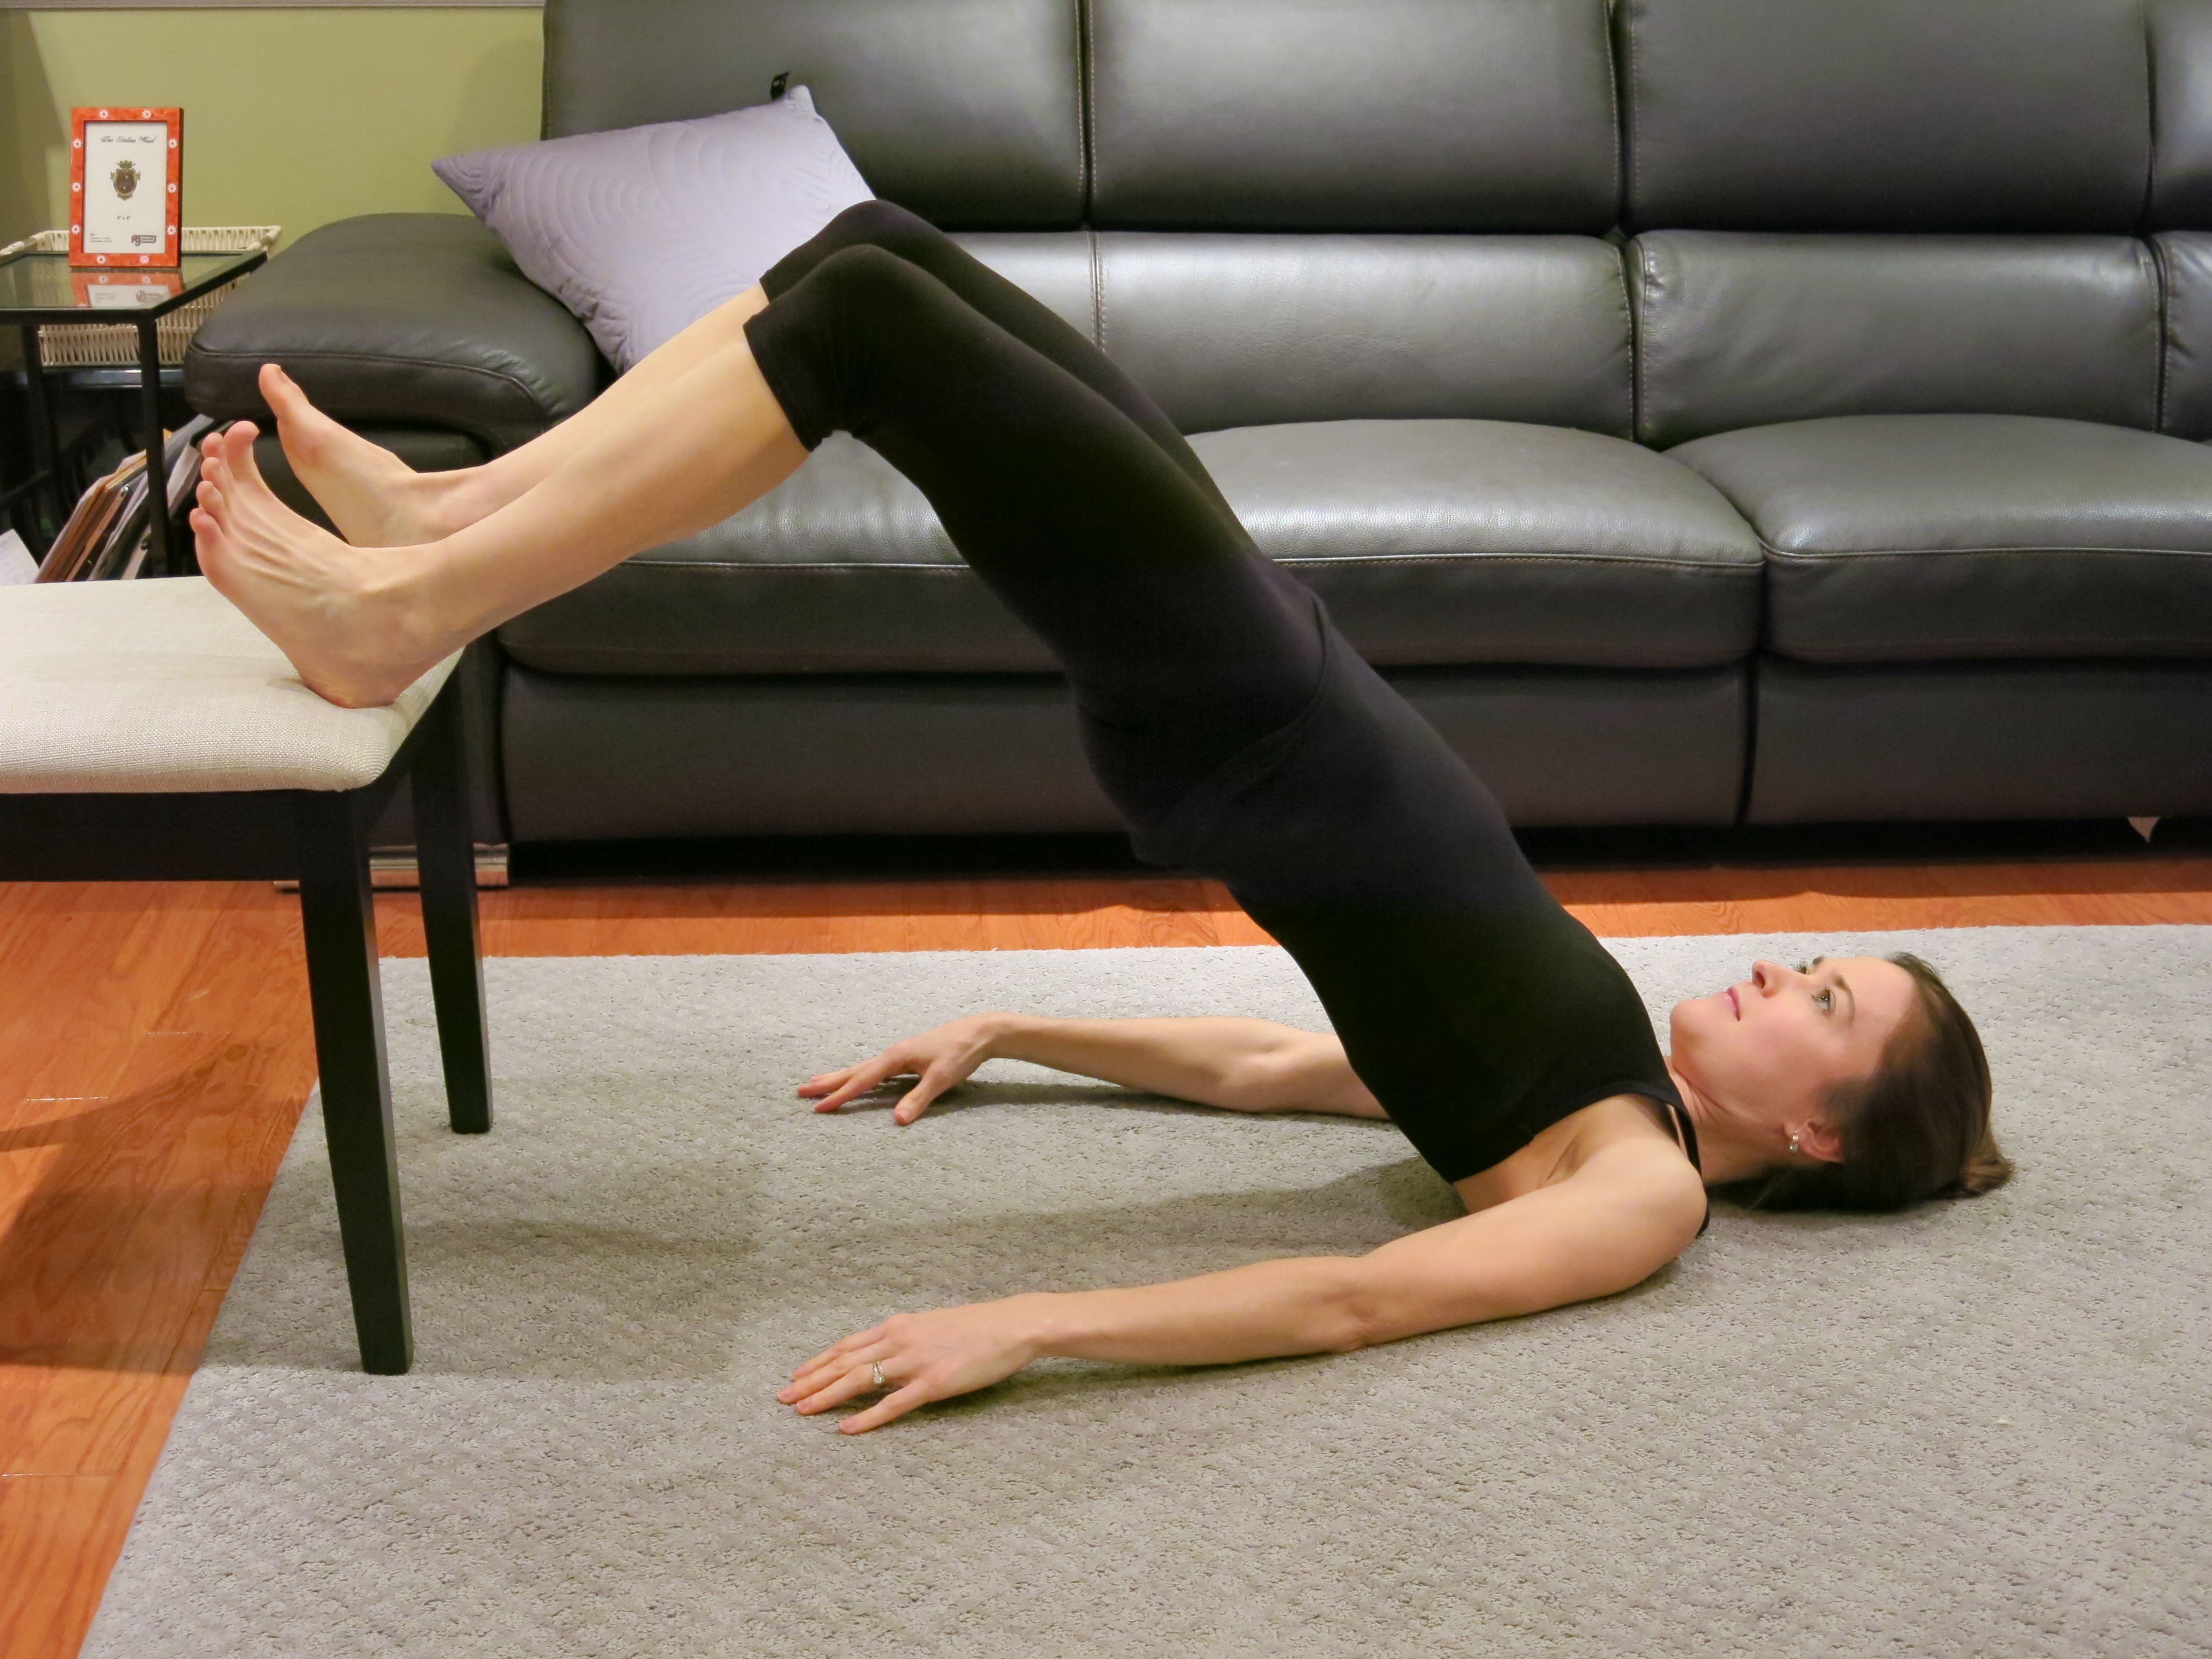
5. Foot-elevated Glute Bridges
Elevating your feet works deeper into the glutes than performing this exercise with your feet on the floor.
Welcome to WellMom, a health and wellness company that offers in-home personal training and private yoga for moms and moms-to-be!
Since this is WellMom’s first official blog post (yay!), I want to share a little bit more about the mission of WellMom, which is to help women be healthy moms, from pregnancy, through labor and delivery, and beyond.
Here’s a little story to help explain more about what that means.
A few weeks back I was looking through photos of myself for WellMom’s “About” page. I came across a picture of me holding my now two-year old daughter, Siyona, just a few days after delivery. I was wearing a fitted camisole and low rise jeans.
I looked amazing.
Before you get put off by that comment and close out of your browser, let me further explain.
I don’t say that to brag. Sure, I stopped at the photo and considered it for my profile picture. After all, isn’t it the dream to swallow a basketball, pop it out after 9 months, and slip right back into the same jeans you wore before you got pregnant? Didn’t my ability to stay fit during my pregnancy give me some extra credibility?
The answer is yes. And no.
Yes, I think we would be kidding ourselves if we said we don’t care what happens to our bodies during our pregnancy. Even though what we want at the end of the day is a healthy baby, and even though we know that means we’re going to put on a few pounds, we sure would like to keep that weight gain to a minimum. And, yes, there probably is something to be said for, “If she can do it, I can do it too, and maybe she can help me.”
But I didn’t choose that picture. I didn’t want to. I couldn’t.
Why? For one thing, every person and every pregnancy experience is different. I had a lot of things going for me that helped me slink right back into my pre-pregnancy jeans. I was slim before my pregnancy. Although I was tired sometimes, I didn’t have months of morning sickness and fatigue keeping me from my workouts. This was my first child, so I didn’t have existing parental responsibilities standing between me and the gym. I enjoy eating well and love to exercise. These things just aren’t true for everyone. Using that picture would have alienated the many moms and moms-to-be out there who are different than me.
Even more importantly, using that picture would overlook the “well” in WellMom. It’s not SkinnyMom. It’s not even FitMom. Yes, exercising regularly throughout your pregnancy does make you less likely to gain unnecessary fat, but it has so many other benefits too, both for you and your baby: you’re less likely to have a long and exhausting labor or to need medical interventions; exercise improves your baby’s ability to deal with the stress of contractions; exercise reduces stress, which is important both during pregnancy and after baby arrives. And that’s just for starters.
A mom-to-be friend of mine recently submitted a blog post about her pregnancy experience that is relevant here. She’s also a fitness enthusiast, but her pregnancy experience has been much different than mine was. She has gained more weight than she prefers, but she realizes that there are more important things to think about right now than vanity.
So, yes, please do exercise and eat well! It’s good for you; it’s good for your baby. If we work together, I will do my best to share with you my passion for exercise and healthy, good food. We will find exercises that you enjoy (you don’t have to run, if you don’t like to run). I can show you that not all Brussels sprouts are created equal (there’s a right way to prepare these guys and a wrong way. Do it the wrong way, and I won’t touch them either). If your pregnancy experience ends up more like mine, then great. You’ll have to buy fewer clothes after delivery. But if you’re experience is more like my friend’s, be kind to yourself. Honor your body and the miracle that’s taking place inside of you.
 sore from nursing, lifting him and carrying him (and his gear). For Max, (baby #2), I was nervous about being physically strong enough to keep up with a very active toddler AND carry around a newborn. Plus, I worked out regularly during my first pregnancy with Jack; with Max, I did little beyond chasing a toddler and walking the dog. I just felt sort of “blah” from not having a good exercise routine. I happened to see Chris’ interview on ARLNow and, on a whim, emailed her.
 ches. But TRUE core strength comes from an entirely different set of muscles, including the diaphragm, transversus abdominis (TVA), pelvic floor, and multifidus. We might call this group of muscles the “inner core” or “inner unit.” You can think of it as a rectangular-shaped cylinder that sits in your abdominal cavity with the diaphragm on top, the TVA in the front, the pelvic floor at the bottom, and the multifidus in the back.